Getting Started
The Charm Kiosk app is a component of the Charm suite of products, certified as a comprehensive Ambulatory EHR meeting stage 1 Meaningful Use criteria. The HIPAA-compliant feature simplifies the patient check-in process. It enables staff to handle patient data during consultations efficiently.
The dynamic iPad interface allows users to:
- Add New Patient
- Update Patient photo using iPad camera
- Search Patients
- Share Questionnaire and Consent Forms
- Patients can add/edit Demographics and Insurance Details
- Answer pre-appointment Questionnaire
- Read and Sign Consent Forms
- Attend TeleHealth Appointments
Practices can use the Charm Kiosk app either with a Nurse Intervention workflow or choose Self check-in workflow based on their Facility's specific needs. Additionally, enable Guided Access on your iPad to prevent Patients from browsing outside the Kiosk app.
How to Set Up a Kiosk Account
The Charm Kiosk app requires you to create a unique login credential. Practice Members with the Facility Settings or Kiosk role privileges can configure sign-in credentials for Charm Kiosk using the following steps:
- Login to the CharmHealth EHR Dashboard using your EHR credentials.
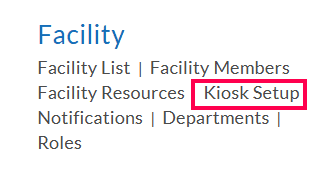
- Go to the 'Settings > Facility > Kiosk Setup' section.

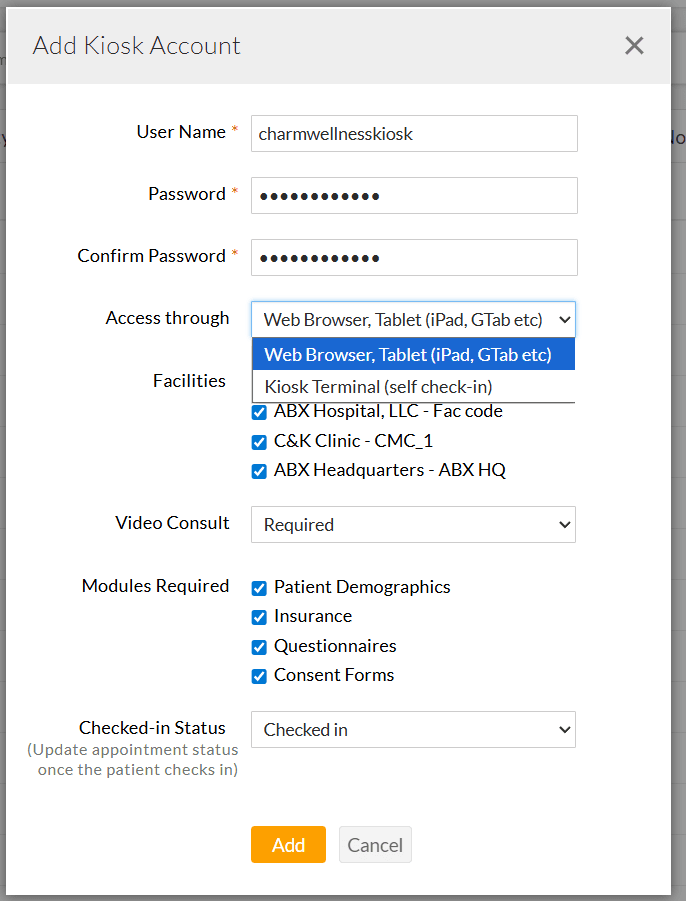
- Tap the '+ New Account' button. Enter the Username and Password based on your Practice requirement.
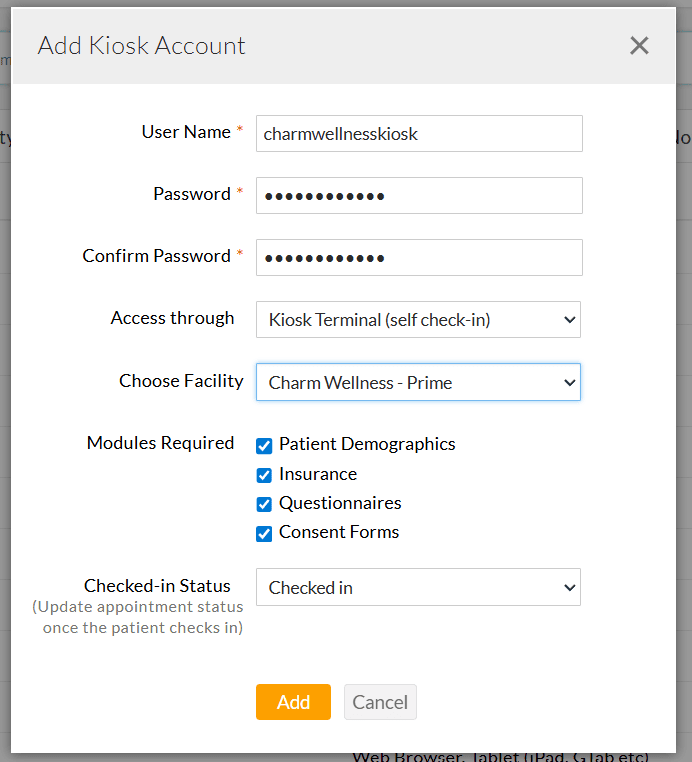
- Now, the 'Access Through' field provides you with two options:
Web Browser, Tablet - Use this option to enable a Nurse Intervention workflow. You can associate multiple facilities to a single Kiosk account. Practices can choose to include TeleHealth Consultations for Patients through the Charm Kiosk using the 'Video Consult' option.

Kiosk Terminal - Select this option to activate the Self Check-in workflow. A separate Kiosk account must be created for each Facility.

Note: To enable the Self check-in option, the Practice should have an active 'Text/Voice Notification' subscription.
- Choose the required Modules (Patient Demographics, Insurance, Questionnaires, and Consent Forms). Only the chosen modules will be displayed in the Kiosk account for Patients to complete.
- Select the default Checked-in Status. When a Patient checks-in, this configured status will be automatically applied to their appointment scheduled for that day.
- Tap the 'Add' button.
- You can create multiple Kiosk accounts using the same steps with individual Username and Password.
a. Downloading the Application
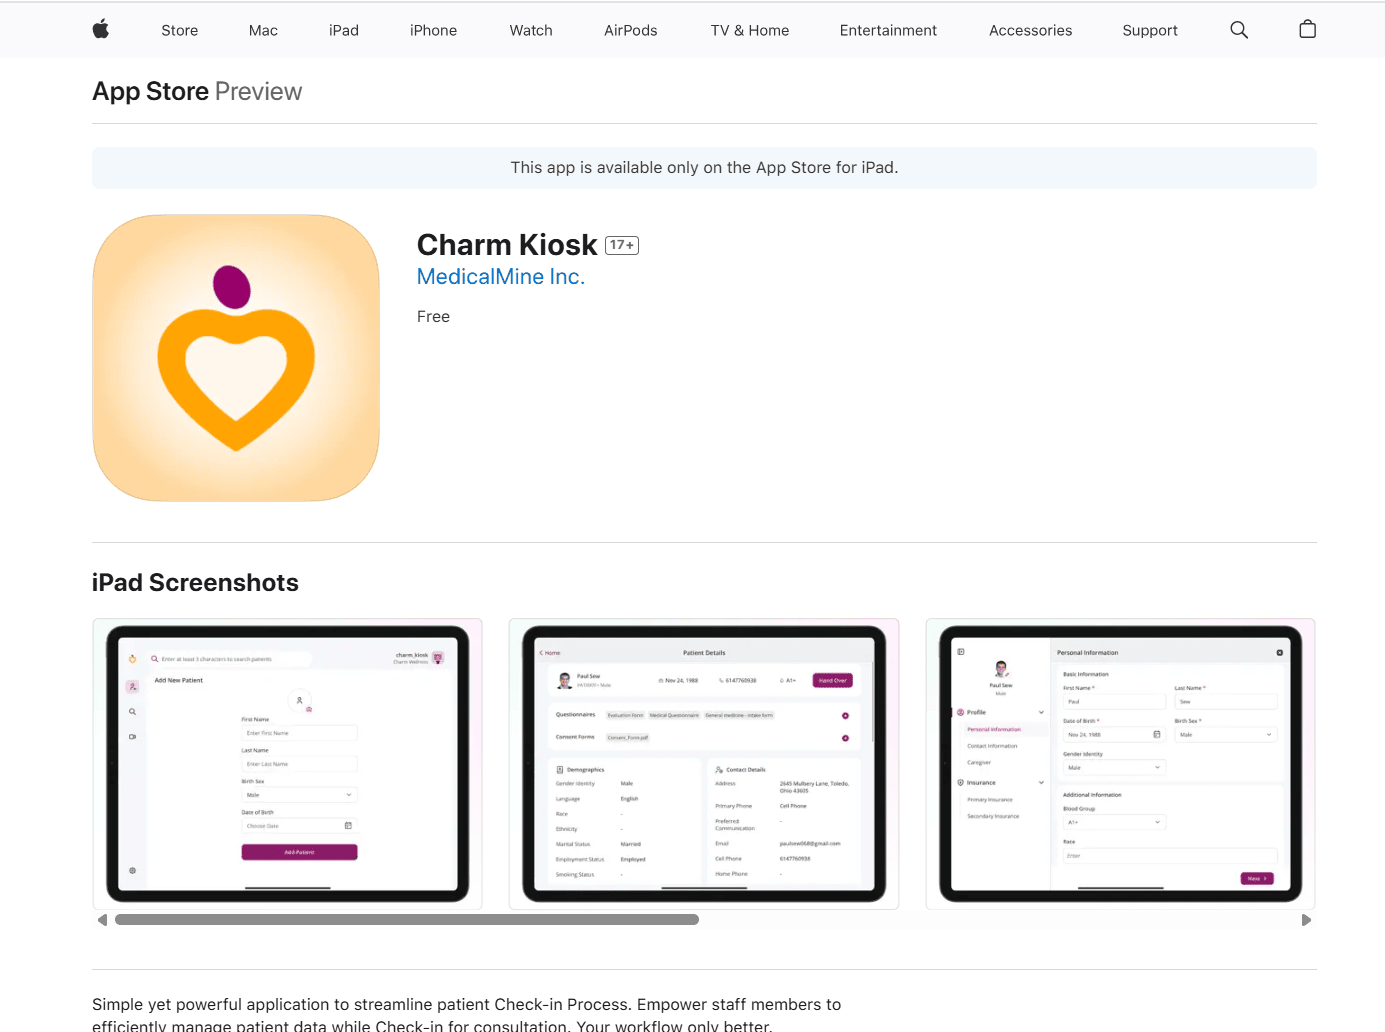
Users can download and install the Charm Kiosk application from the App Store (iOS).
The Charm Kiosk App requires iPadOS 13.0 or later.
