Charm Chart Note App
'Charm Chart Note' App for iPad is a certified Ambulatory Electronic Health Record (EHR) application that meets Stage 1 & 2 Meaningful Use criteria. Designed for Healthcare Providers, it offers flexible, secure, and efficient clinical documentation.
Seamlessly integrated with CharmHealth EHR, this app empowers Providers to streamline charting, manage appointments, access patient data, and conduct telehealth visits from anywhere. With its Offline Support, you can chart even when you are not connected to the internet.
Key Features
- Document Encounter notes, vitals, and treatment plans instantly.
- Book and manage Patient visits efficiently.
- Quickly review key Patient details, such as medications and labs.
- E-Prescribe medications securely from the app.
- Add CPT and ICD codes directly to the chart.
- Work offline and sync later.
- Start and document video consultations seamlessly.
- Easily manage your day with built-in task reminders and to-do lists.
1. Getting Started
a. Downloading the Application
Practice members can download and install the Charm Chart Note application from the App Store (iOS).
The Charm Chart Note App requires iPadOS 14.0 or later.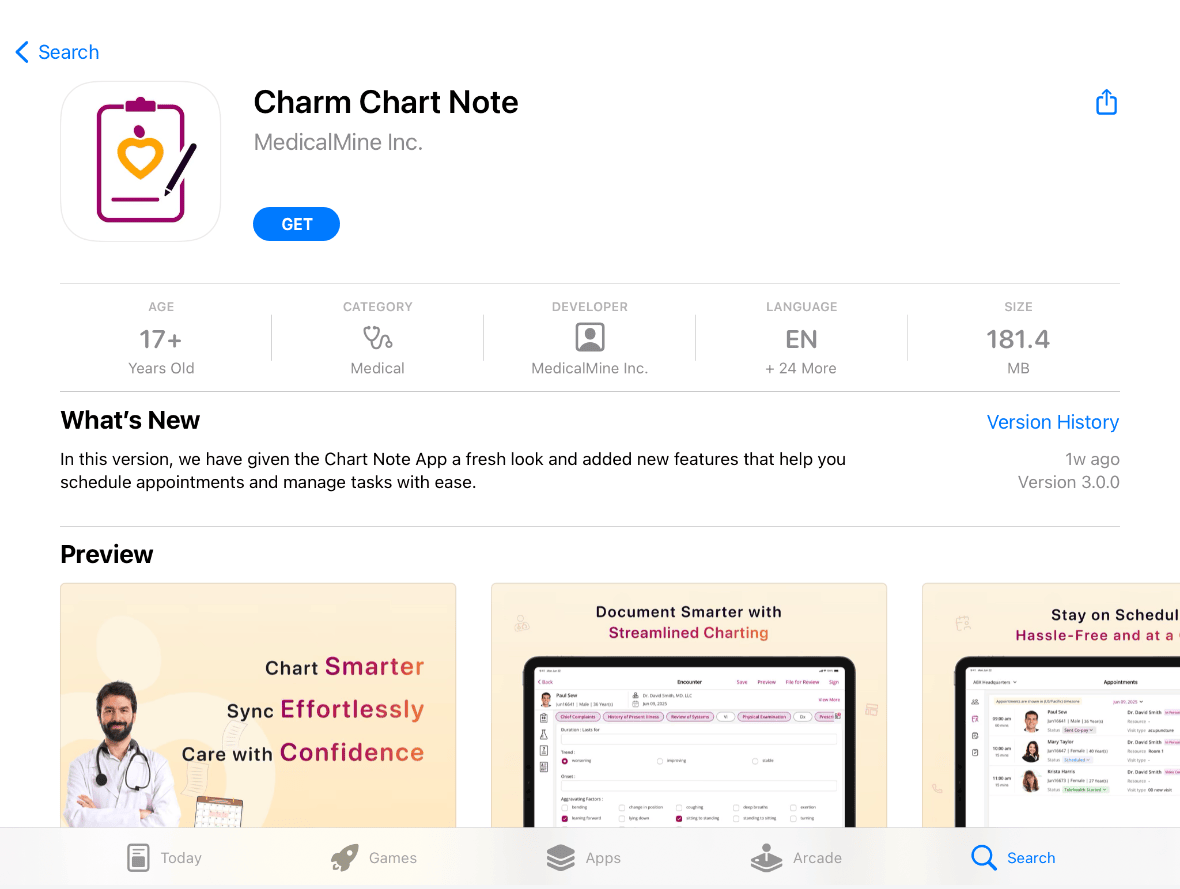
b. Login and App Access
Practice members must have the following role privileges enabled under 'Settings > Facility > Roles > Past Encounters' in CharmHealth EHR to use the Charm Chart Note App:
- Start encounter and Enter Vitals
- Enter SOAP Notes, Prescribe Medications, and Order Labs/Images Log in using your CharmHealth EHR credentials and choose the required Facility.
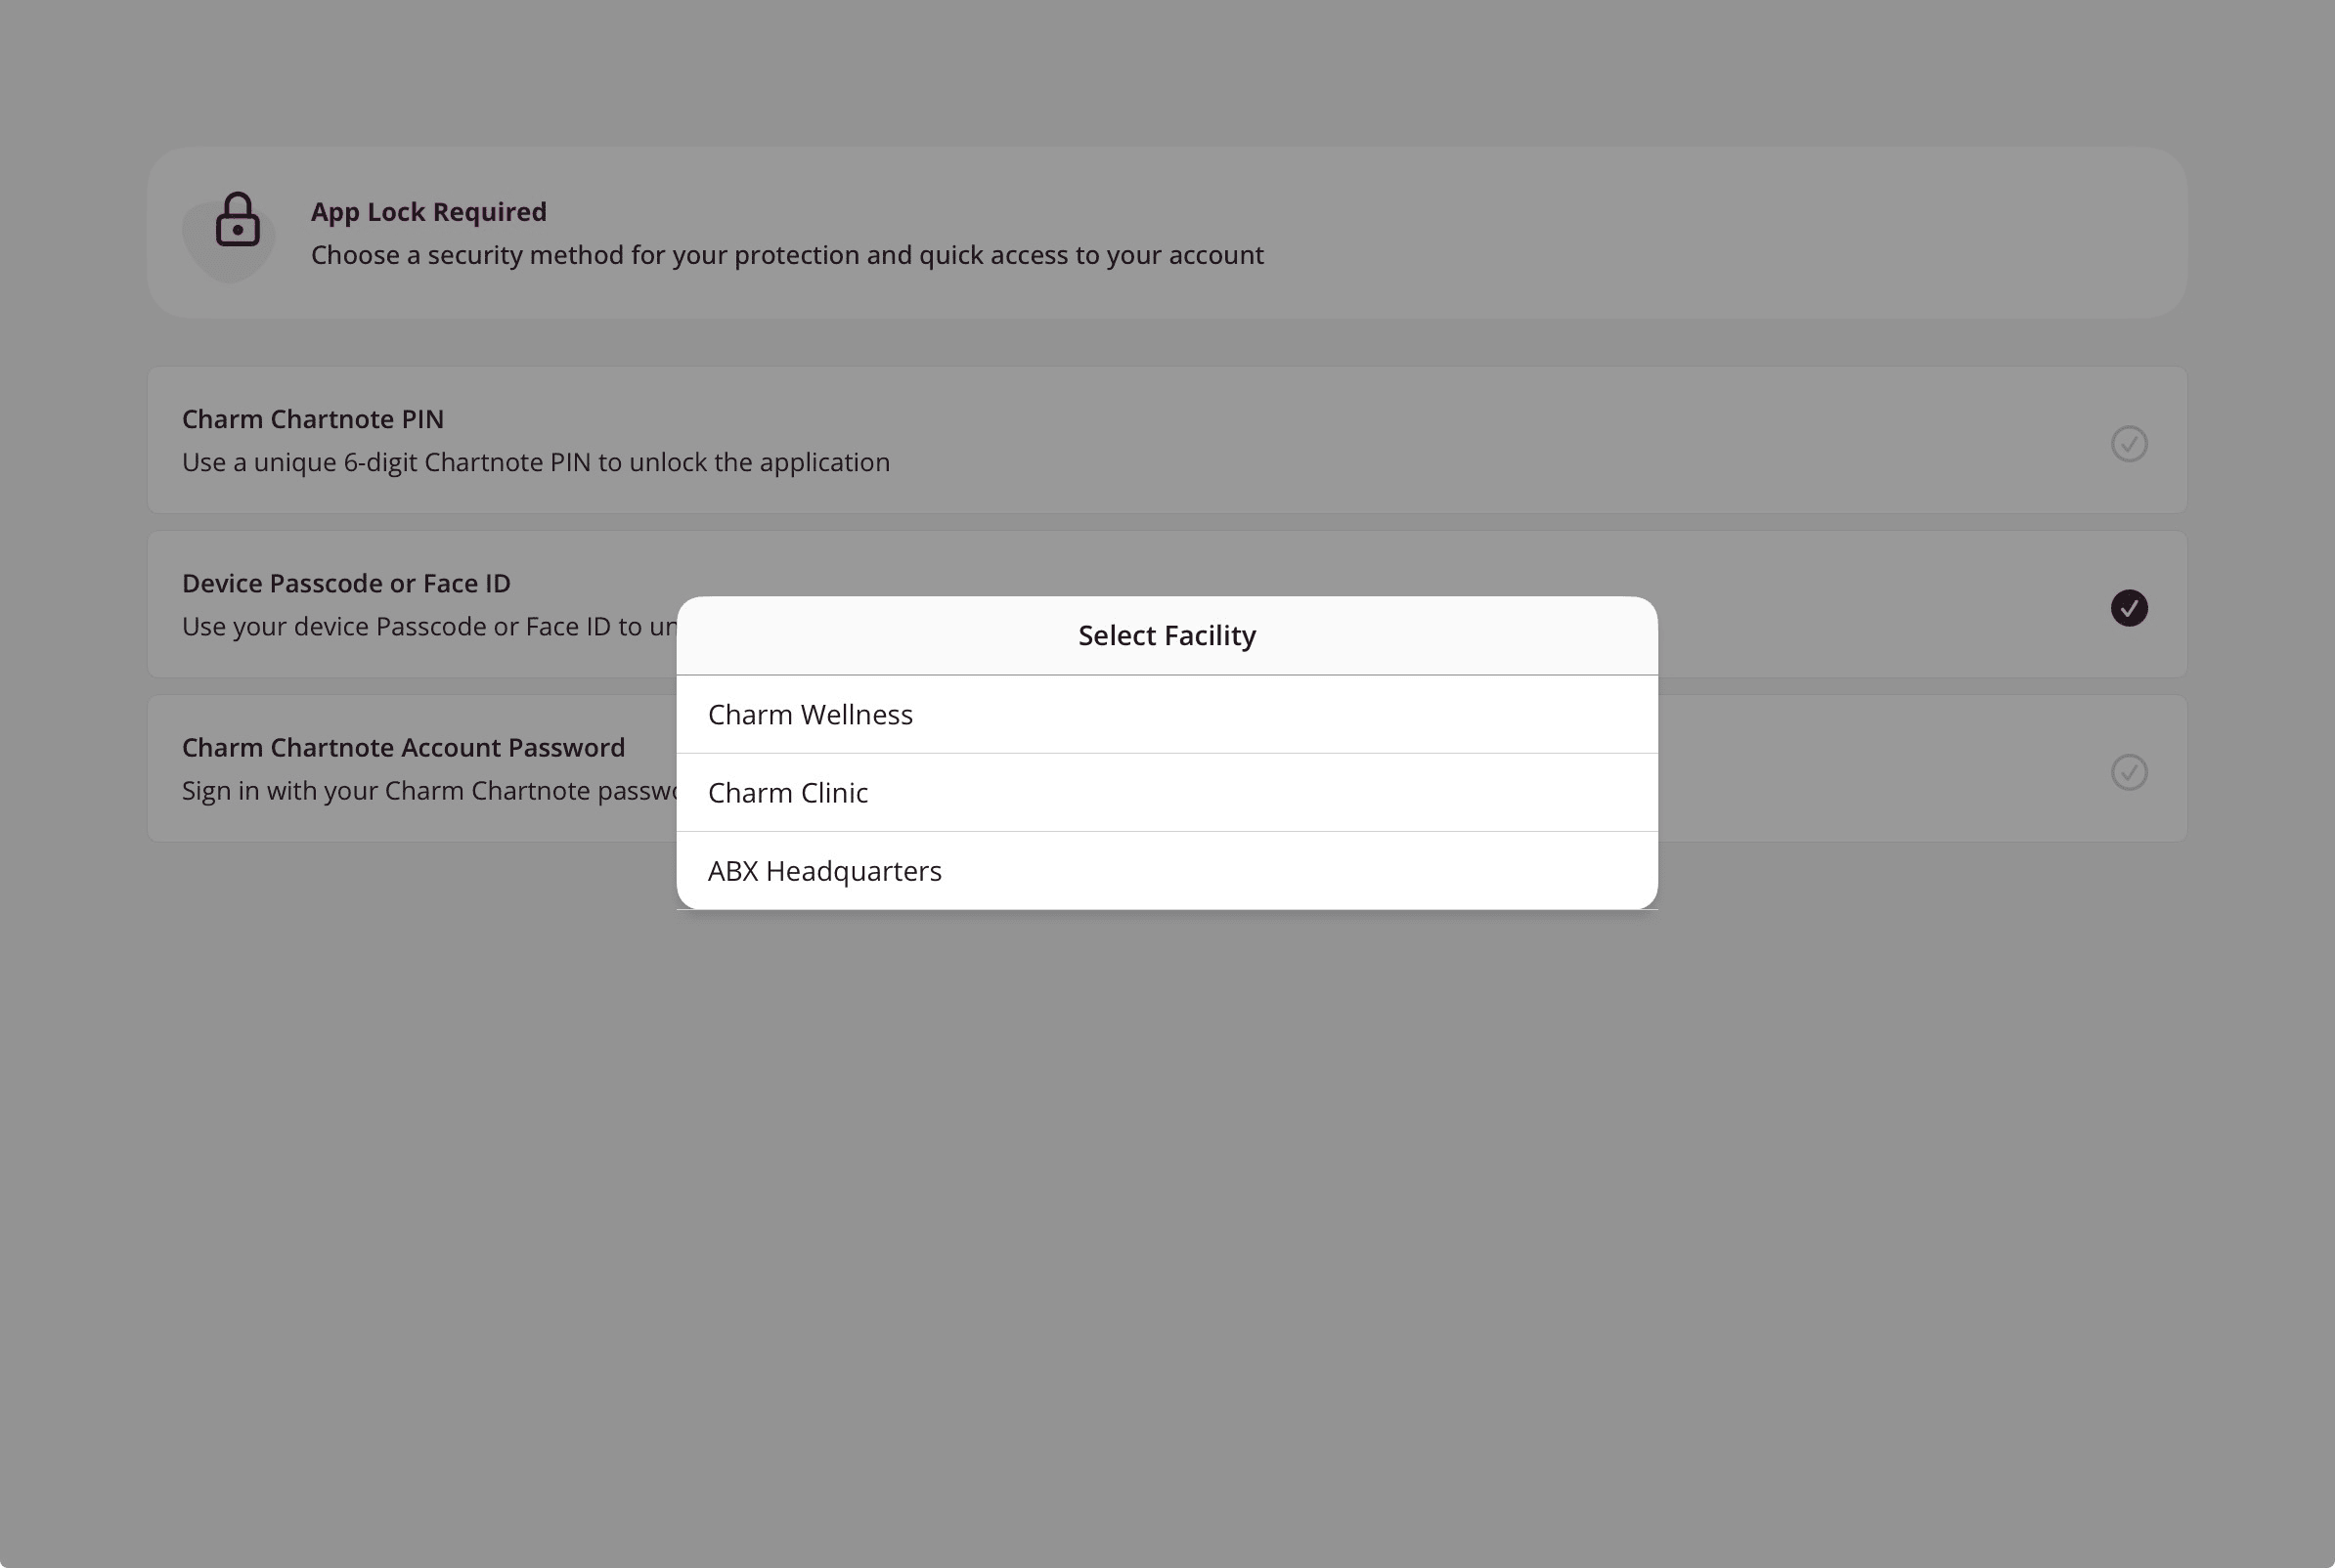
Upon login, the Homepage displays the following.
- Patients
- Add Patient
- Search Patient
- Appointments
- Review Charts
- Tasks

2. Manage Patients
a. Add Patient
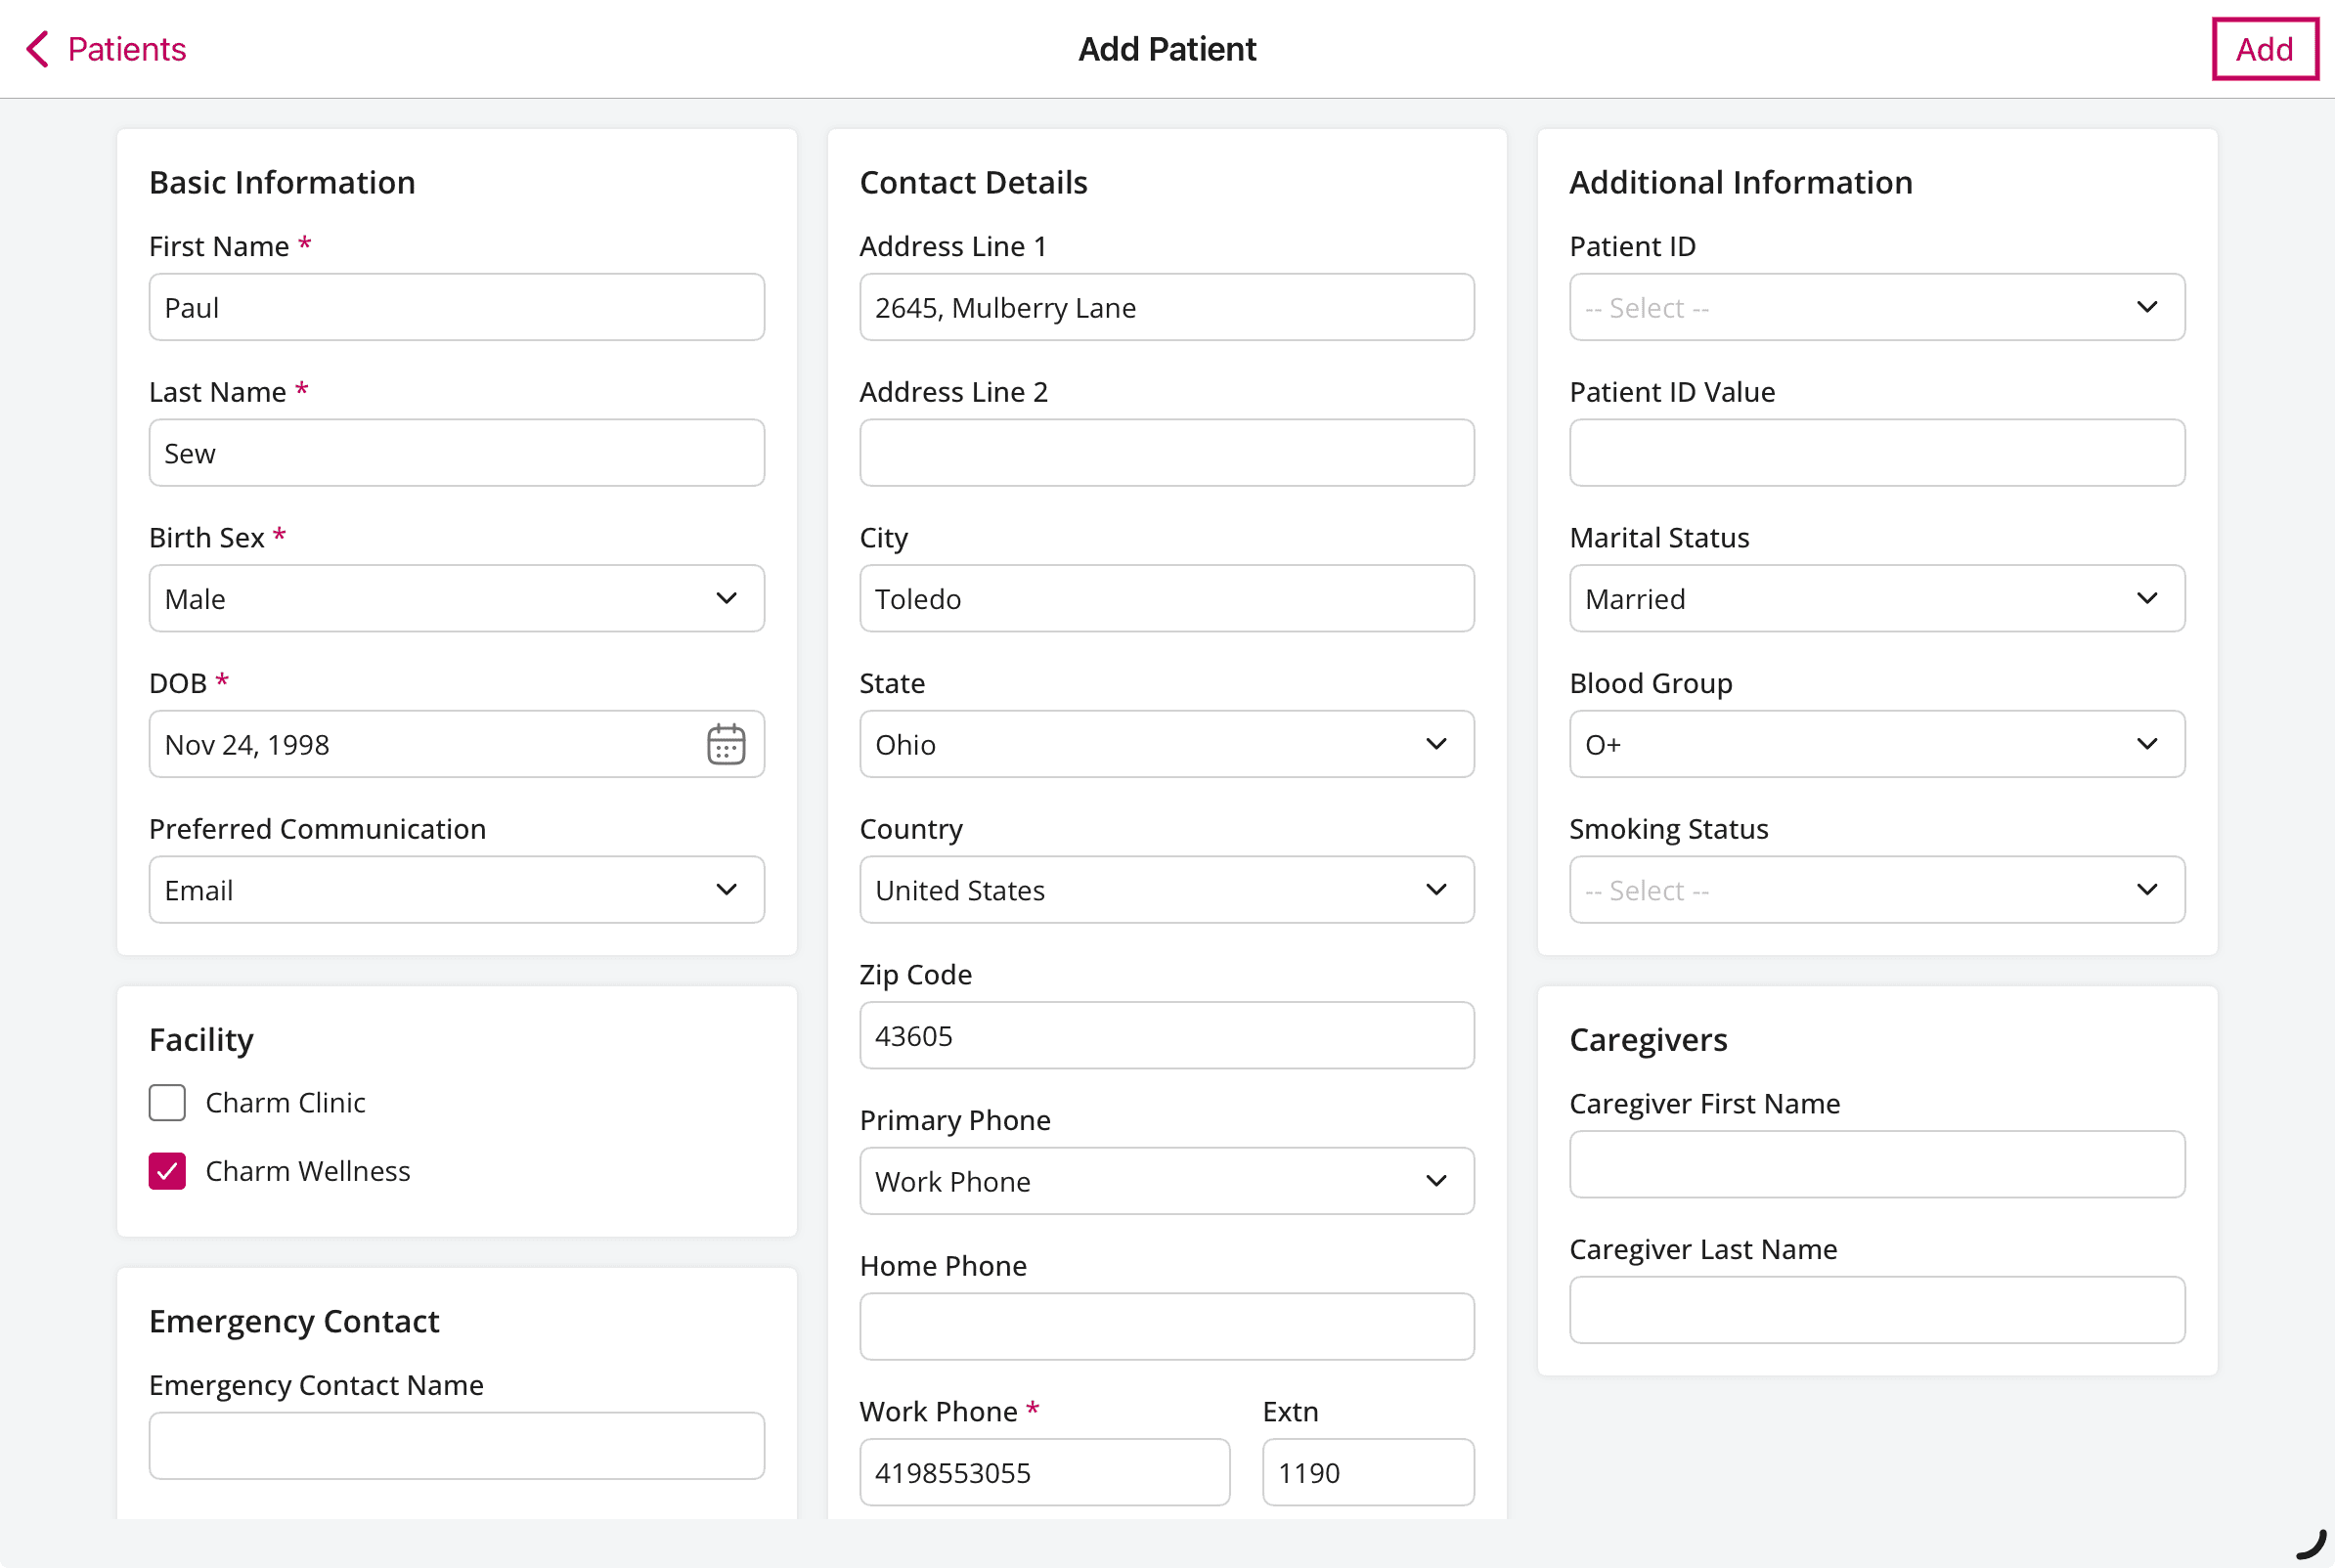
The Practice member can add new Patients within the selected Facility by following the steps below.
- Navigate to the 'Patients' section and tap the 'Add Patient' option at the top-right corner.

- Enter the required information and tap 'Add'.
b. Search Patient
To search for a Patient within the selected Facility, follow the steps given below.
- In the search bar, enter the Patient's name.
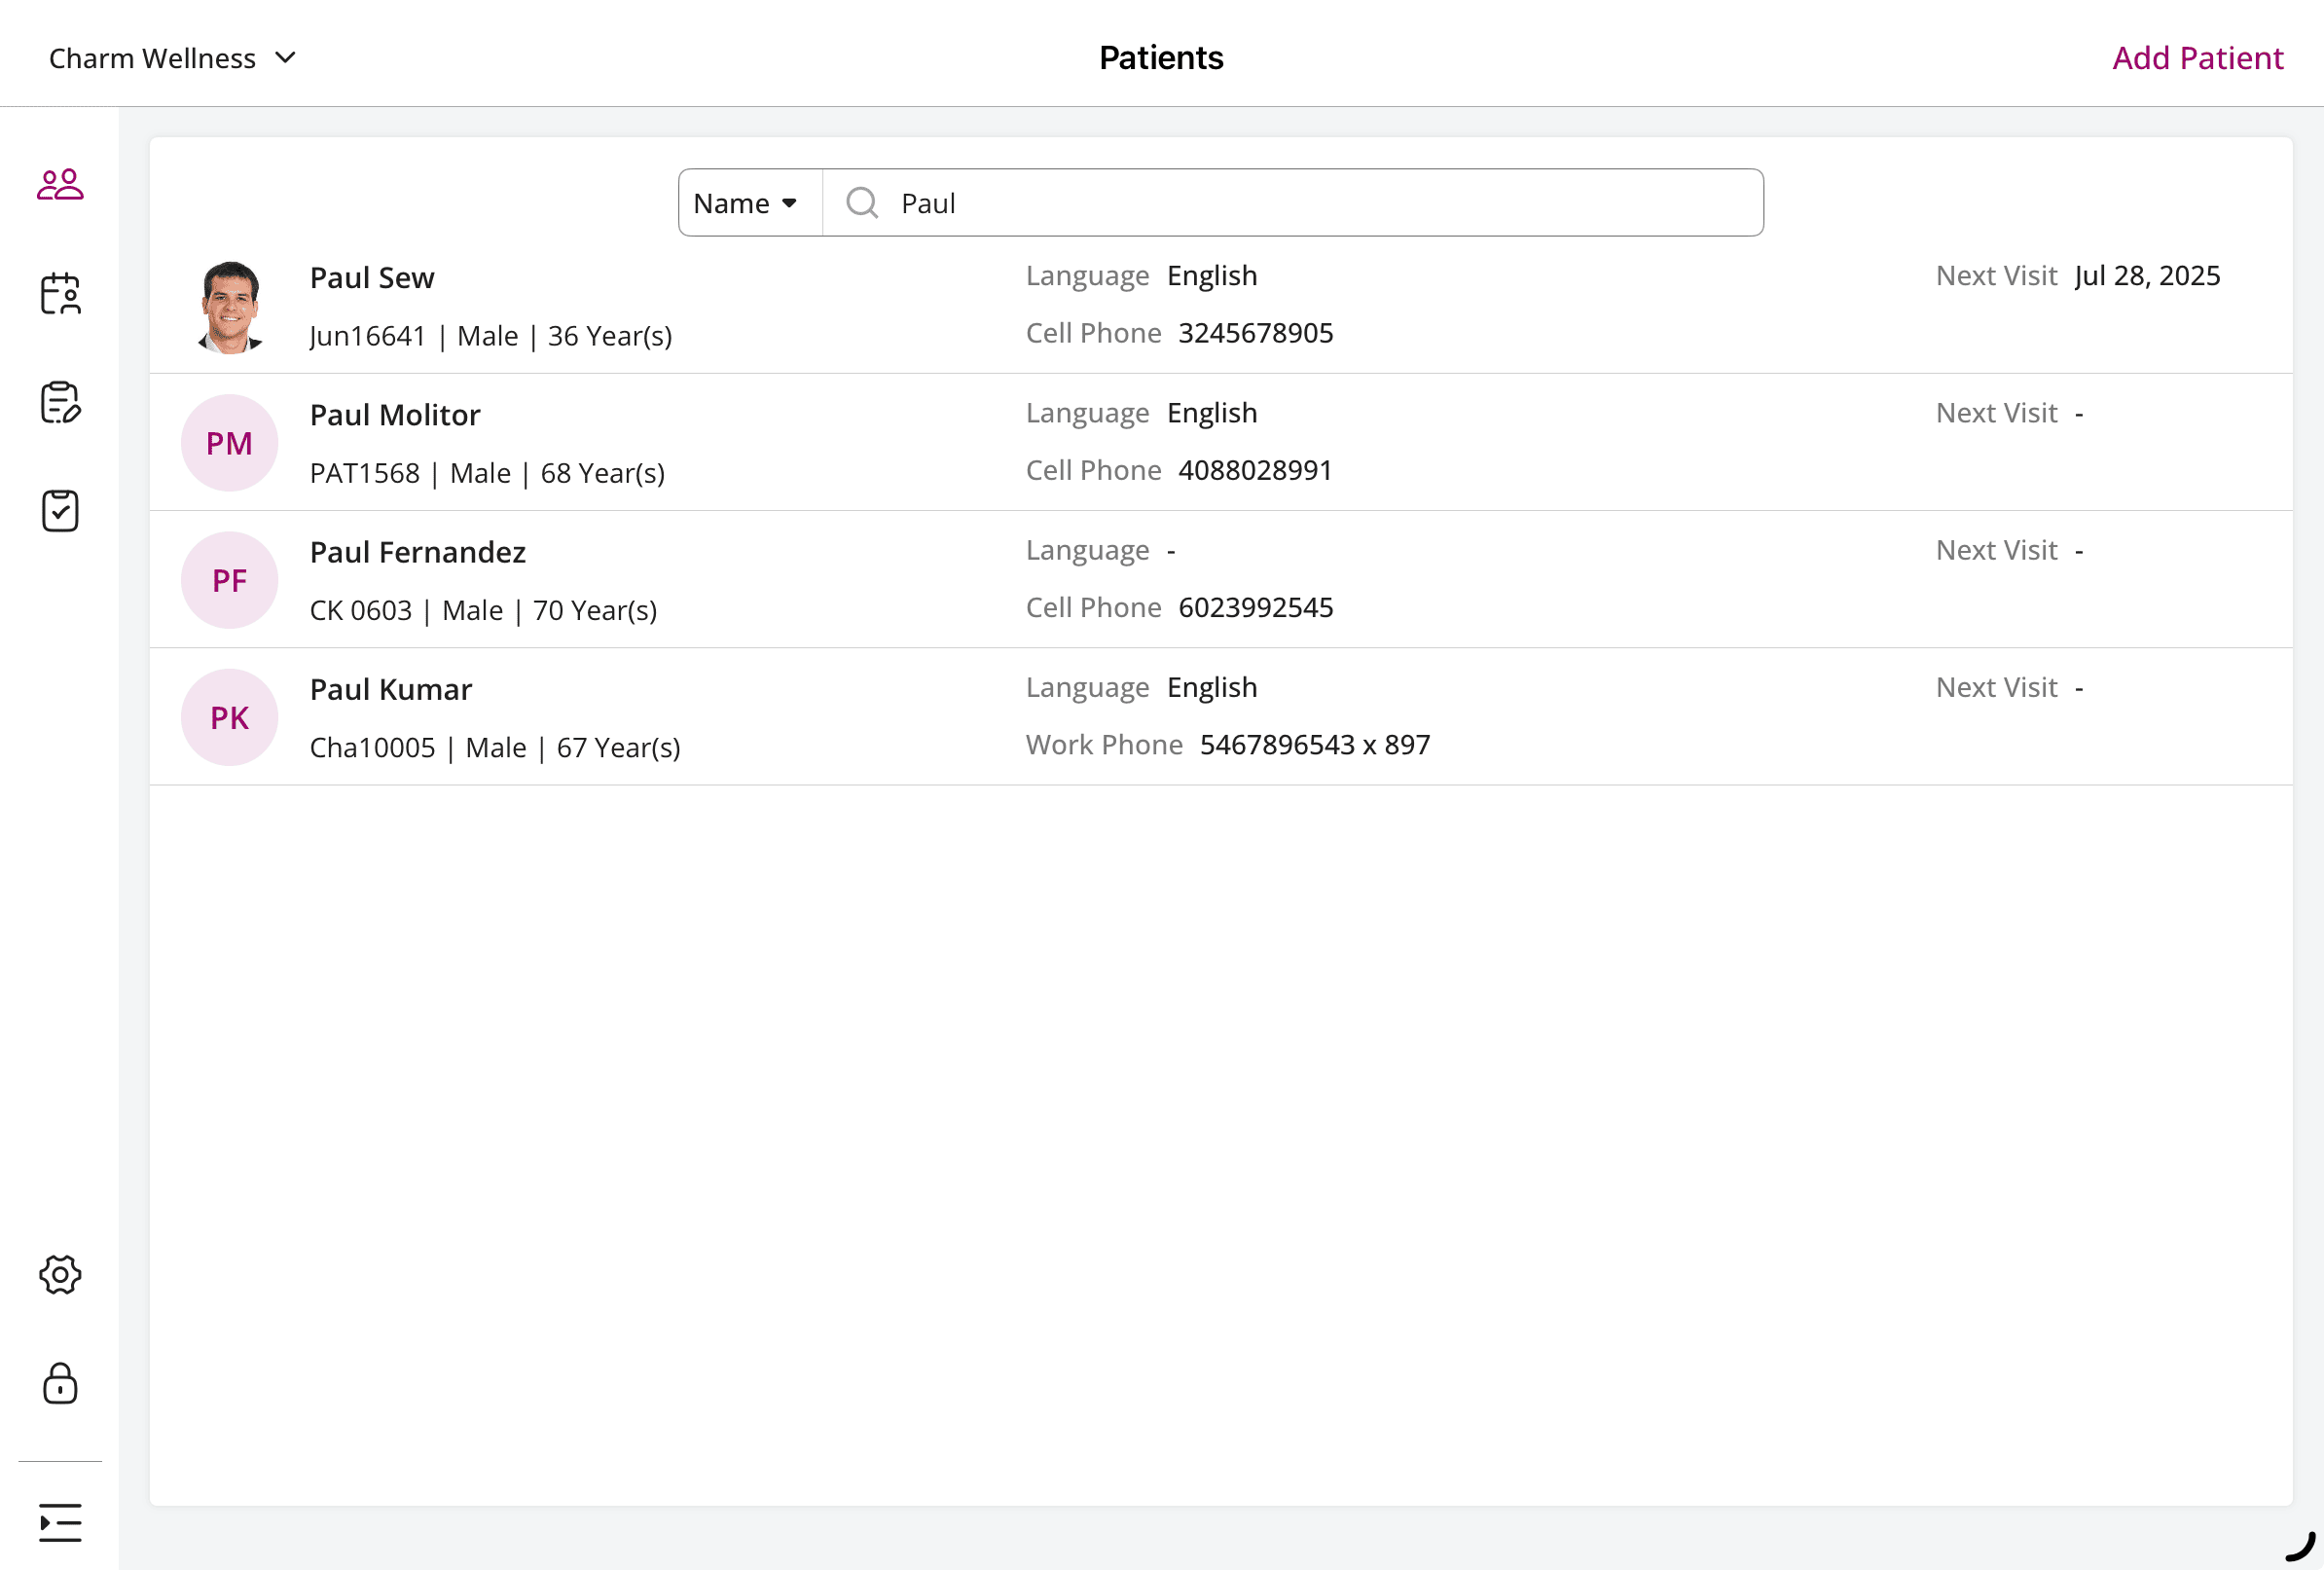
- Choose a Patient profile from the list of matching profiles.
- The Patient Summary displays Allergies, Medications, Problems, Vitals, Immunization, and Injection.
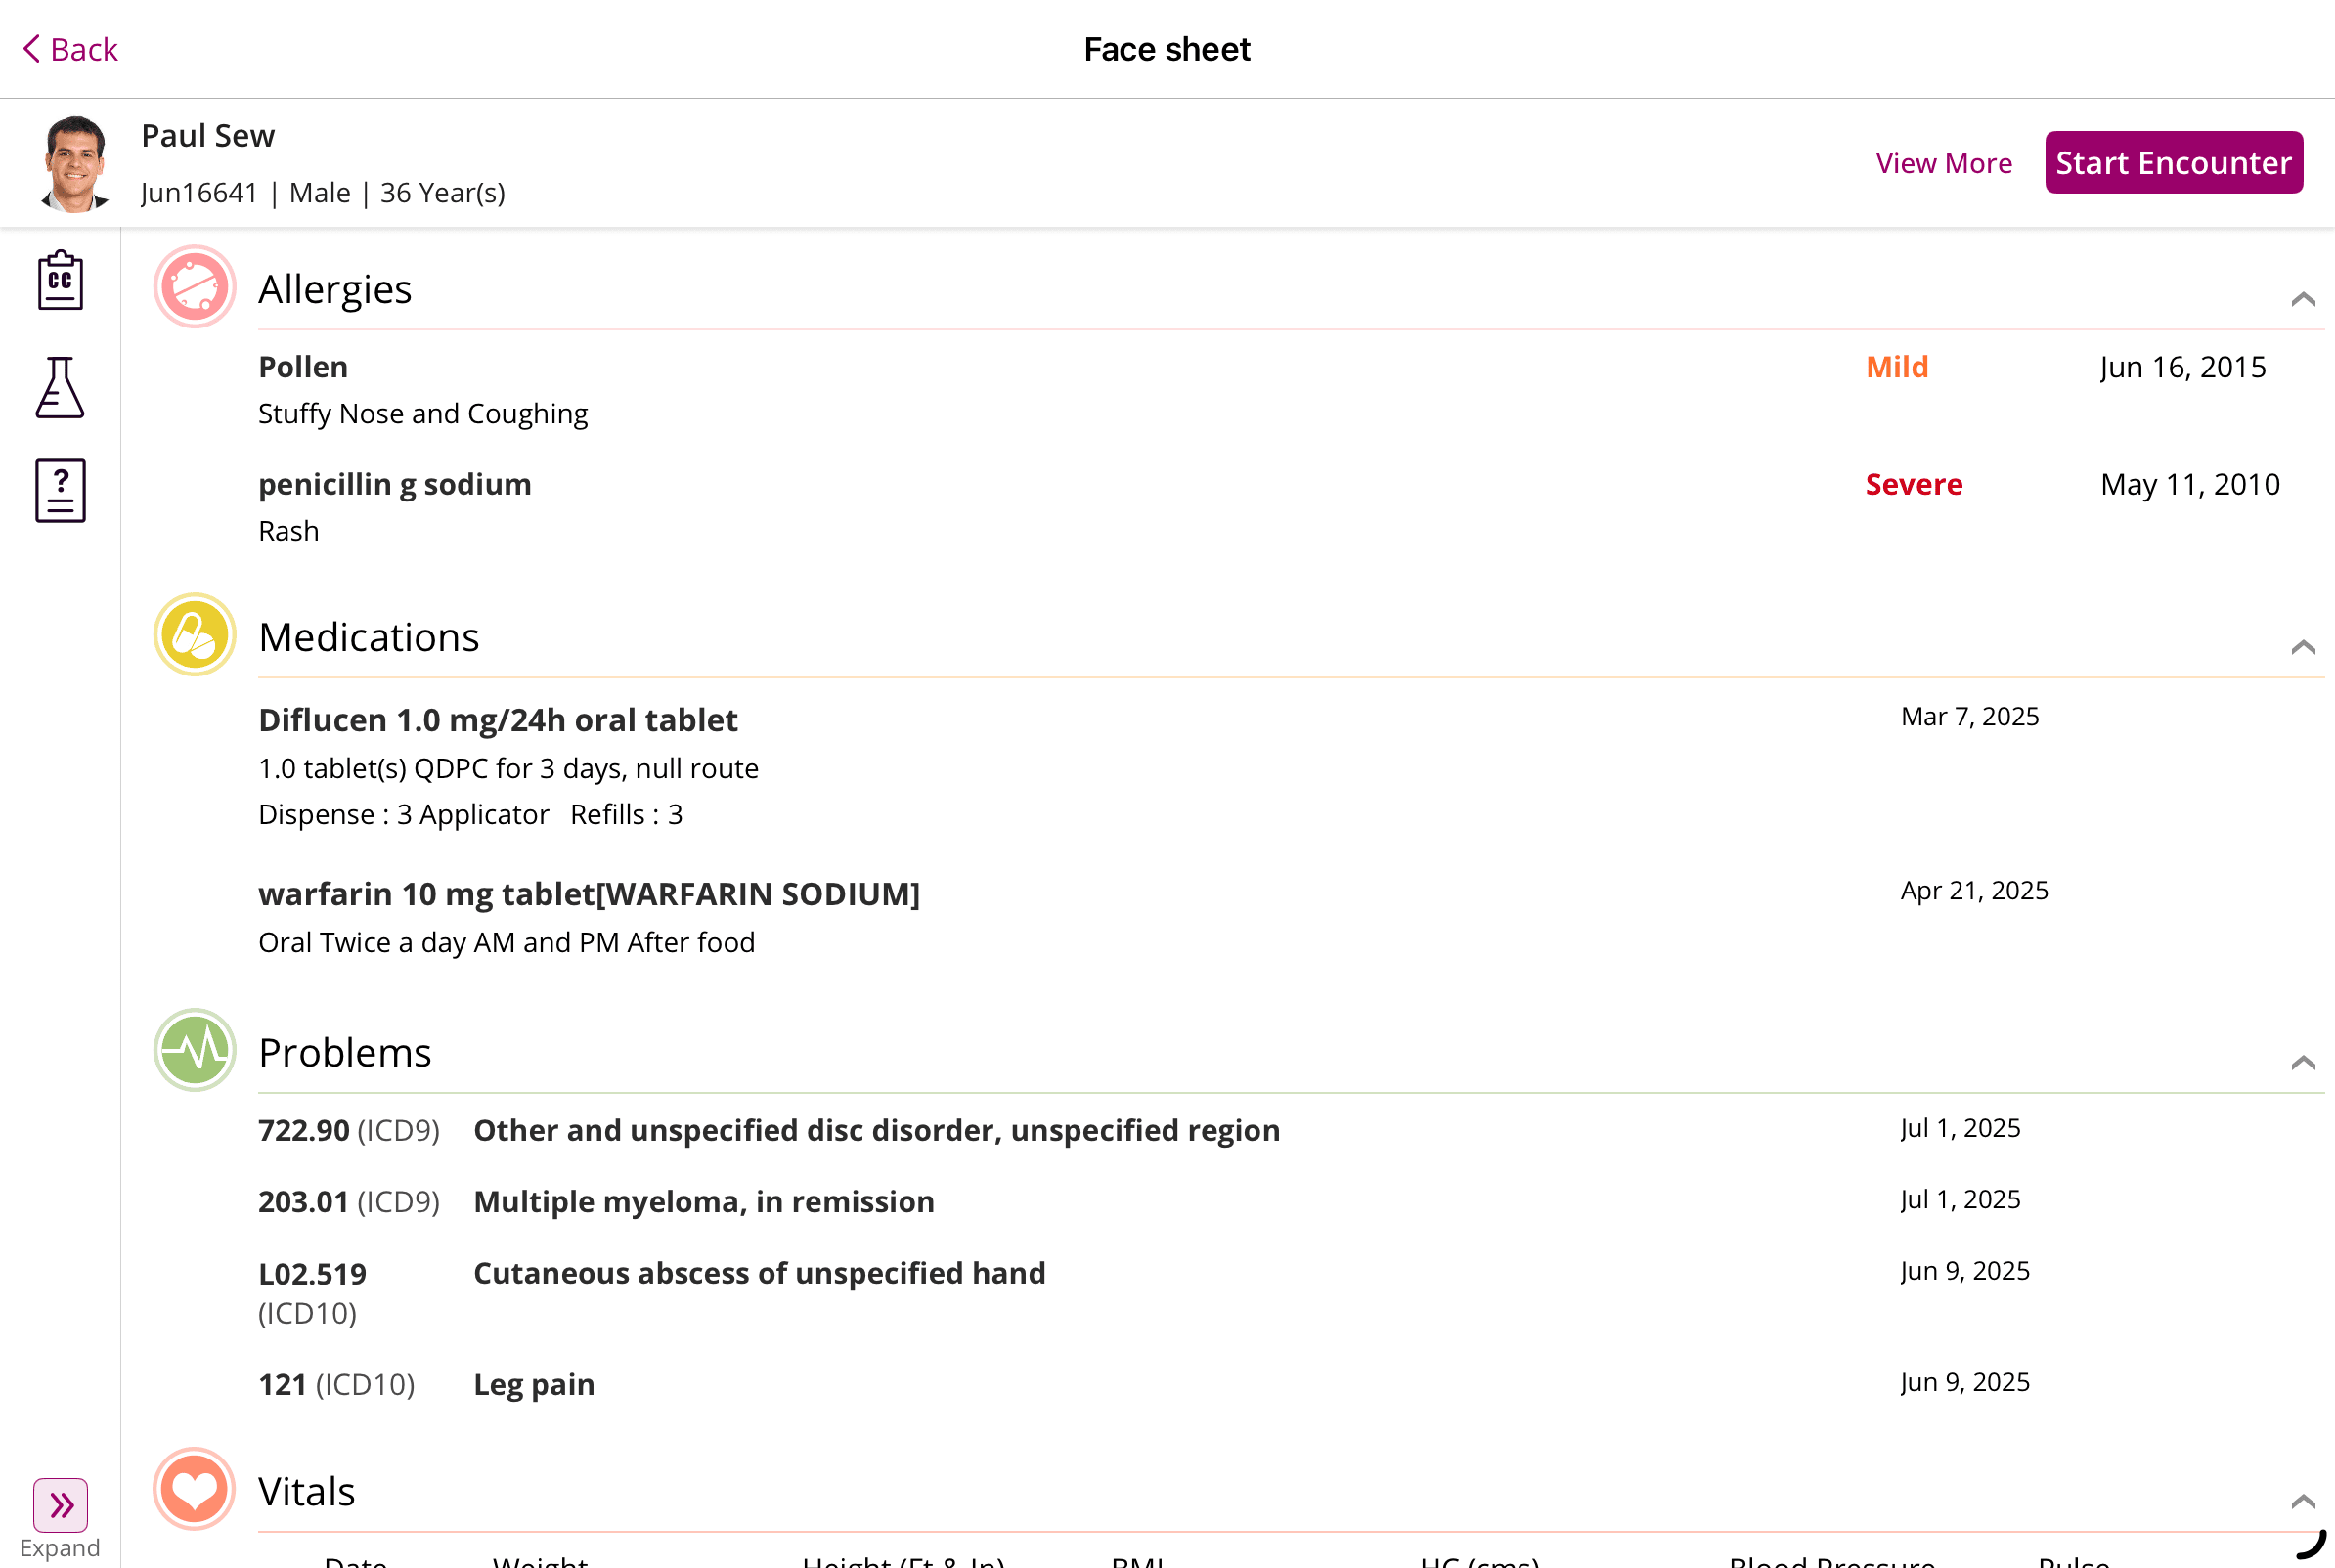
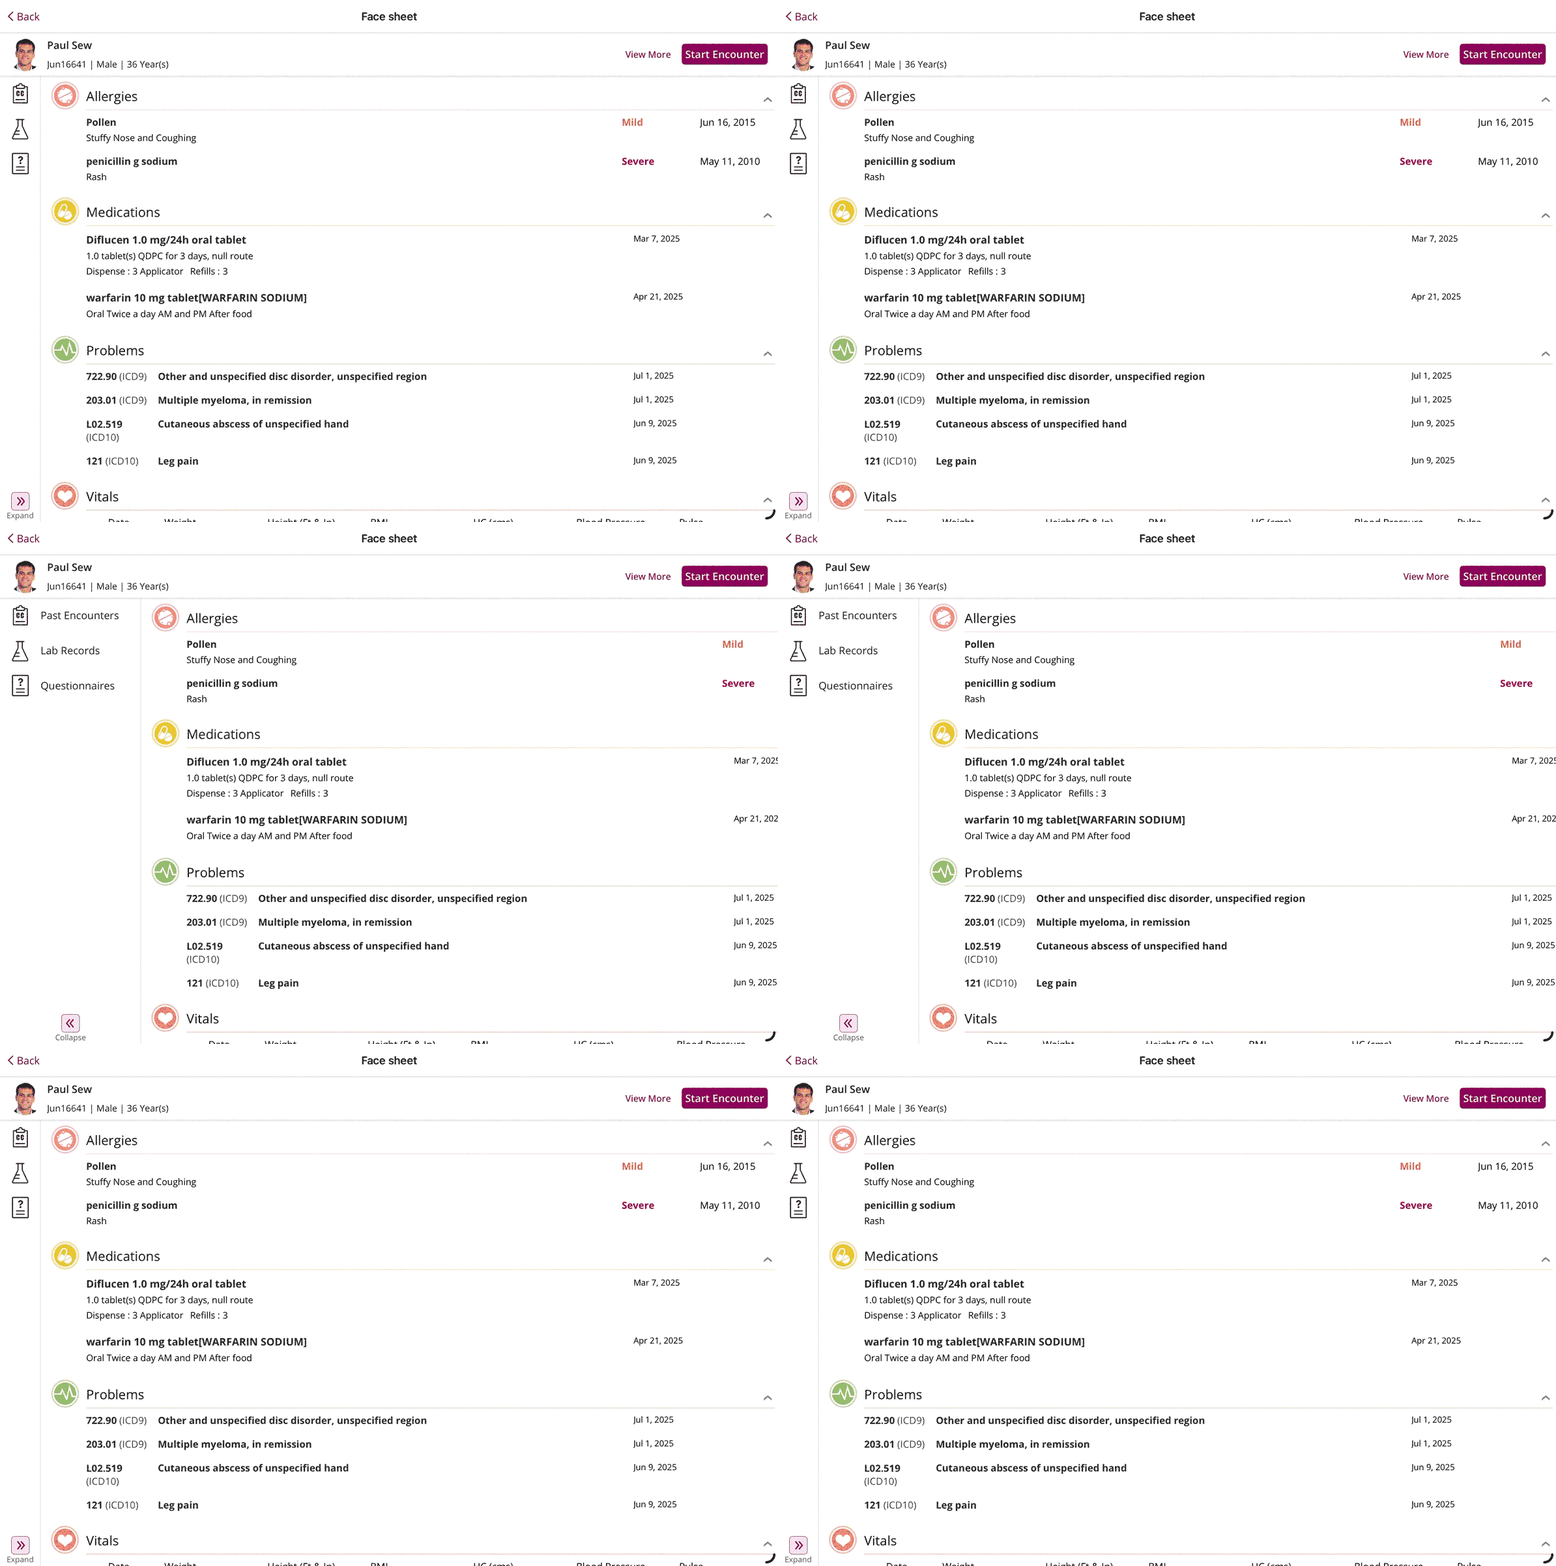
- You can also view the Patient's Past Encounters, Lab Records, and Questionnaires by expanding the left pane. Tap on each section to view the complete list.
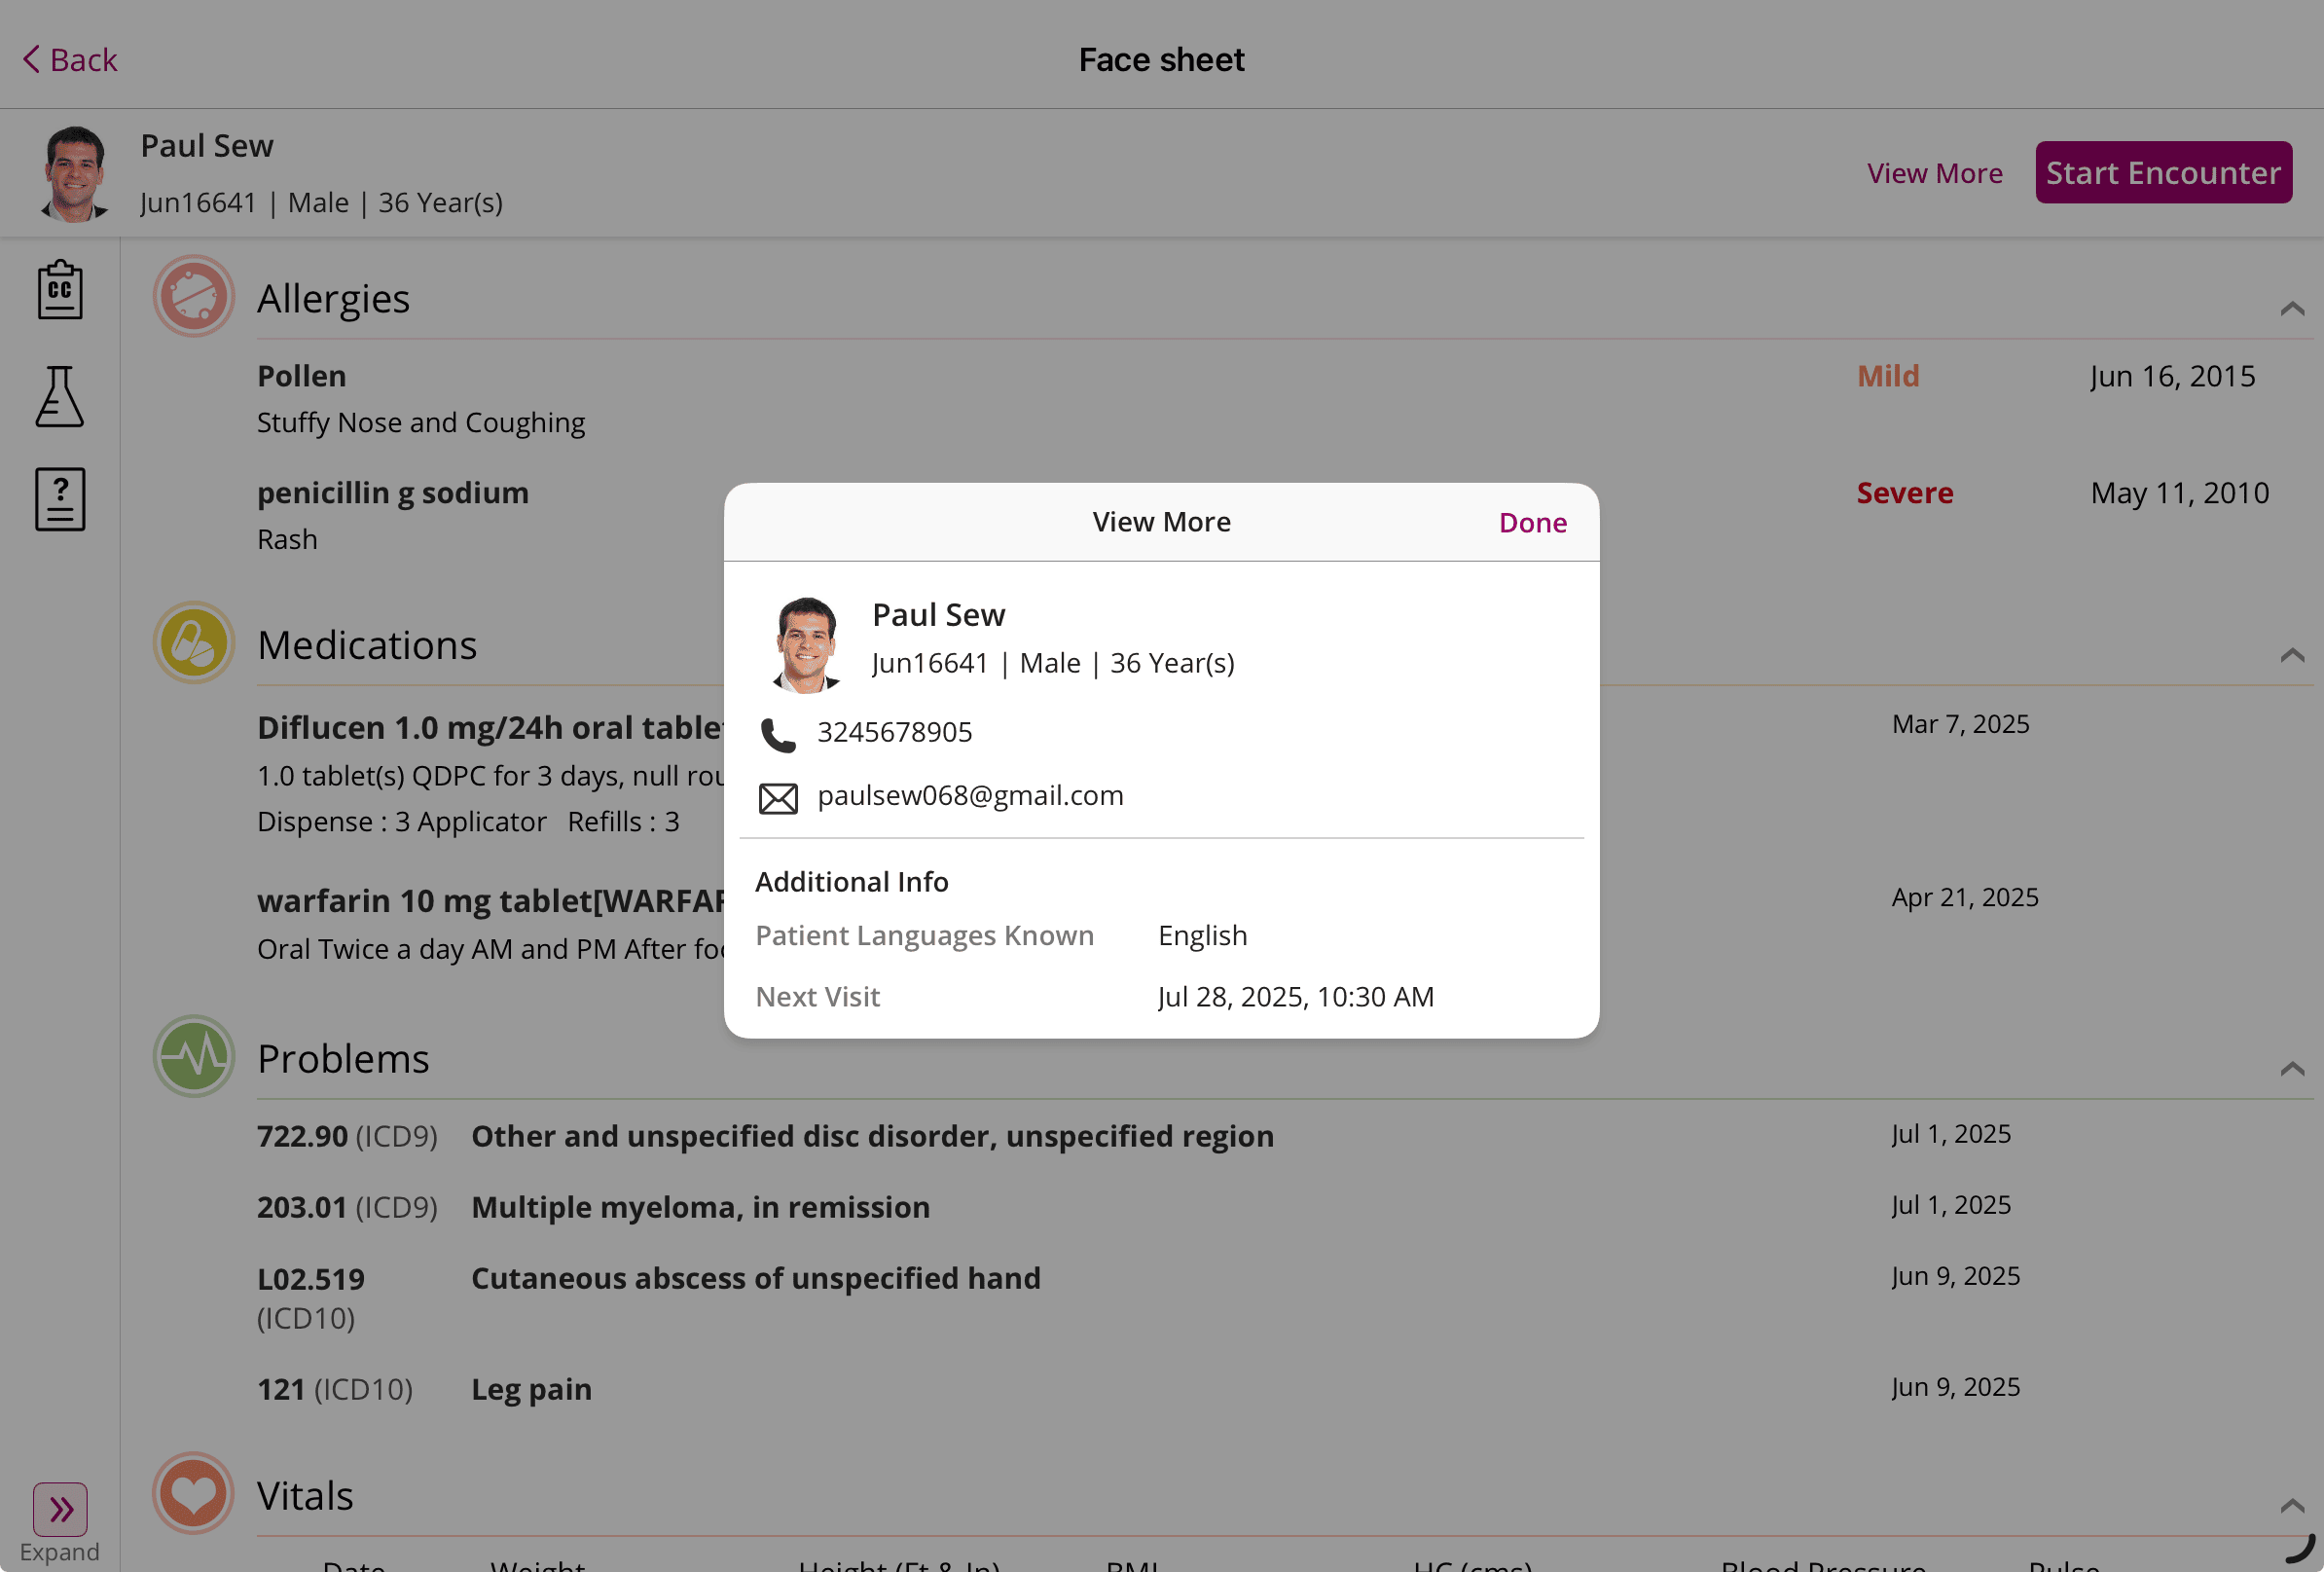
- To view the Patient's additional details, tap the 'View More' option.
- You can start an Encounter for the Patient by tapping the 'Start Encounter' button.
3. Schedule Appointments
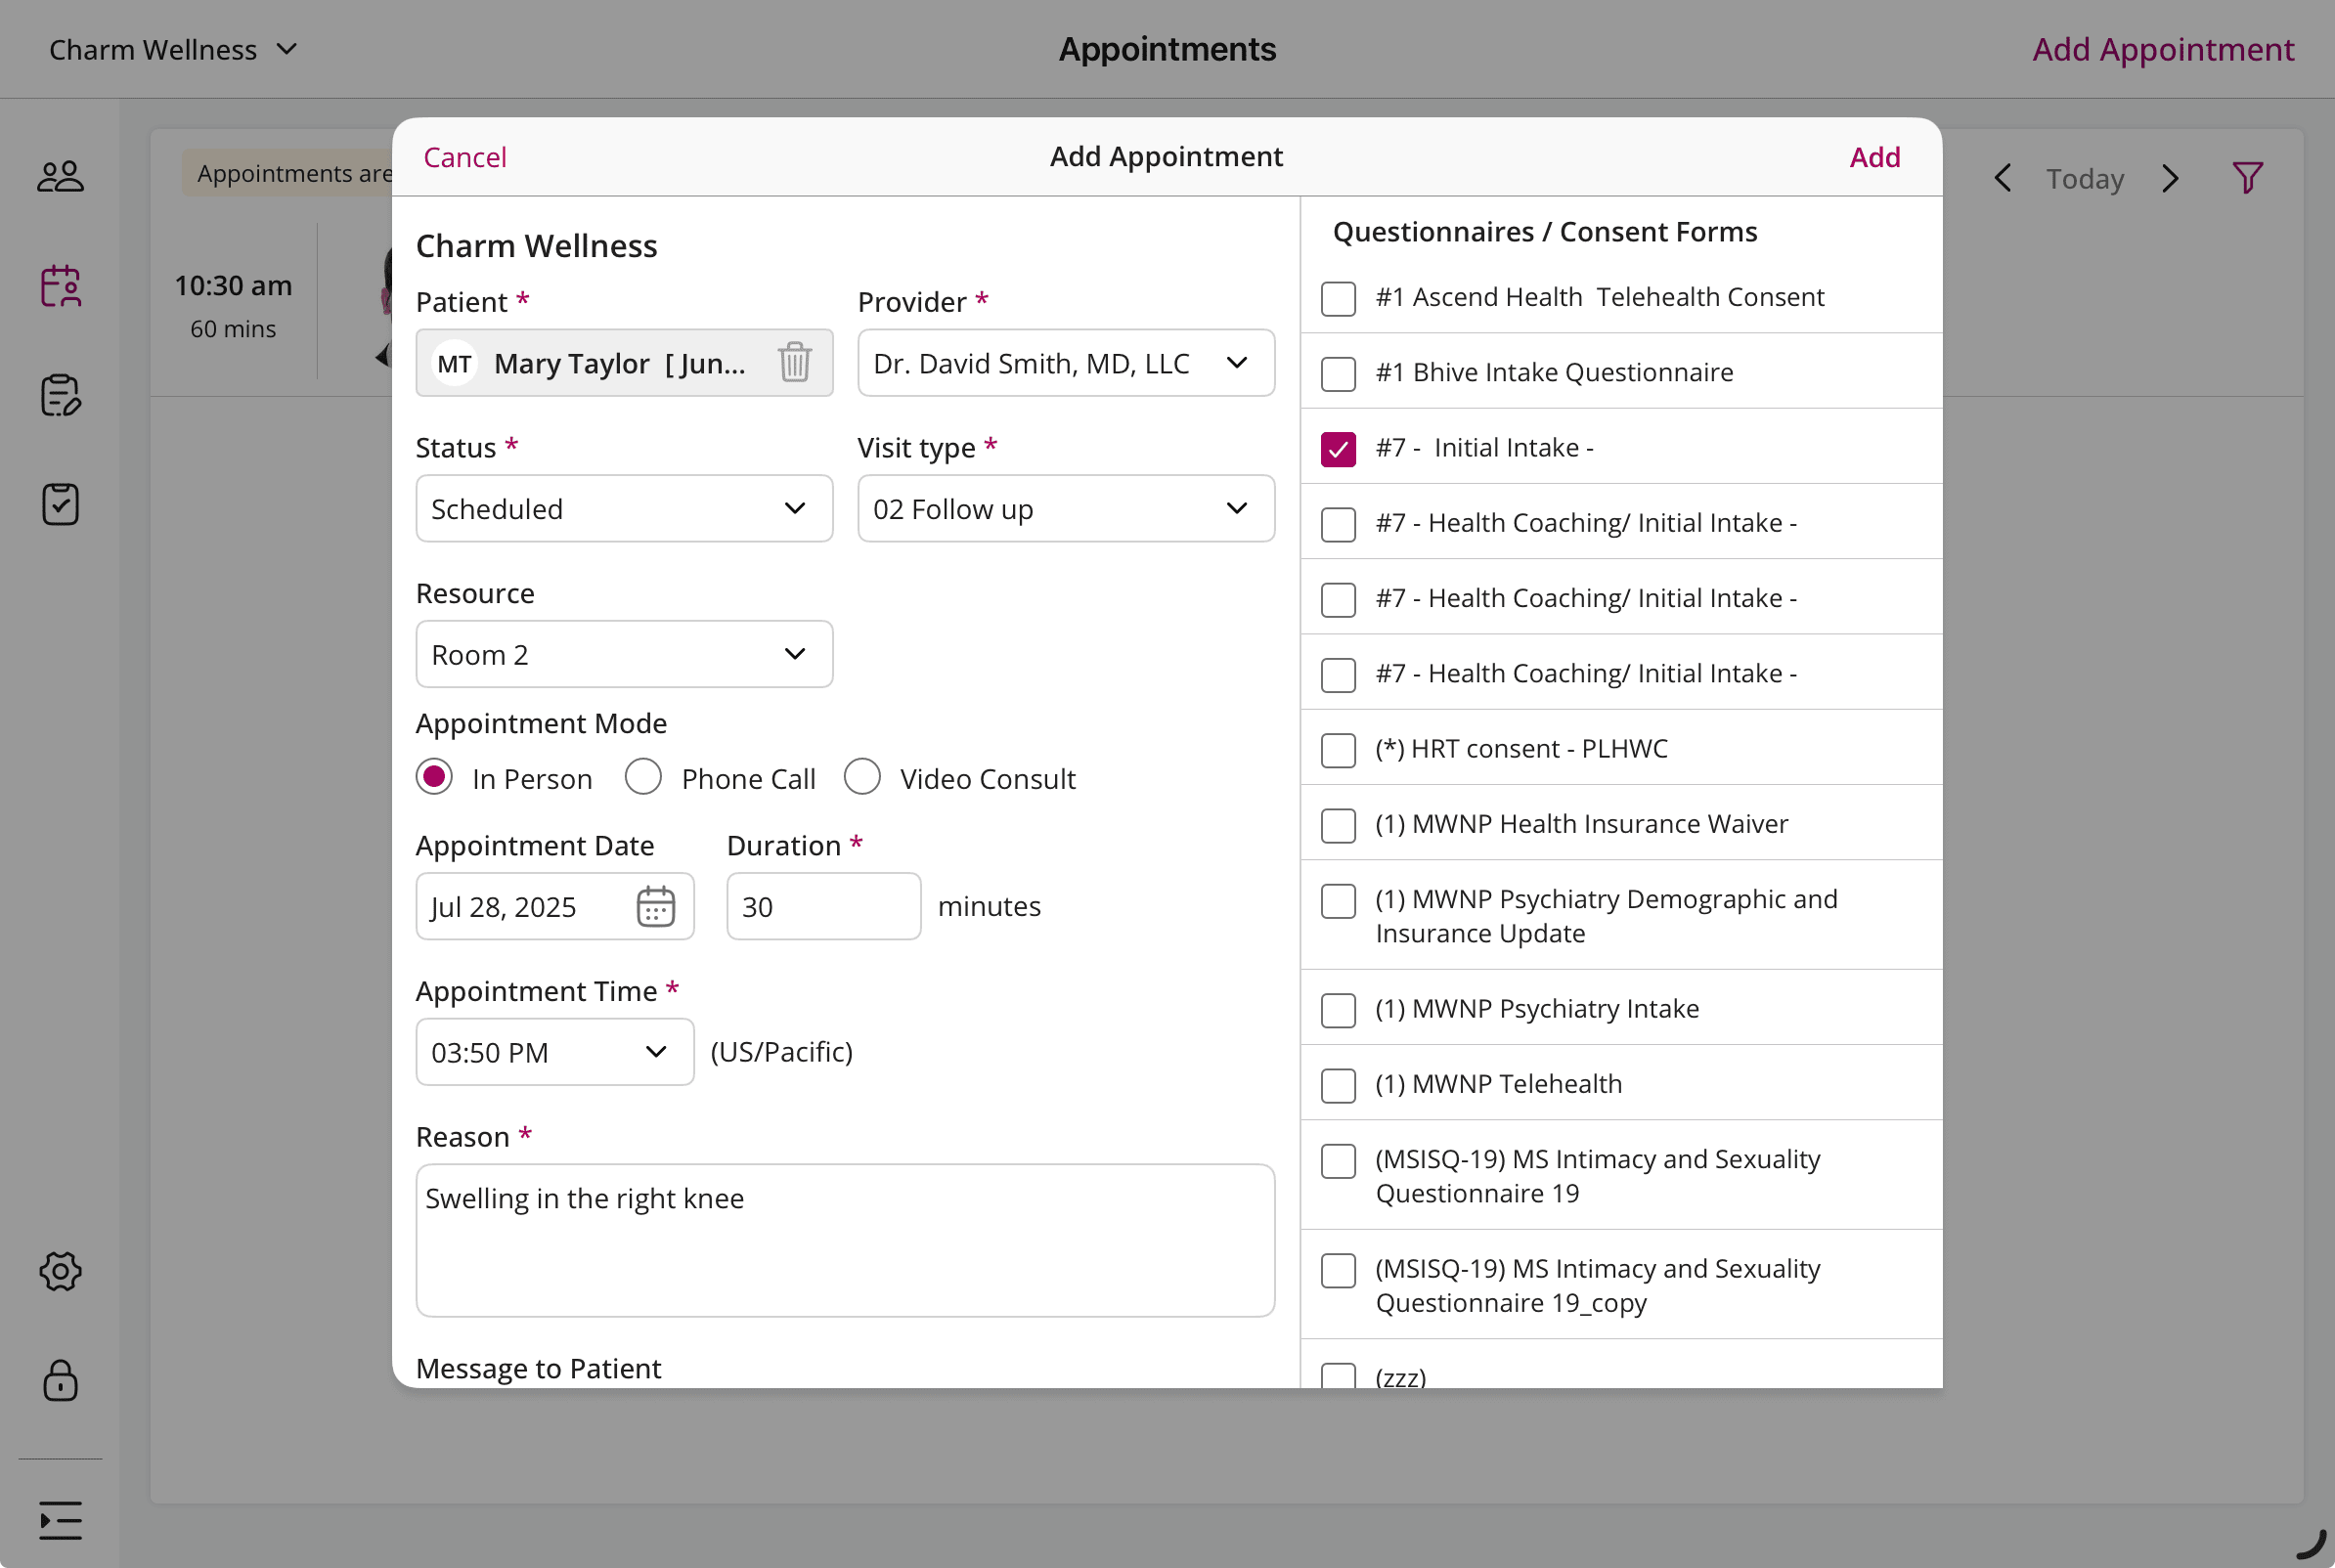
Practices can schedule Appointments by navigating to the 'Calendar' section and tapping the 'Add Appointment' option.
You can view all Appointments, edit, and change the Appointment Status as required.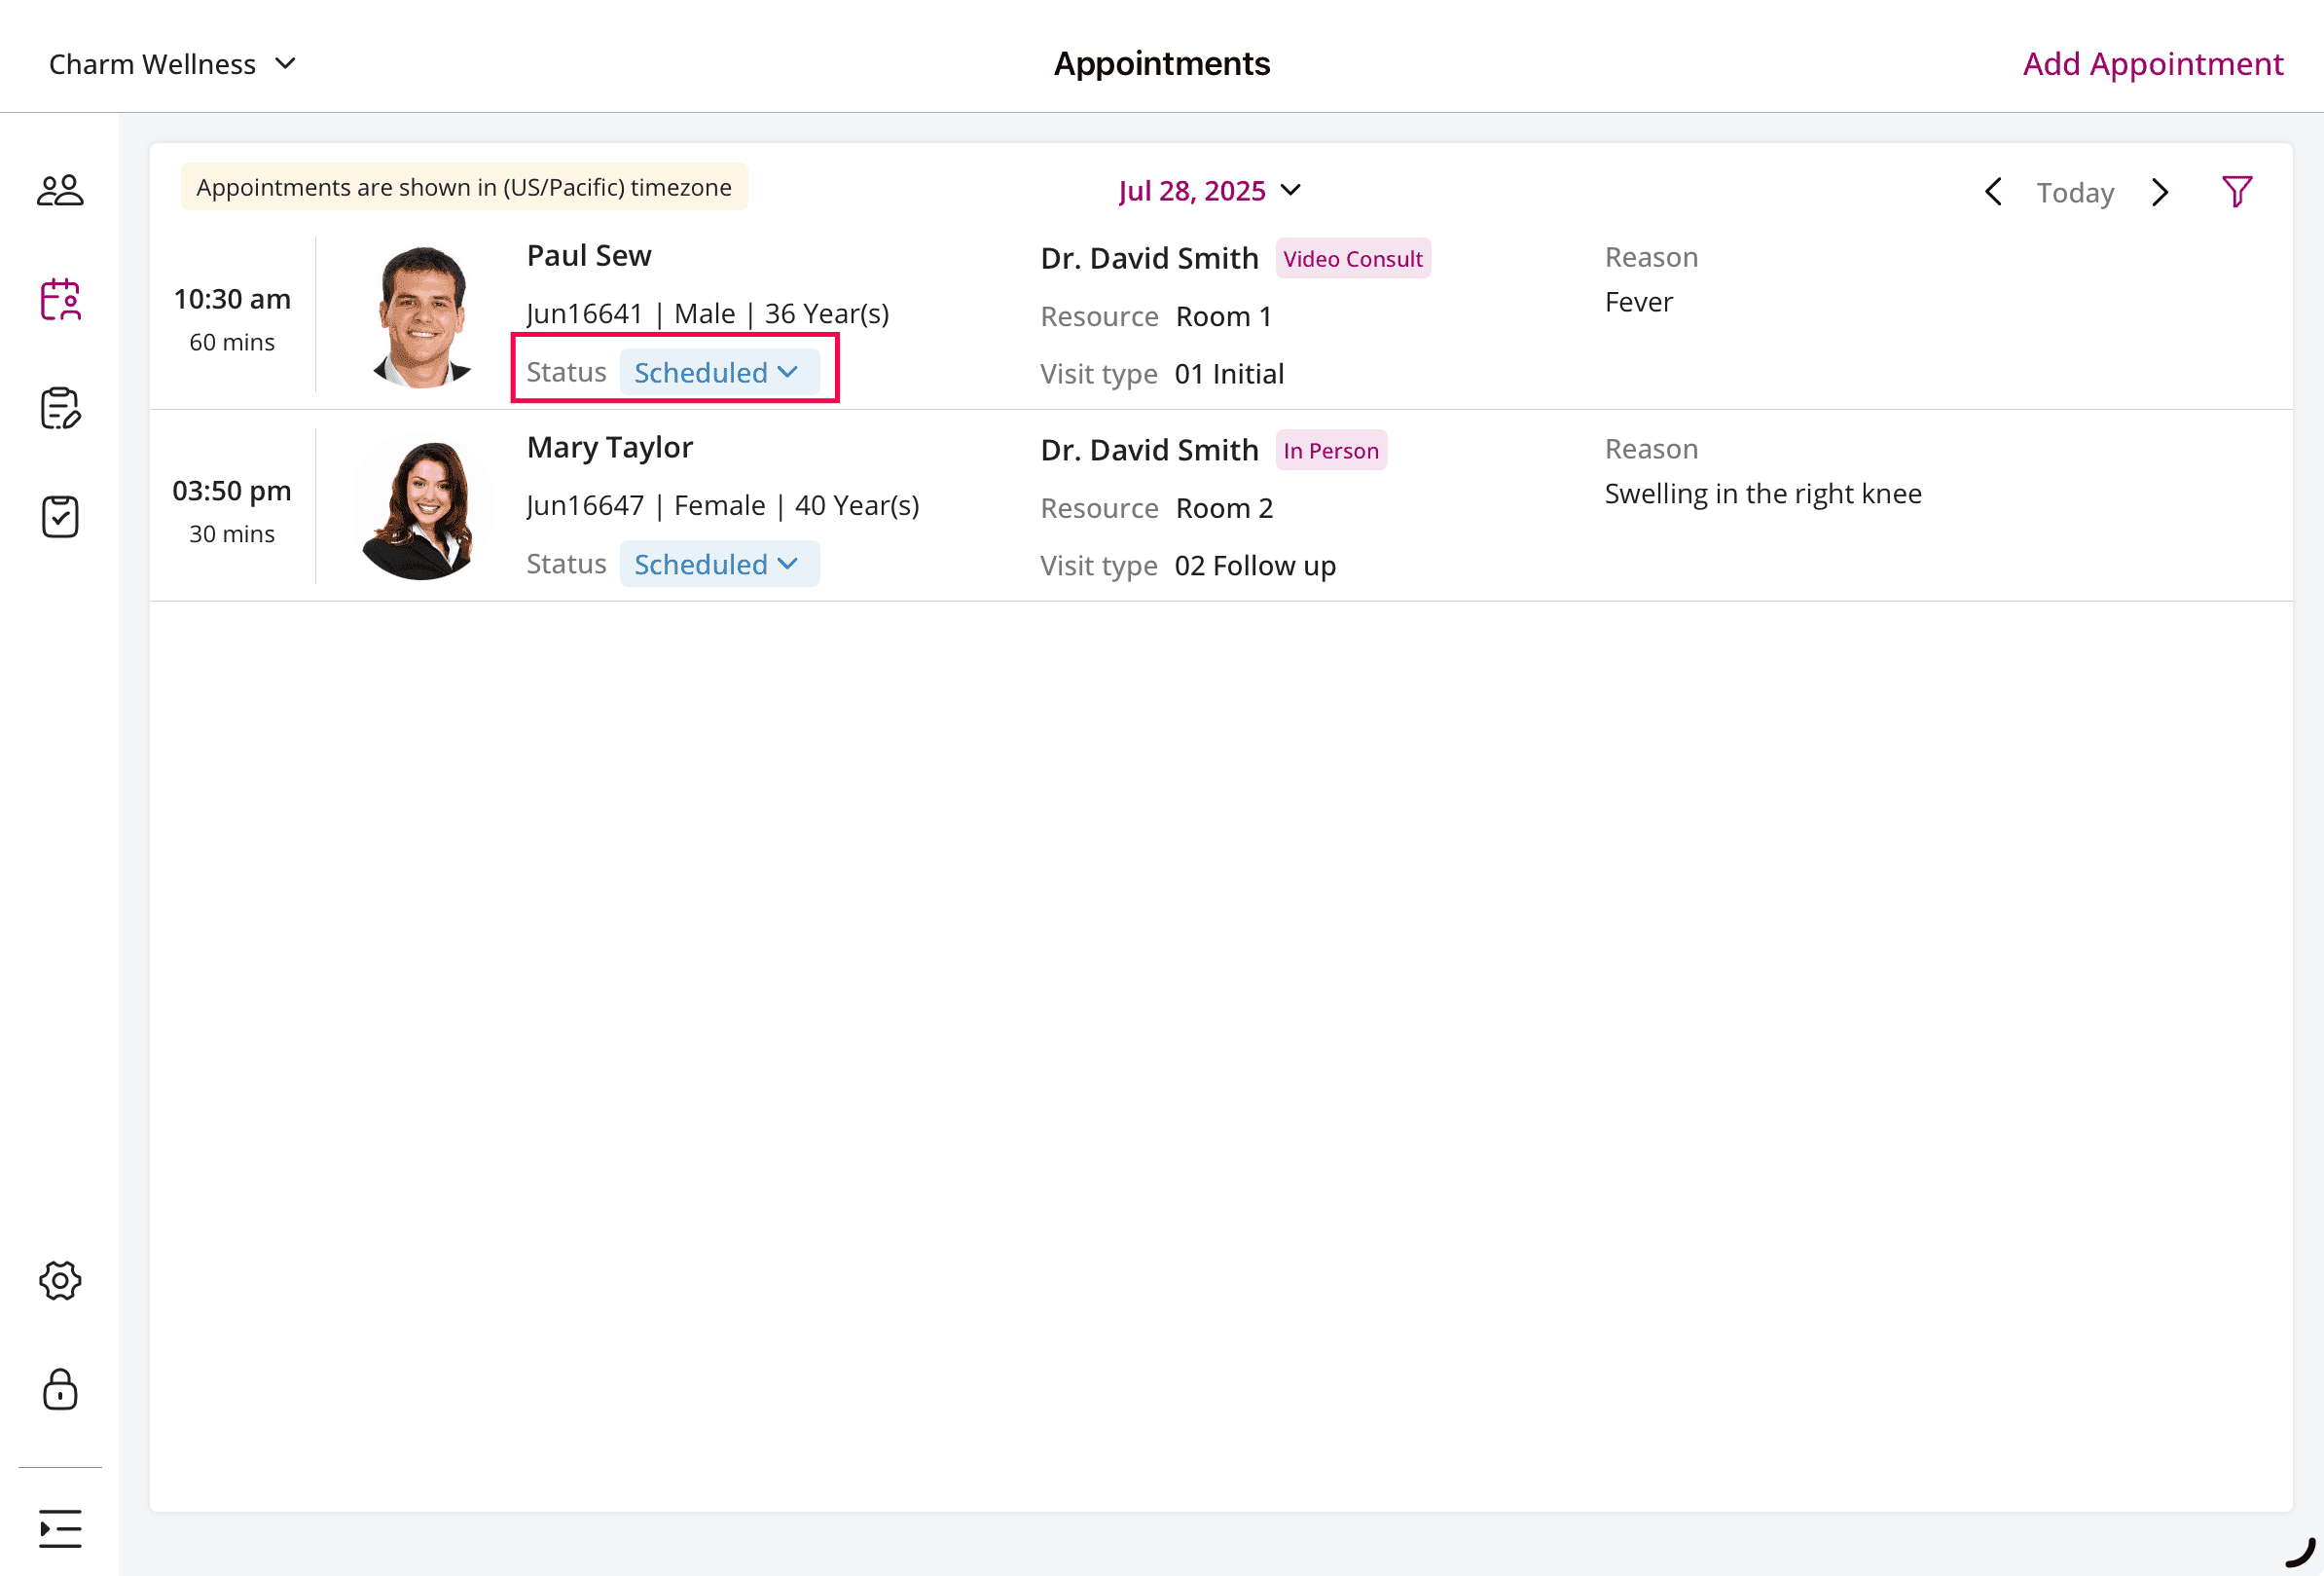
4. Start or Edit Encounter
- Providers can start or edit an Encounter for a Patient within the Charm Chart Note App from three sections:
- From the 'Patients' section: Search for the Patient and swipe left to start an Encounter.

- From the Patient Dashboard: Tap the 'Start Encounter' button to start a new Encounter.

- From the 'Appointment' section: Swipe left on the required Appointment entry to start or edit an Encounter.

- From the 'Patients' section: Search for the Patient and swipe left to start an Encounter.
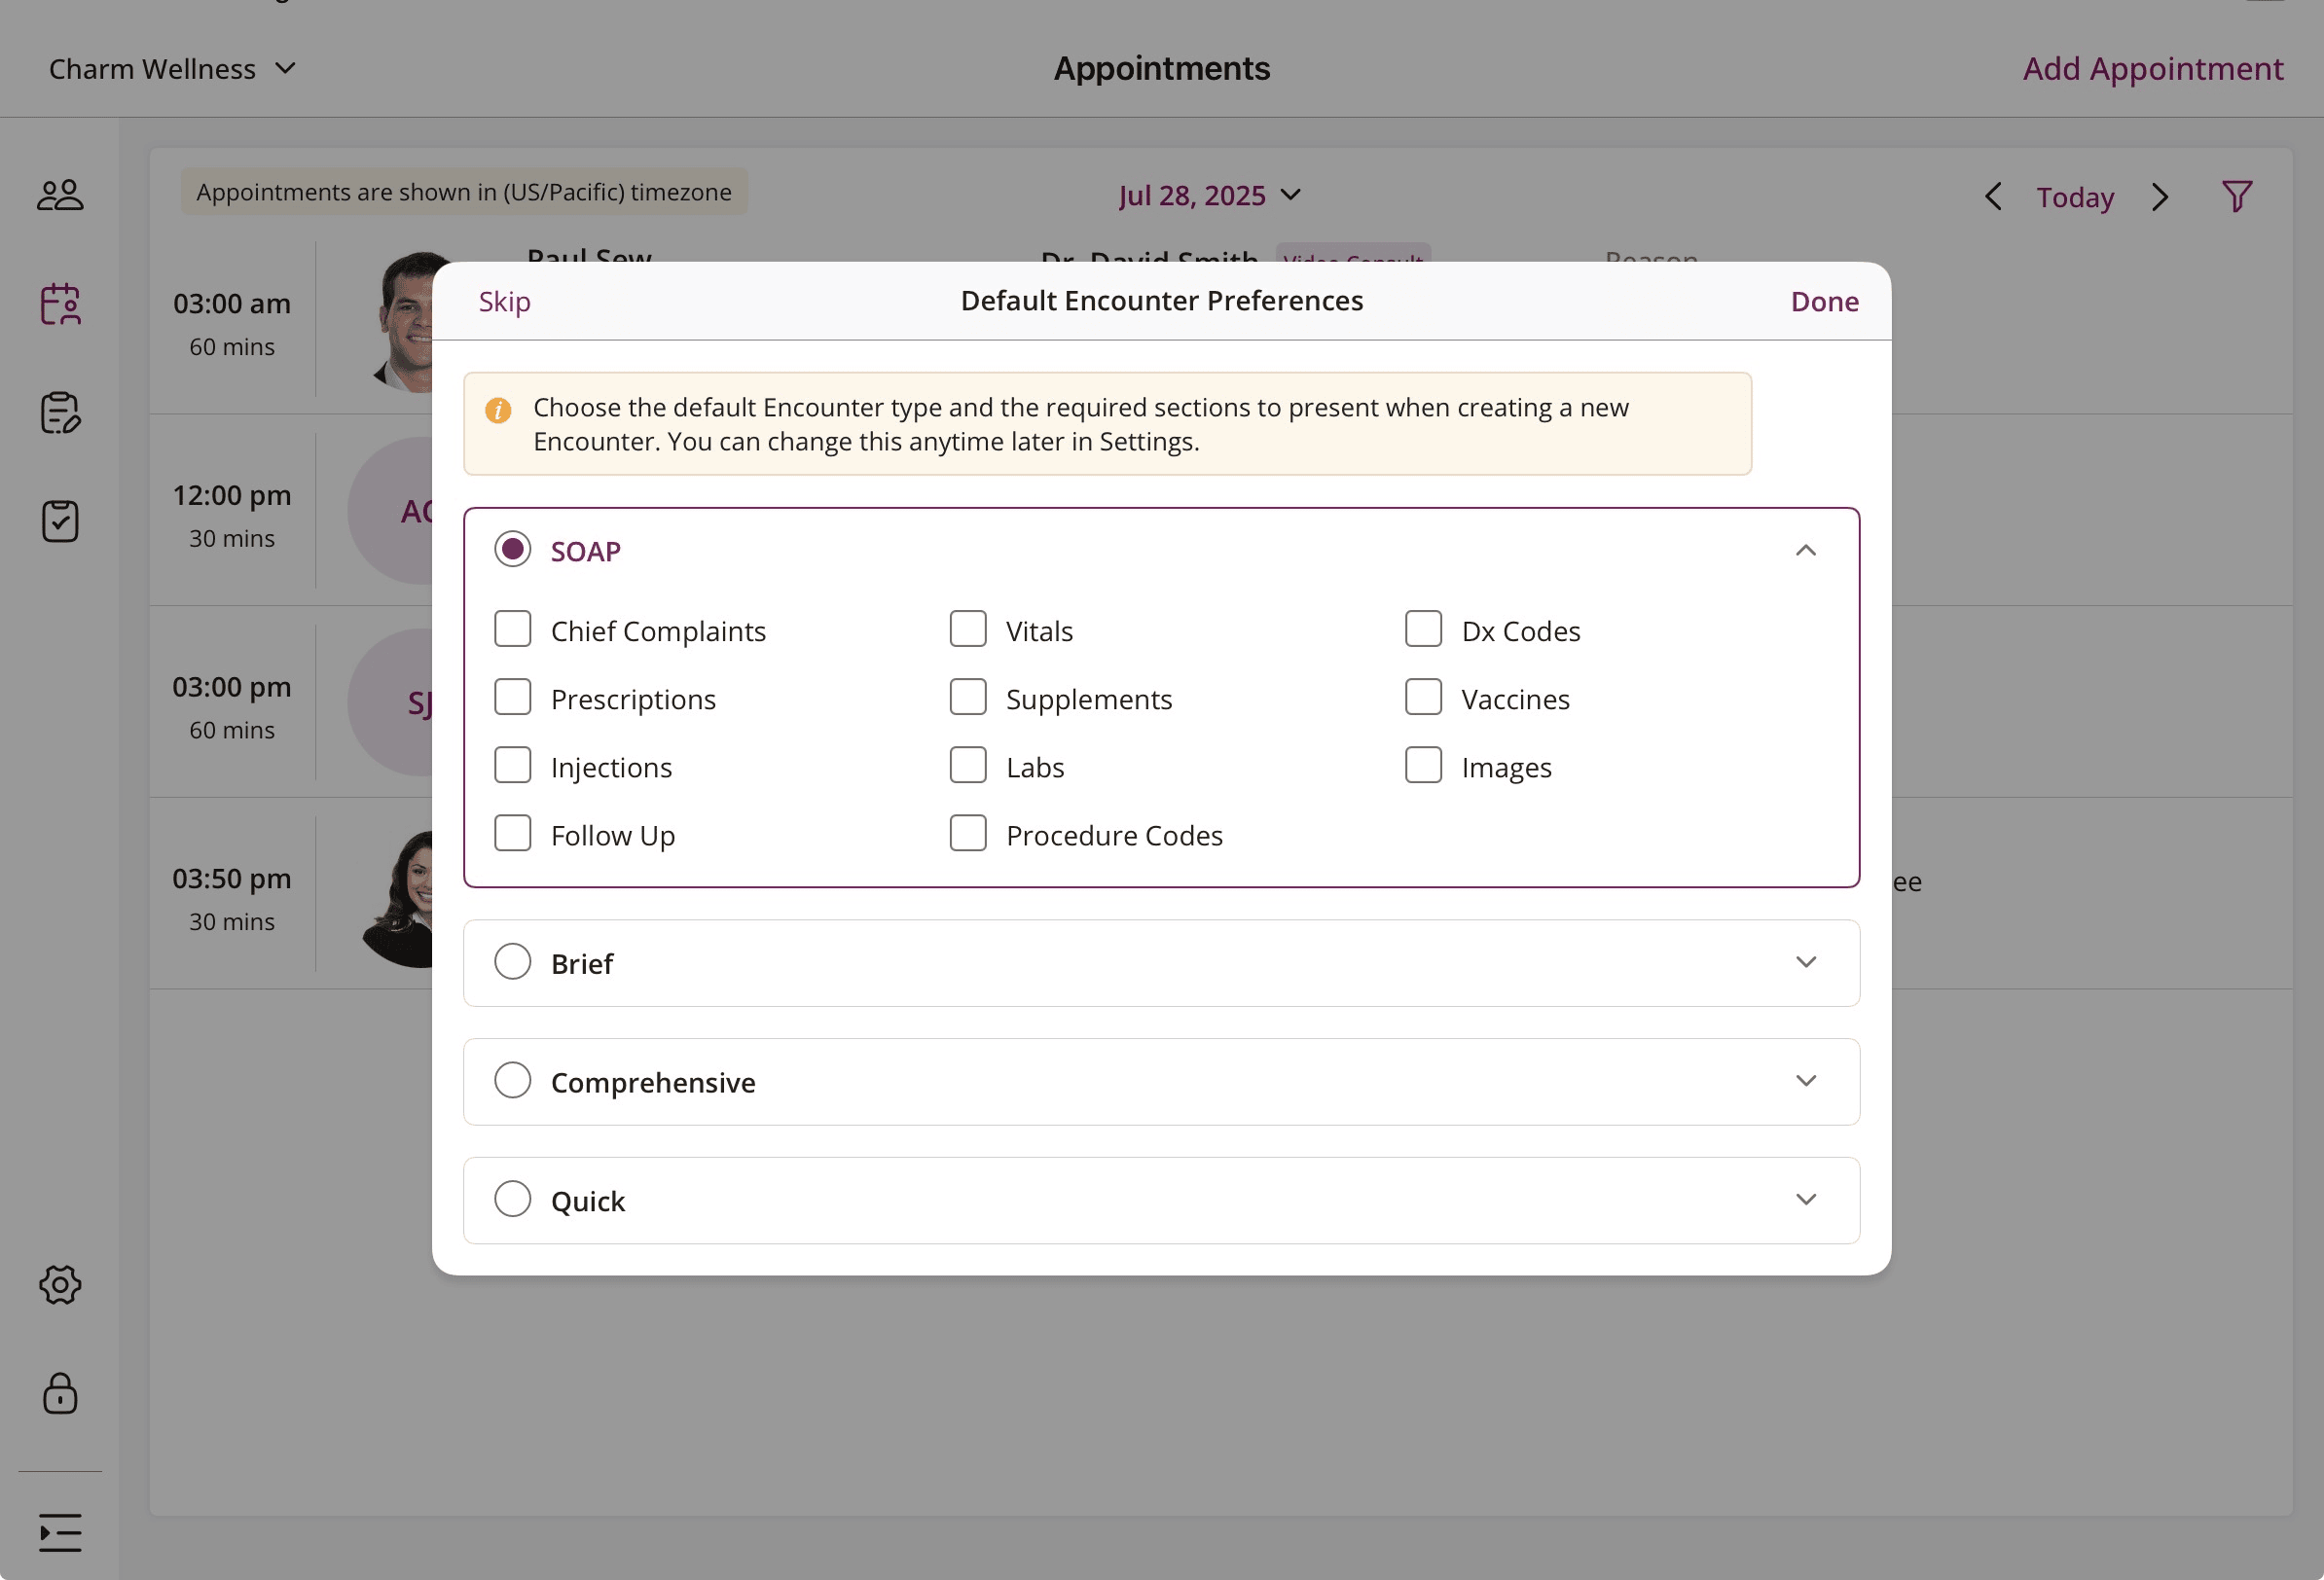
- When creating the Encounter for the first time, you will be prompted to choose the default Encounter Type and required sections. You can update these default options anytime in 'Settings'.
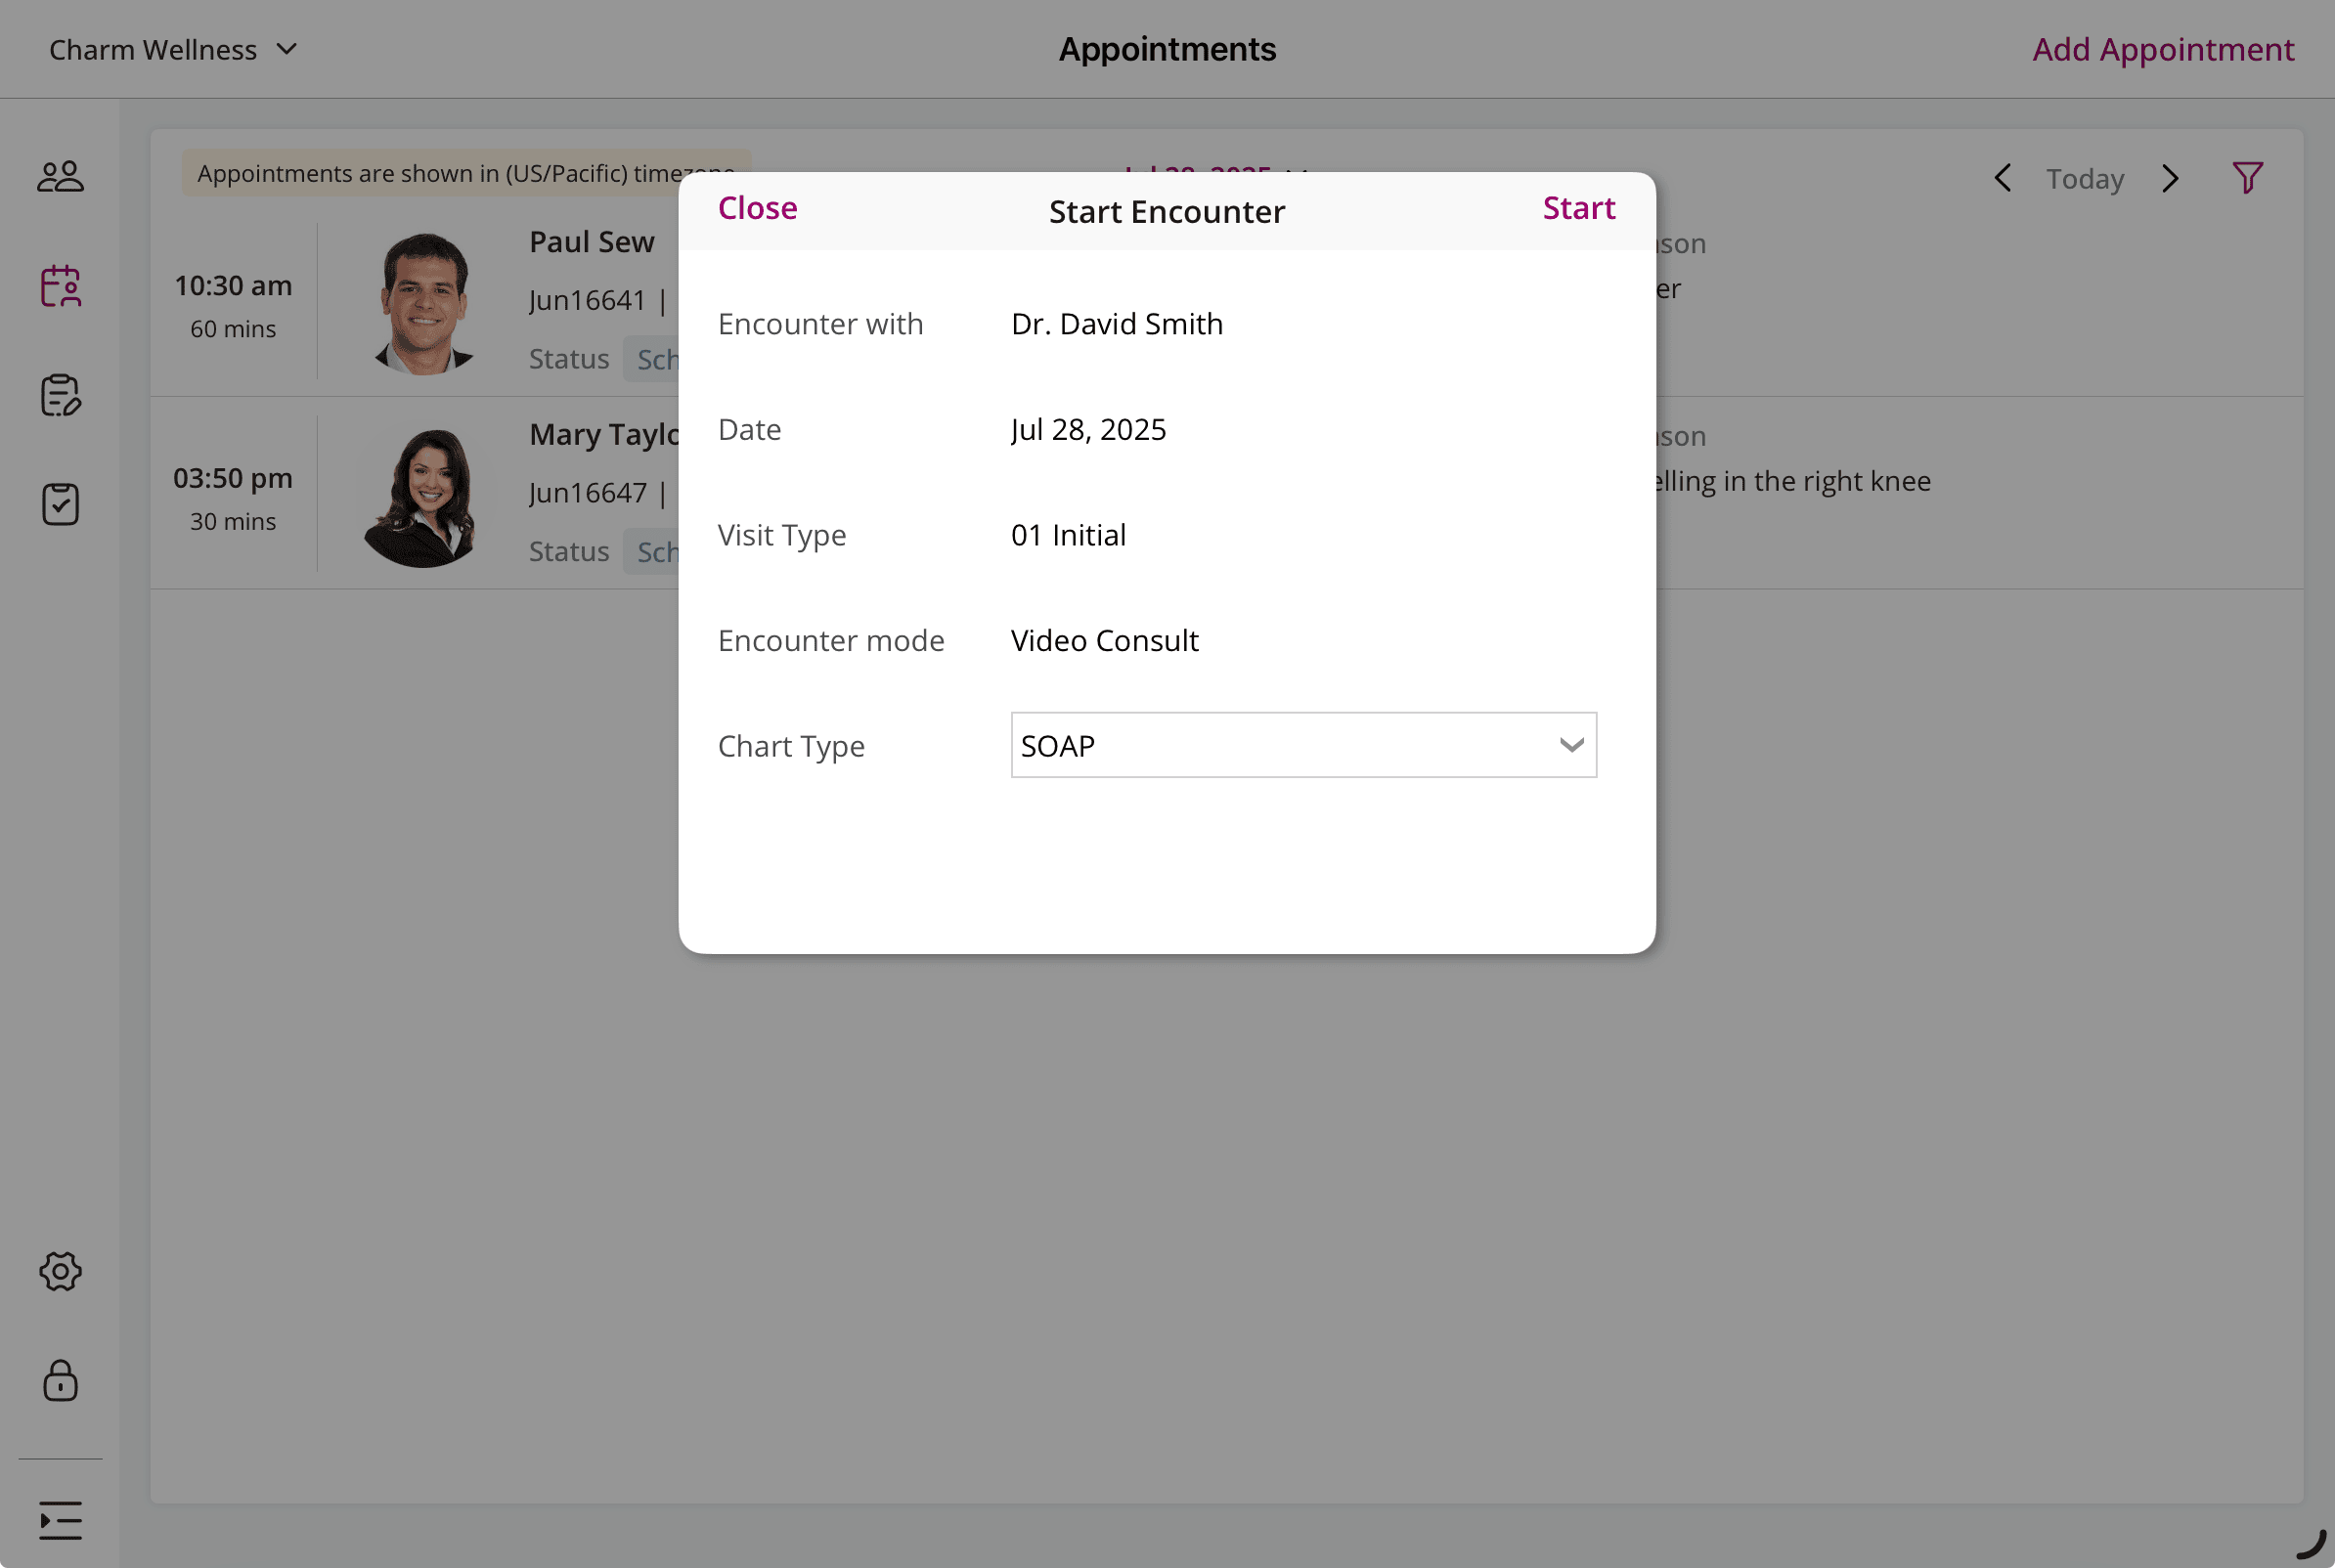
- Tap 'Start' to begin the Encounter.
- Choose a SOAP Template (offline or online) to pre-fill the SOAP notes.

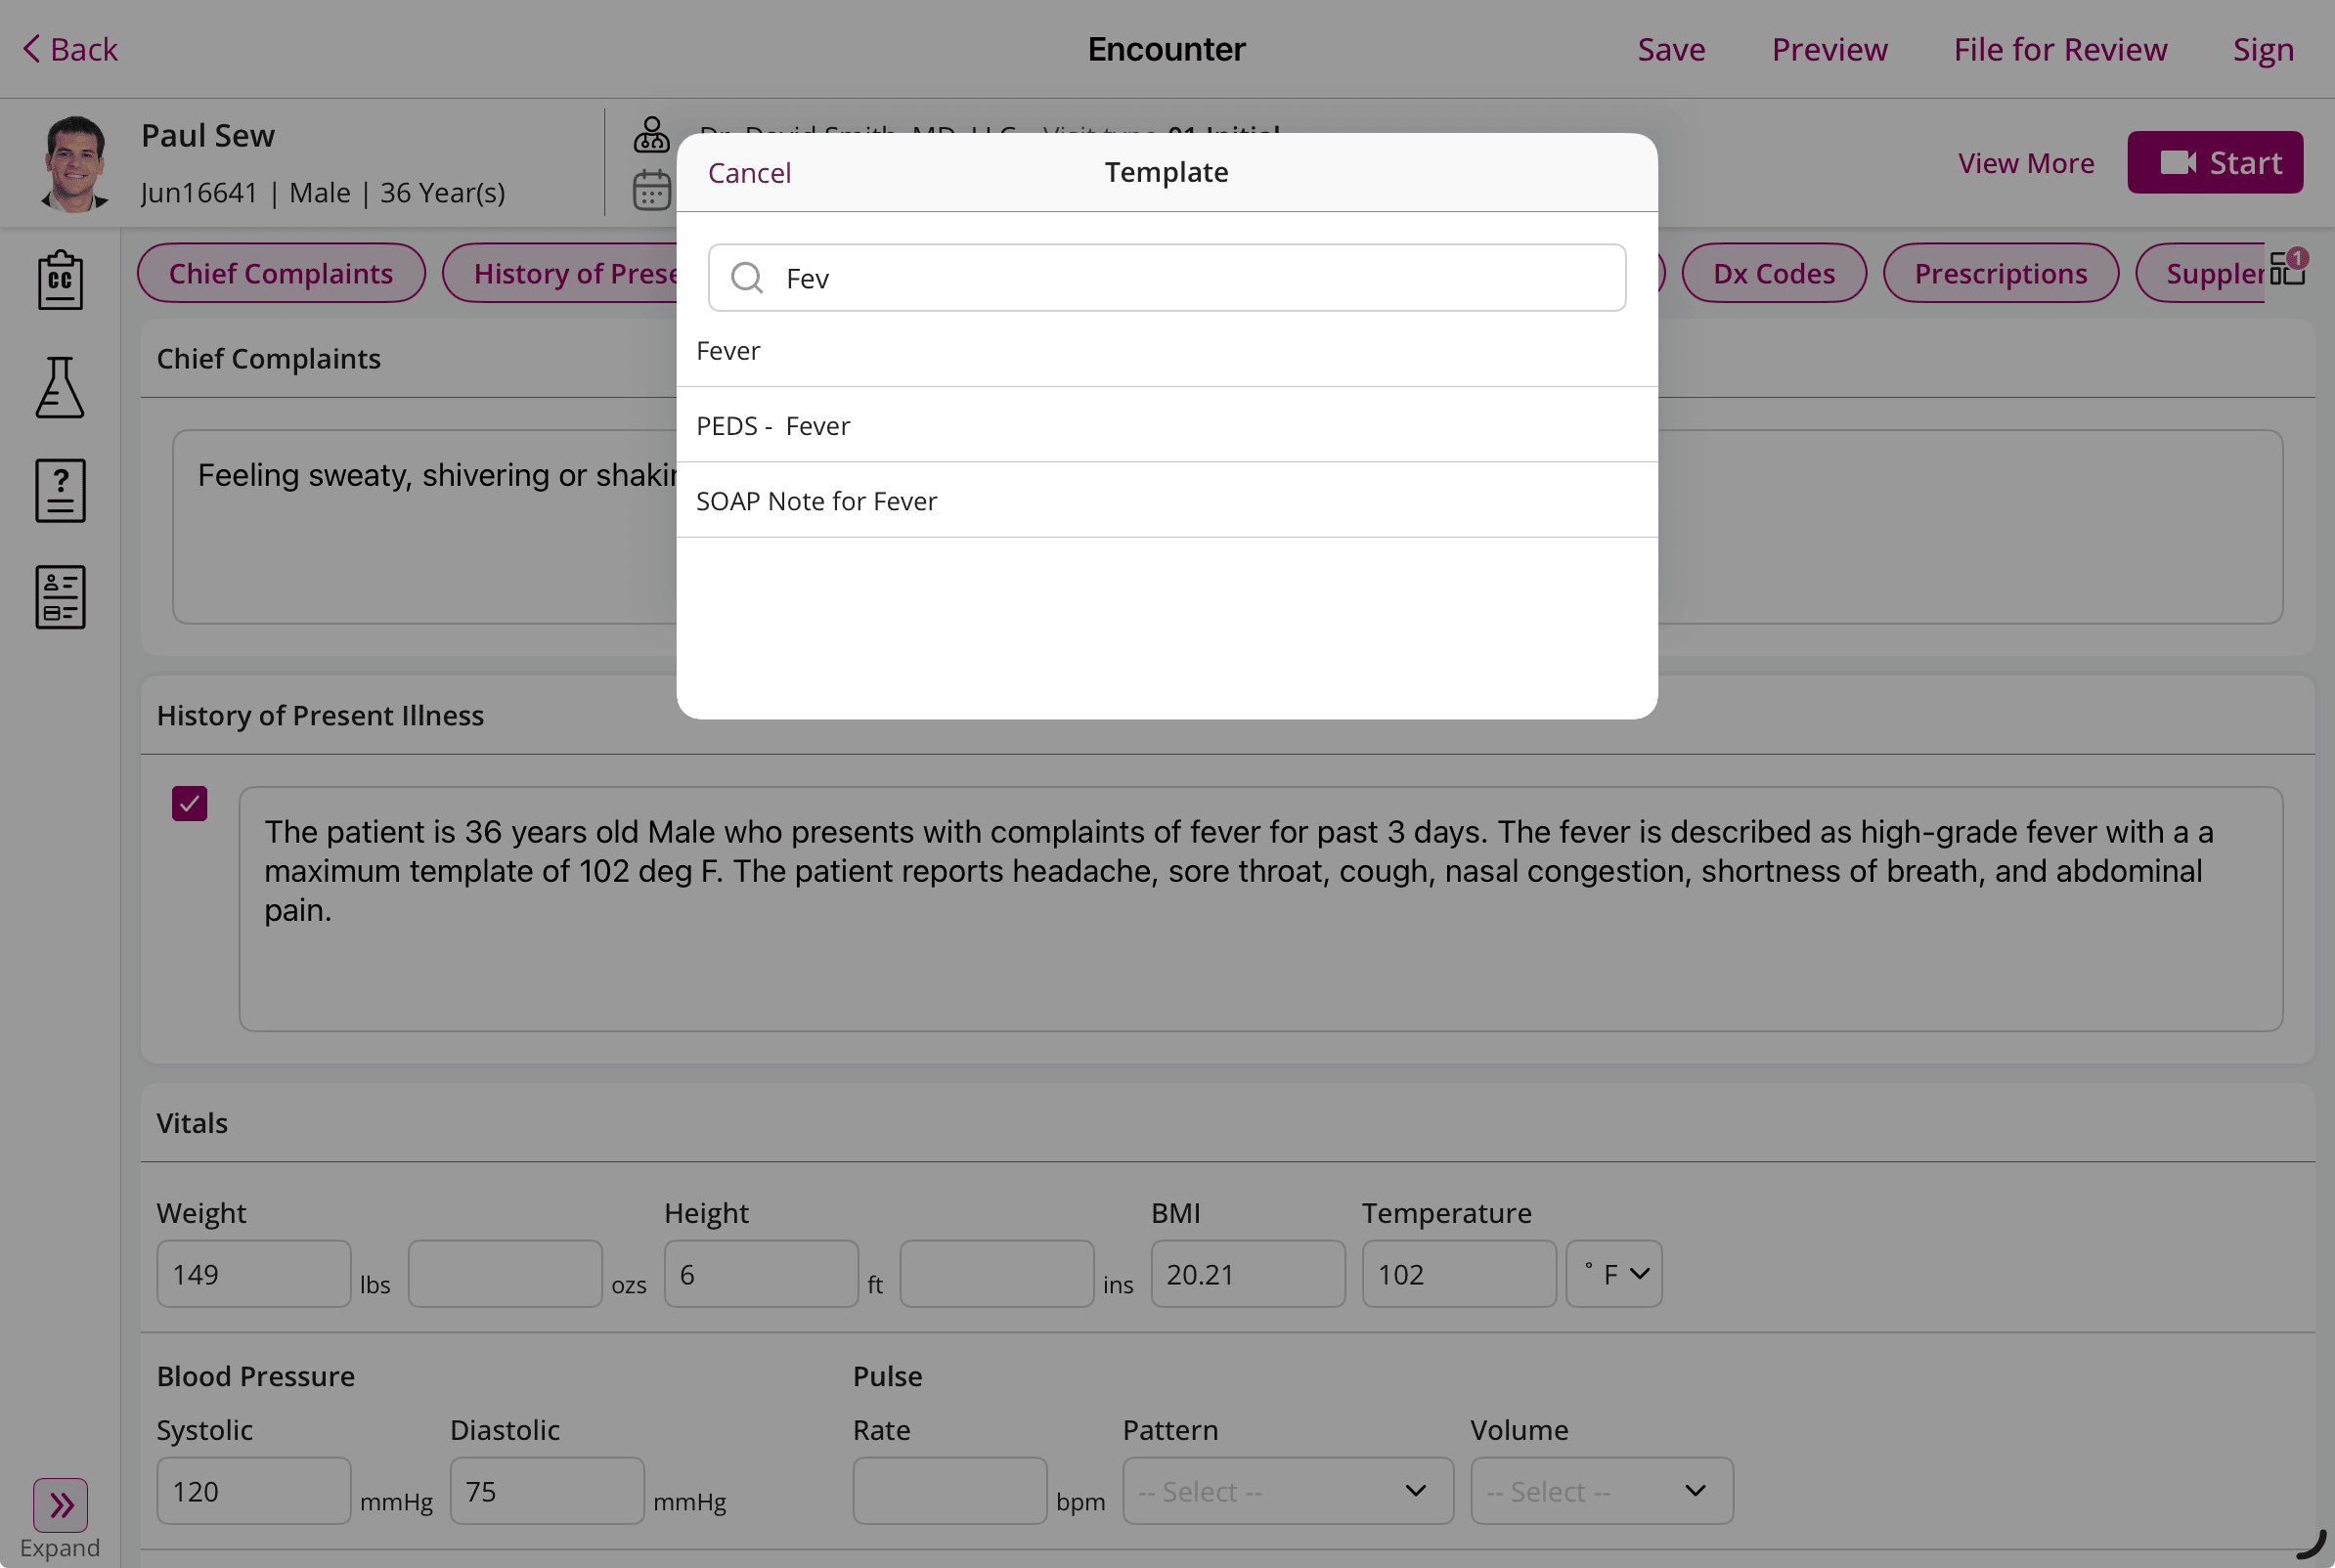
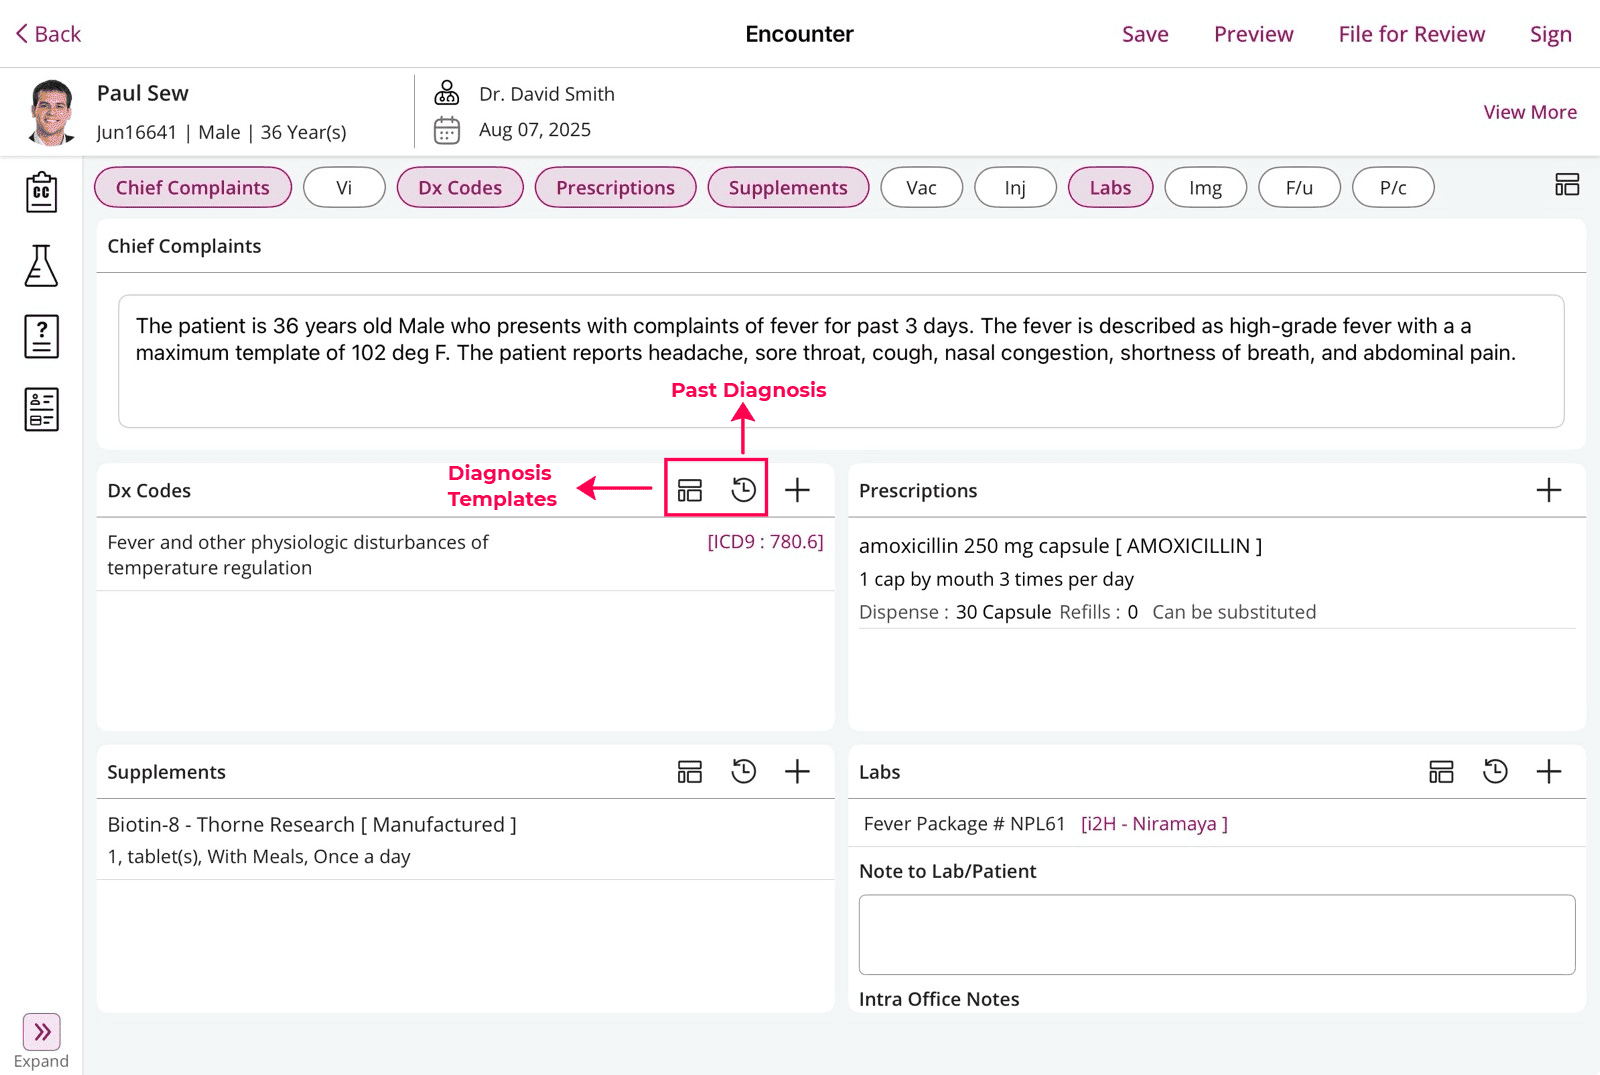
- Add clinical components by tapping the relevant sections:
- Chief Complaint (CC)
- Symptoms
- Diagnoses & Assessment Notes
- Procedure Codes
- Medications (Transmit if eRX is enabled)
- Supplements
- Vaccines & Injections
- Lab Orders

- You can add Templates for individual sections or repeat notes from the Past section.
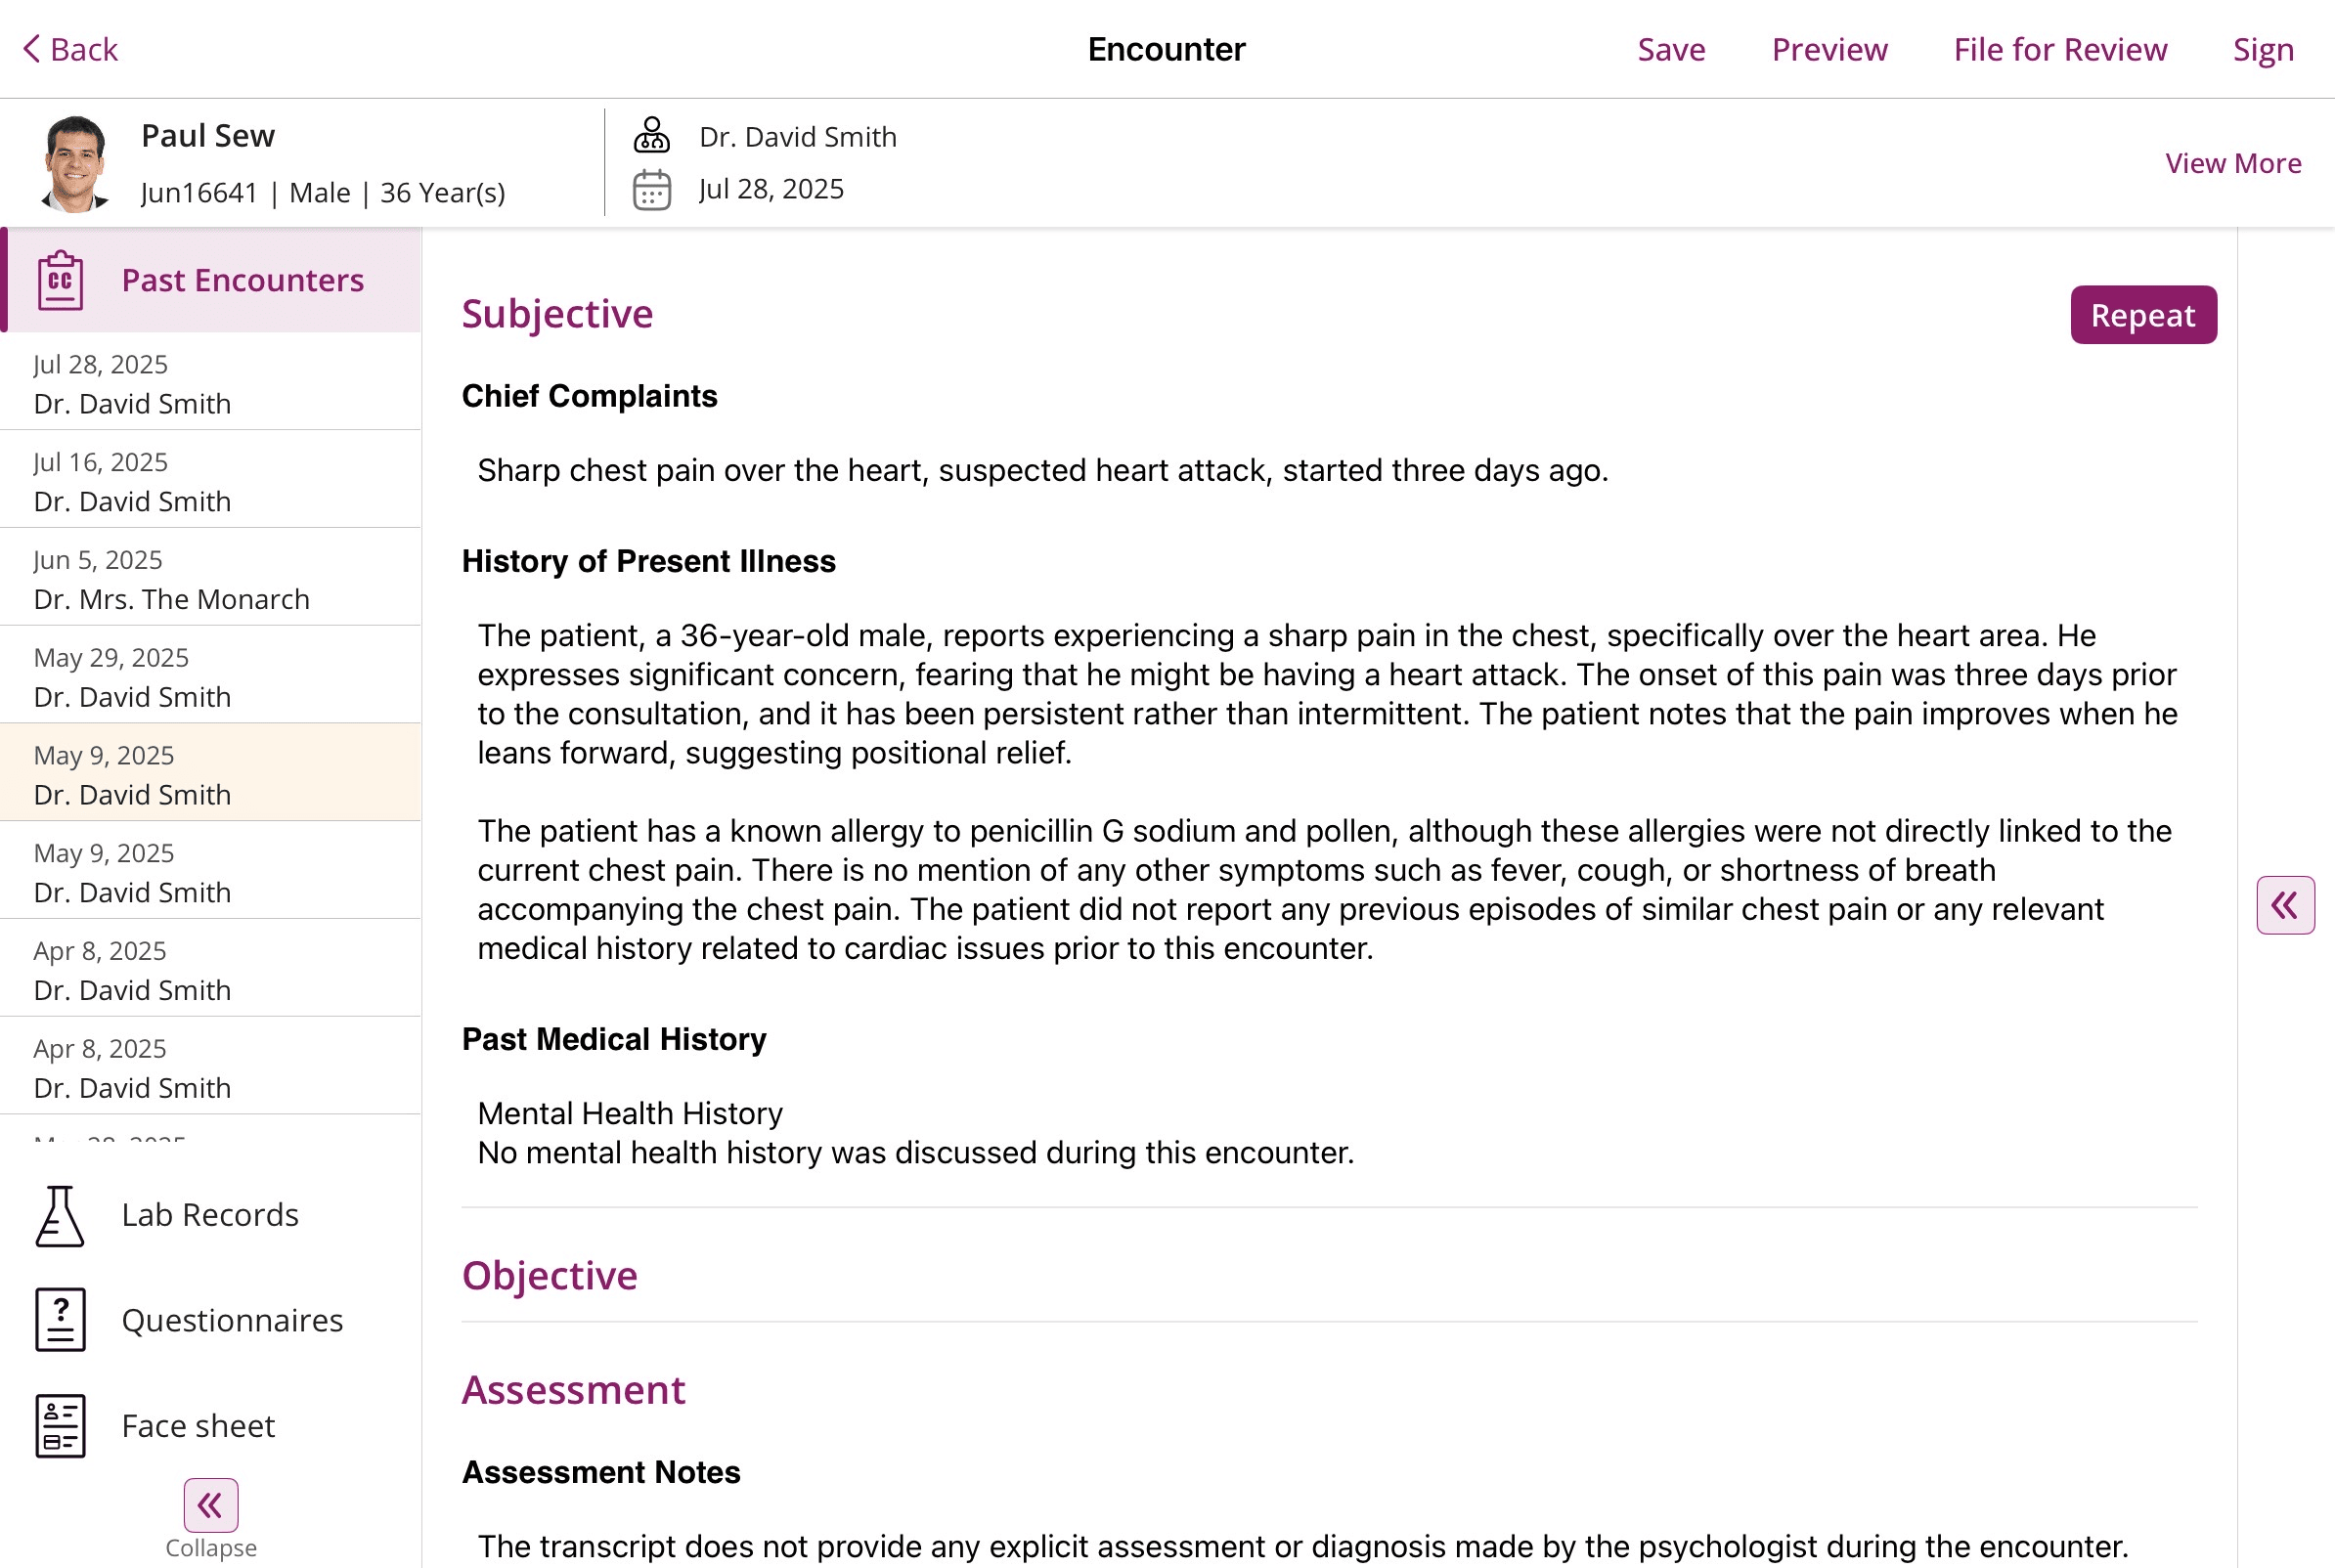
- Expand the left pane to view the Past Encounters, Lab Records, Questionnaires, and Face Sheet of the Patient.
- You can also Preview the Encounter Summary and file the Encounter for Review.


- Tap 'Sign' to sign the Encounter.
Repeat Encounter
You can repeat a Past Encounter for the same Chart Note Type by following the steps below.
- Tap on the 'Past Encounter' section.
- Select the Encounter you need to repeat for the Patient.
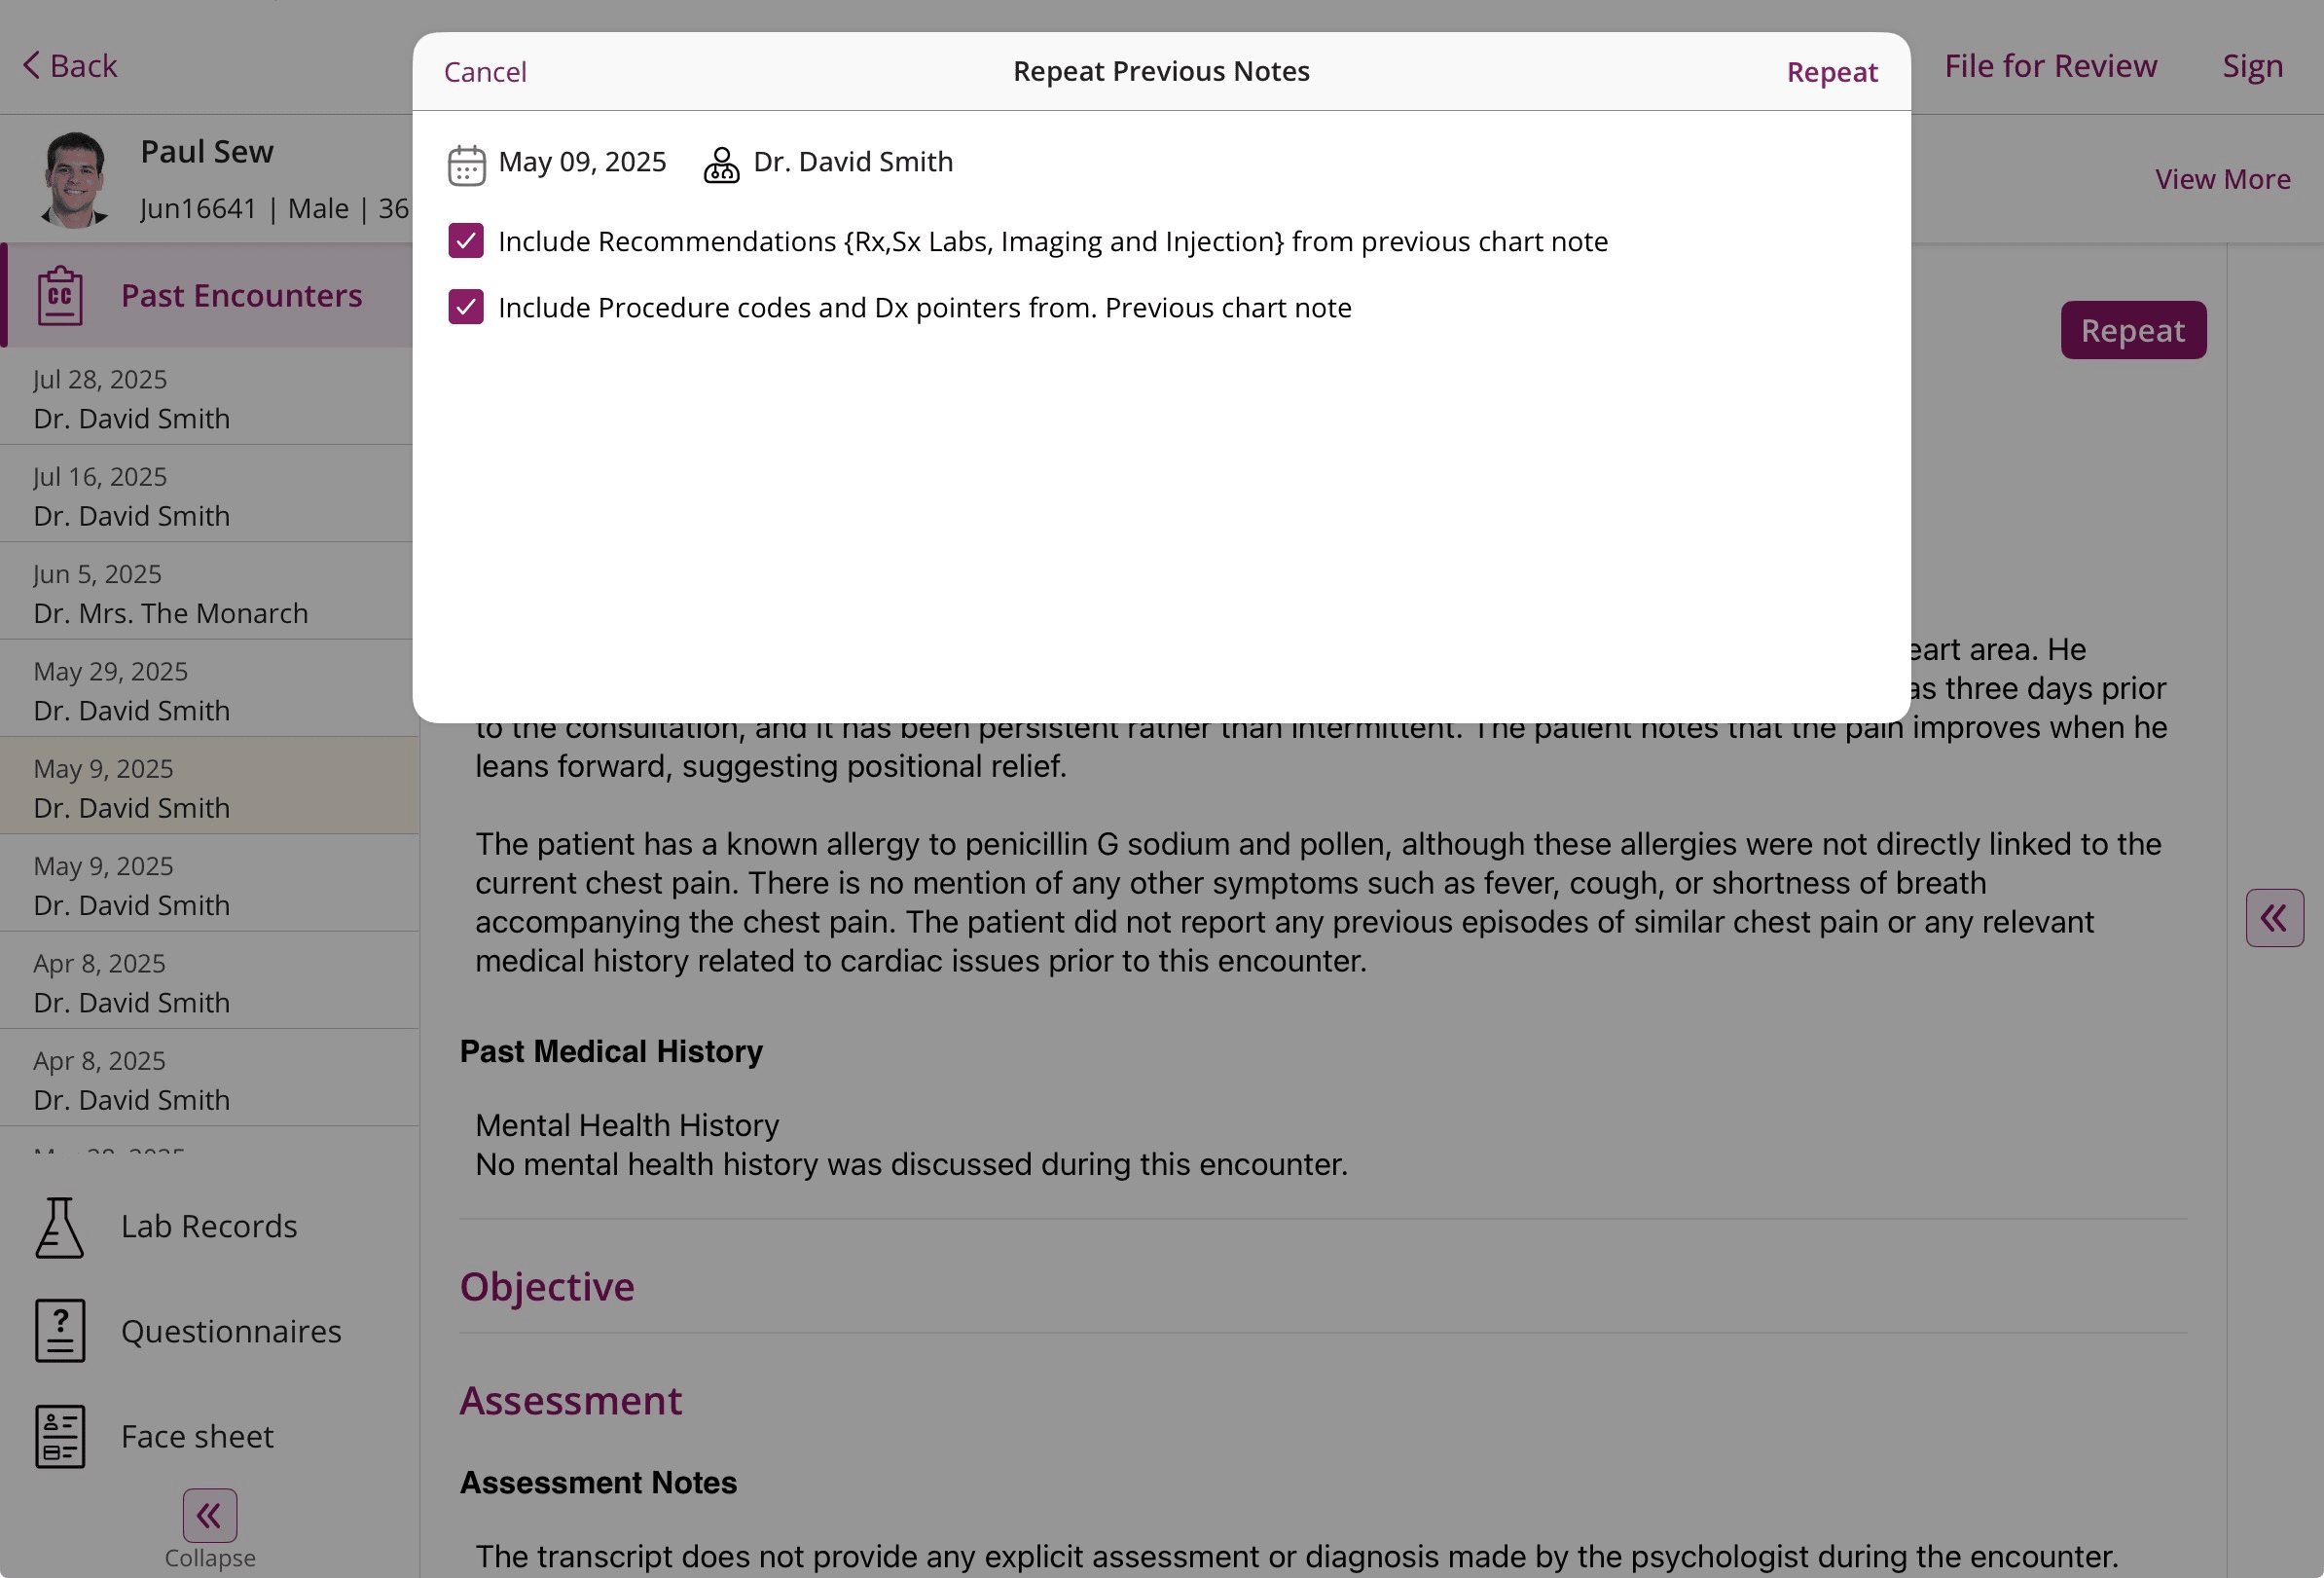
- Tap 'Repeat' to copy the Encounter notes.
- You can also include recommendations for Medications, Supplements, Labs, Imaging, Injection, Procedure Codes, and Dx pointers from previous Chart Notes.
5. TeleHealth Sessions
Tap the Video icon within the Encounter to start a TeleHealth session with the Patient.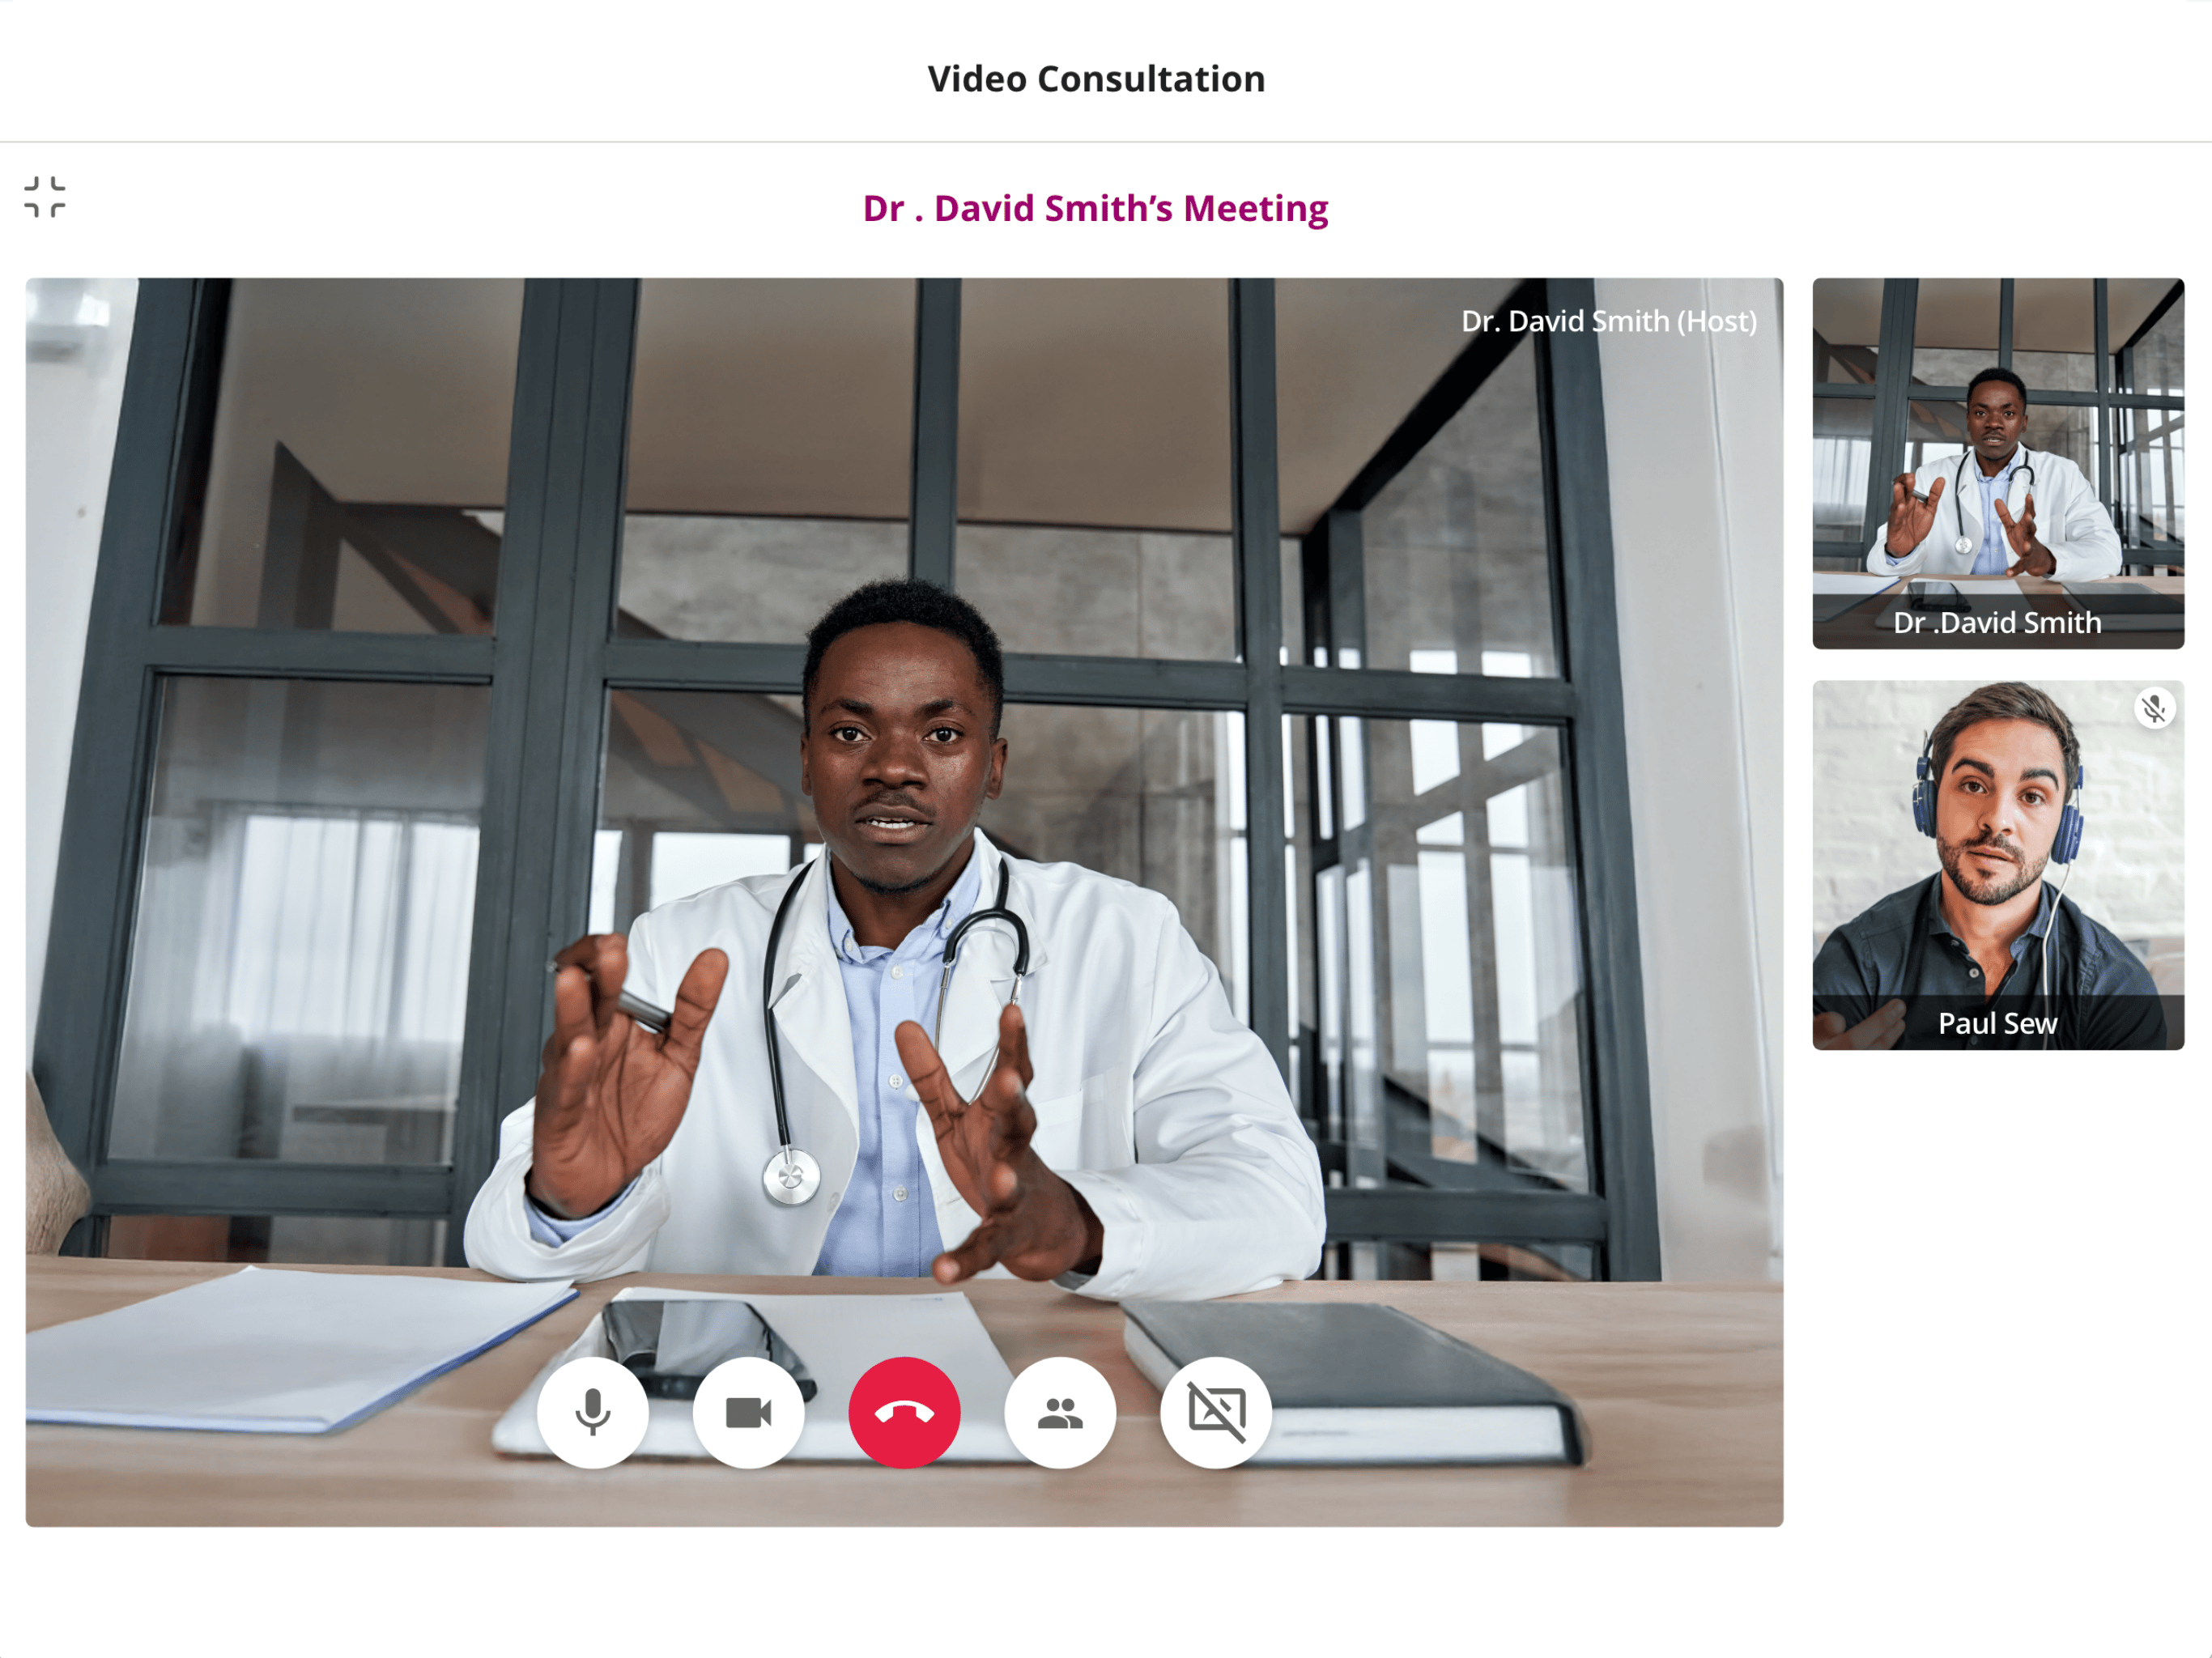
6. Review Charts
Providers can review the Unsigned, Signed, and Offline Charts under the 'Review Charts' section.
You can review and edit the Unsigned Encounters and Sign them as needed.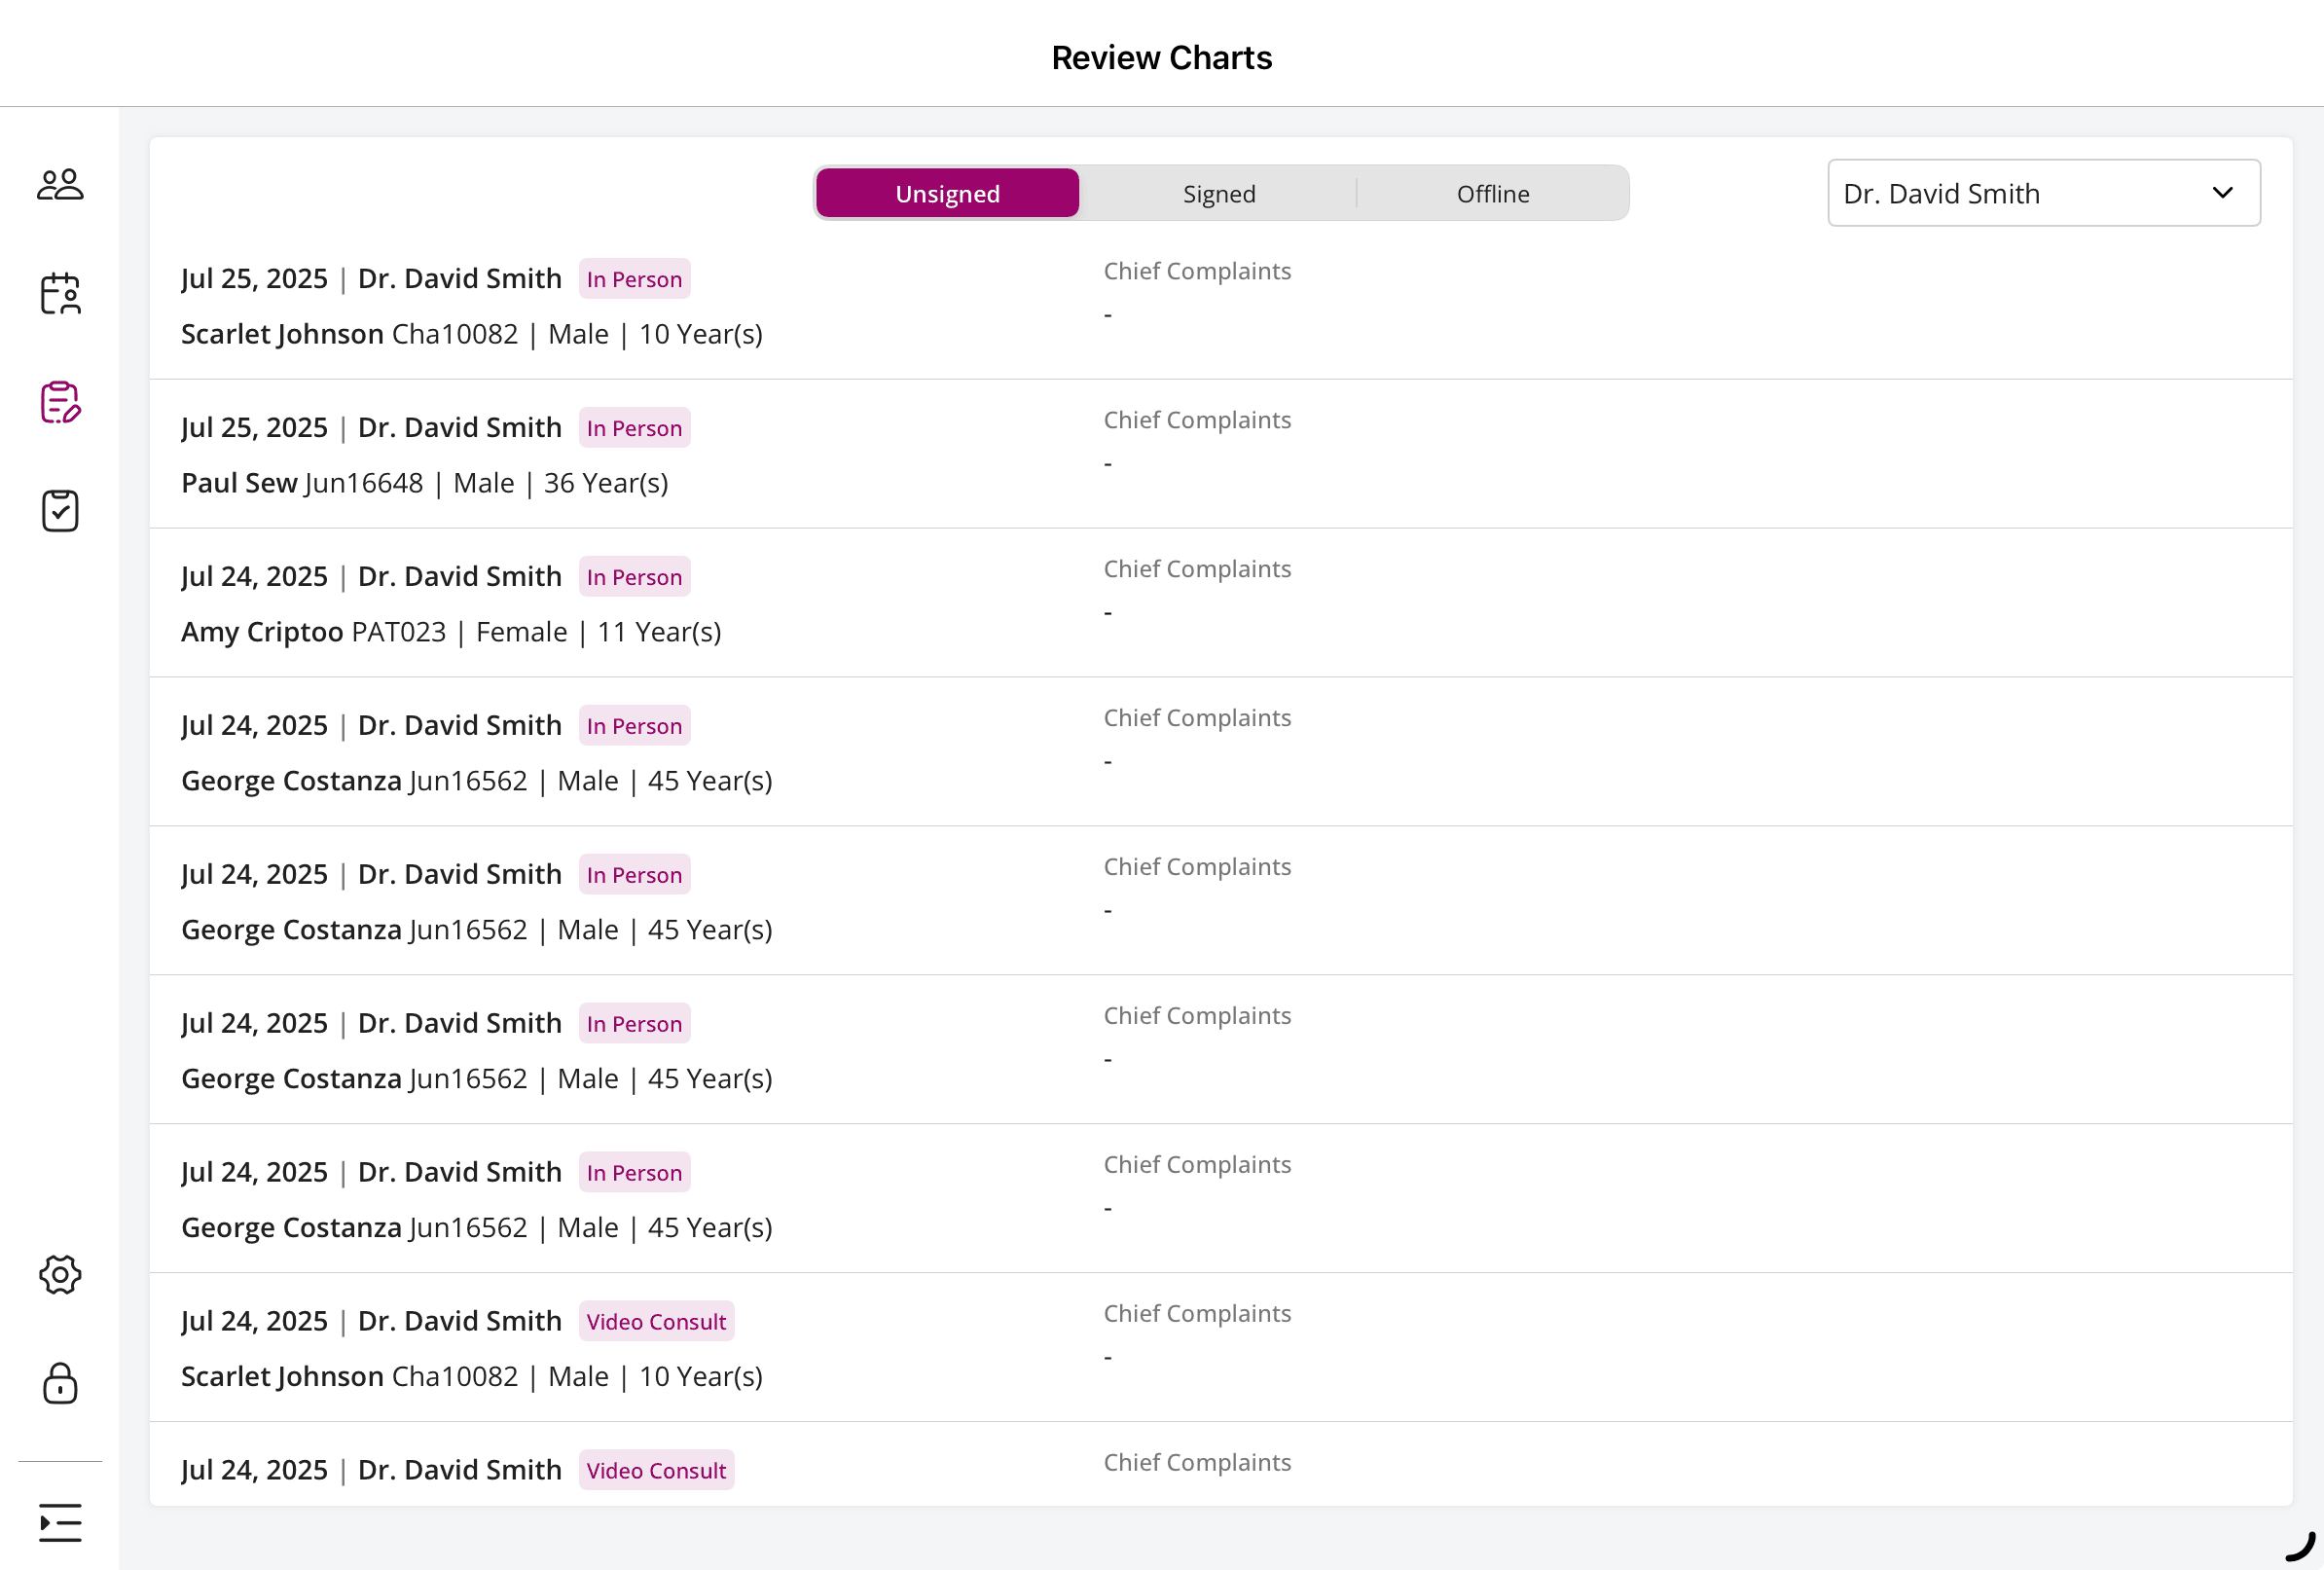
7. Work in Offline Mode
The Charm Chart Note App allows Providers to work offline and synchronize seamlessly when reconnected to the network.
a. Offline Encounter
If the network is unstable, Providers can start an Encounter by entering the Patient Record ID or basic demographic details.
Tap the 'Start Encounter' option to document the Encounter notes in offline mode.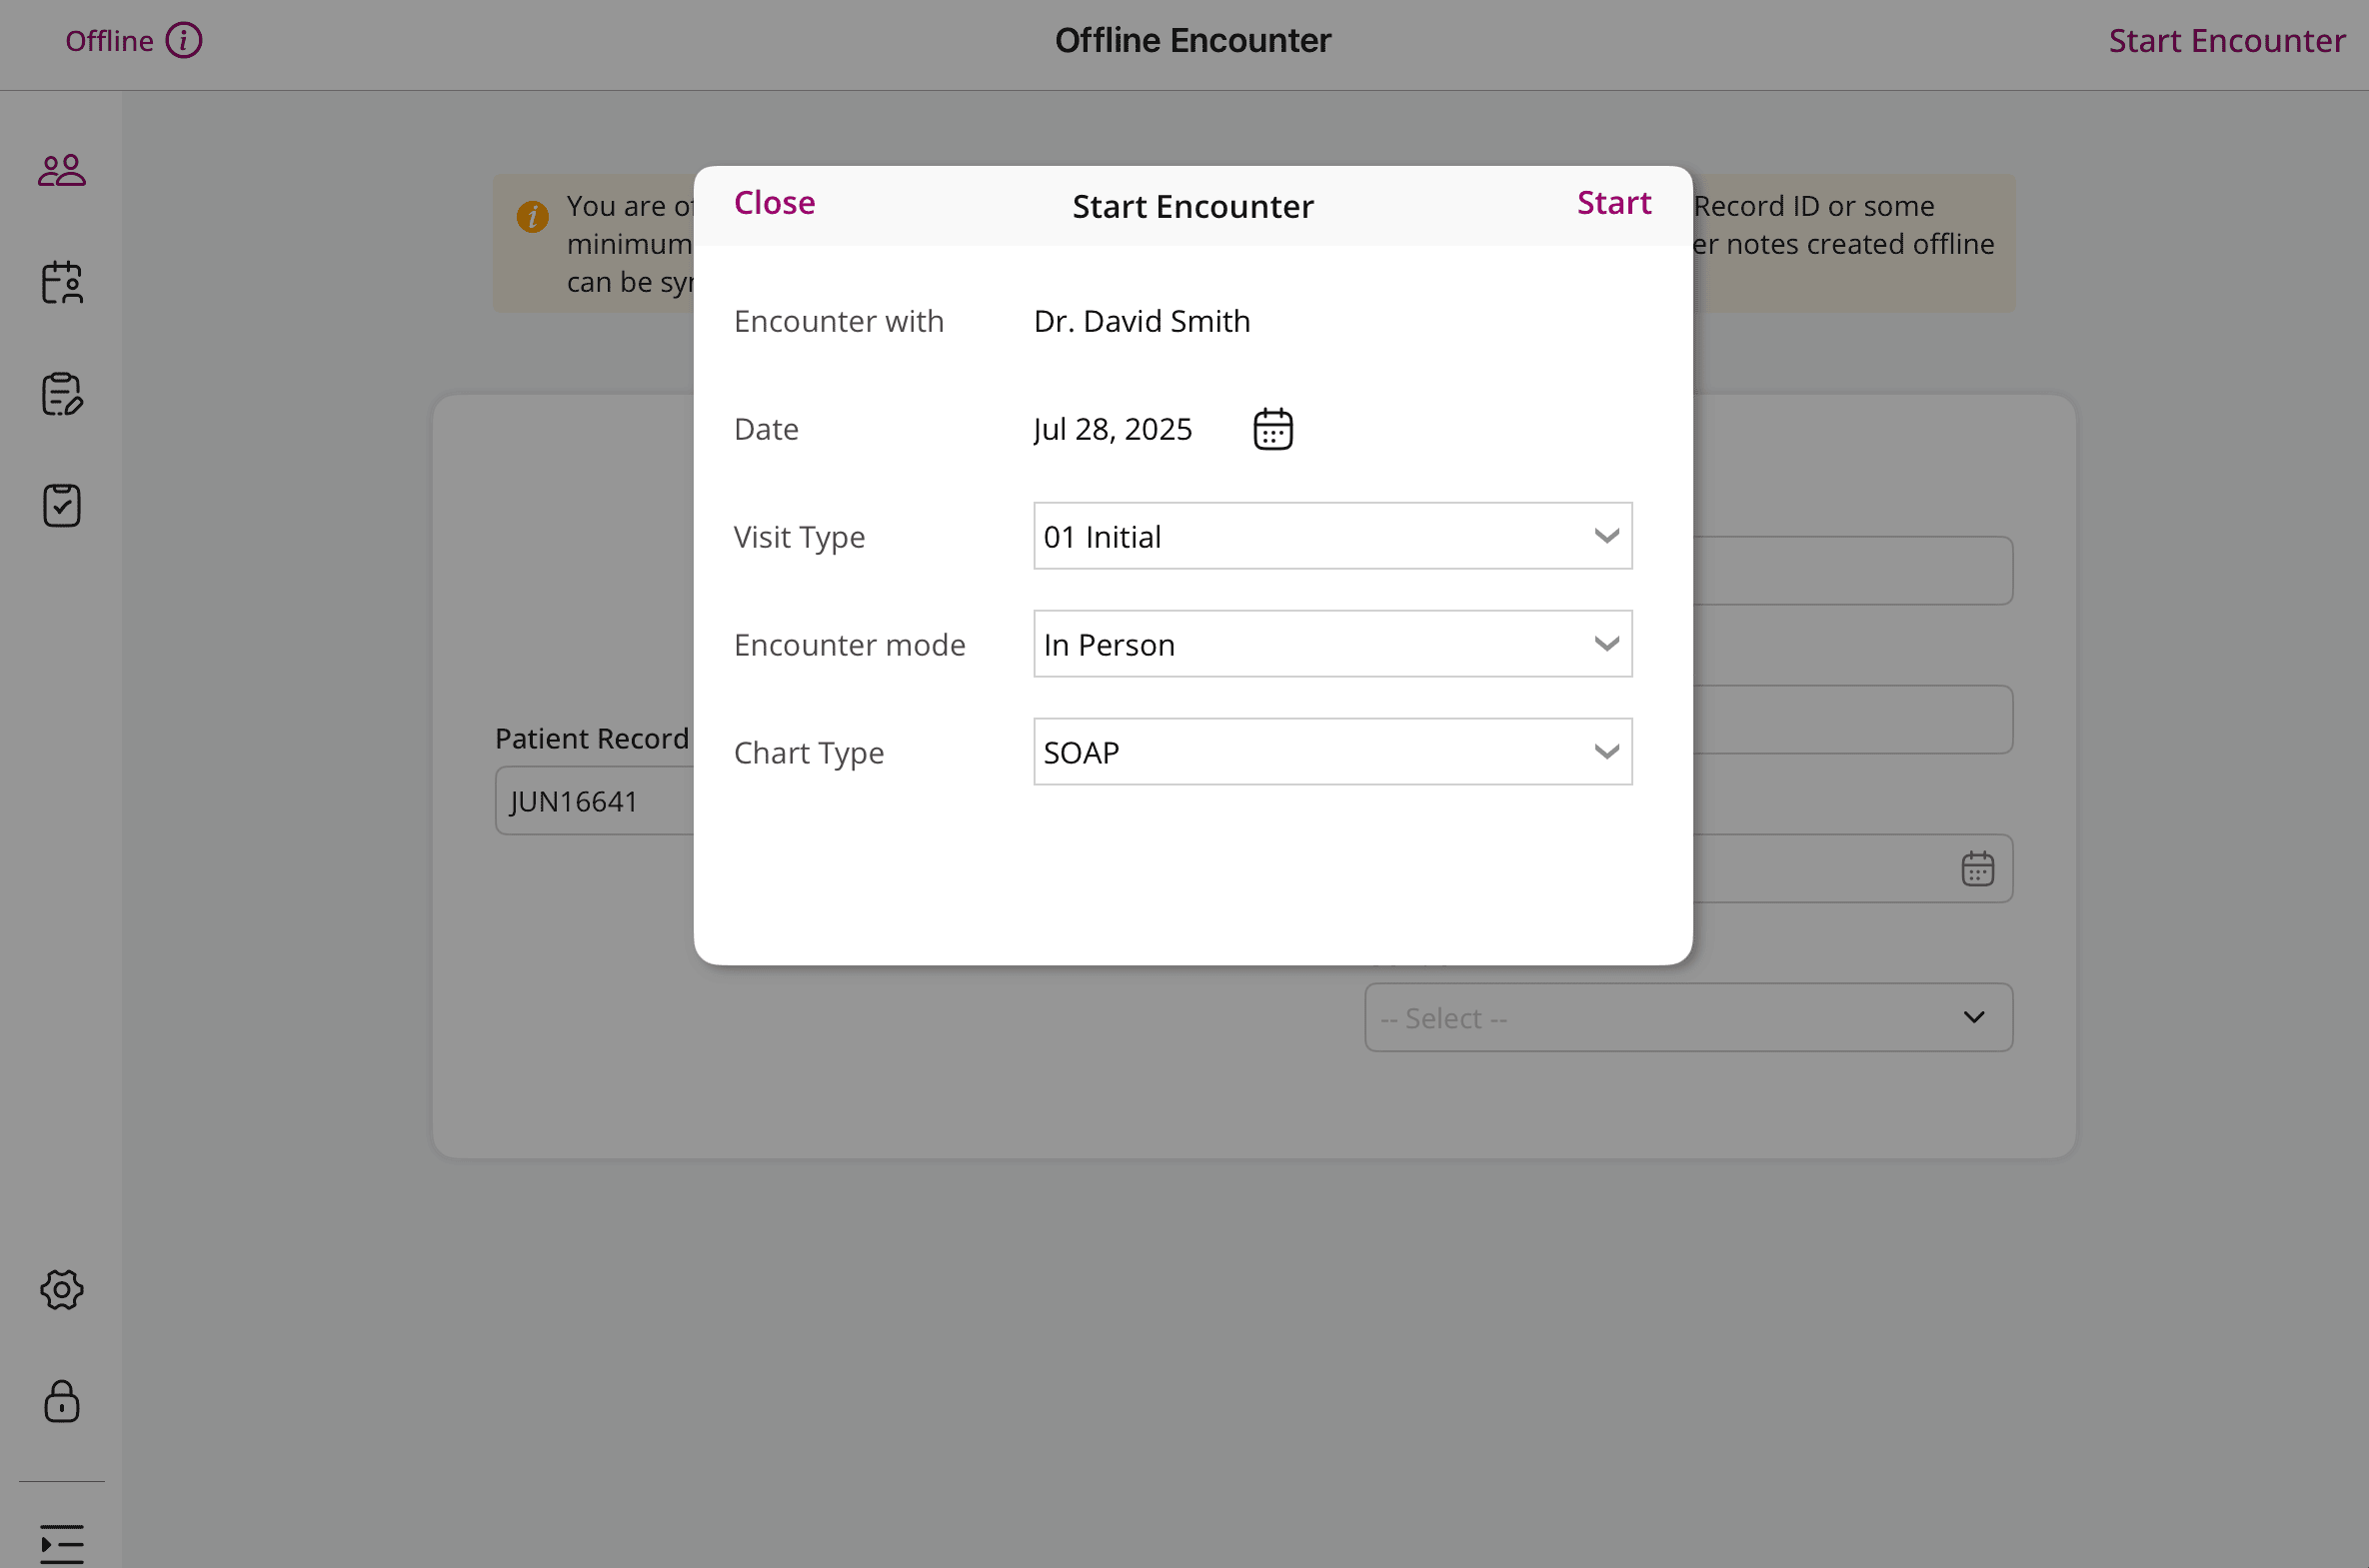
During the Encounter, Providers can choose the Offline Templates for each section and add them to the Chart note.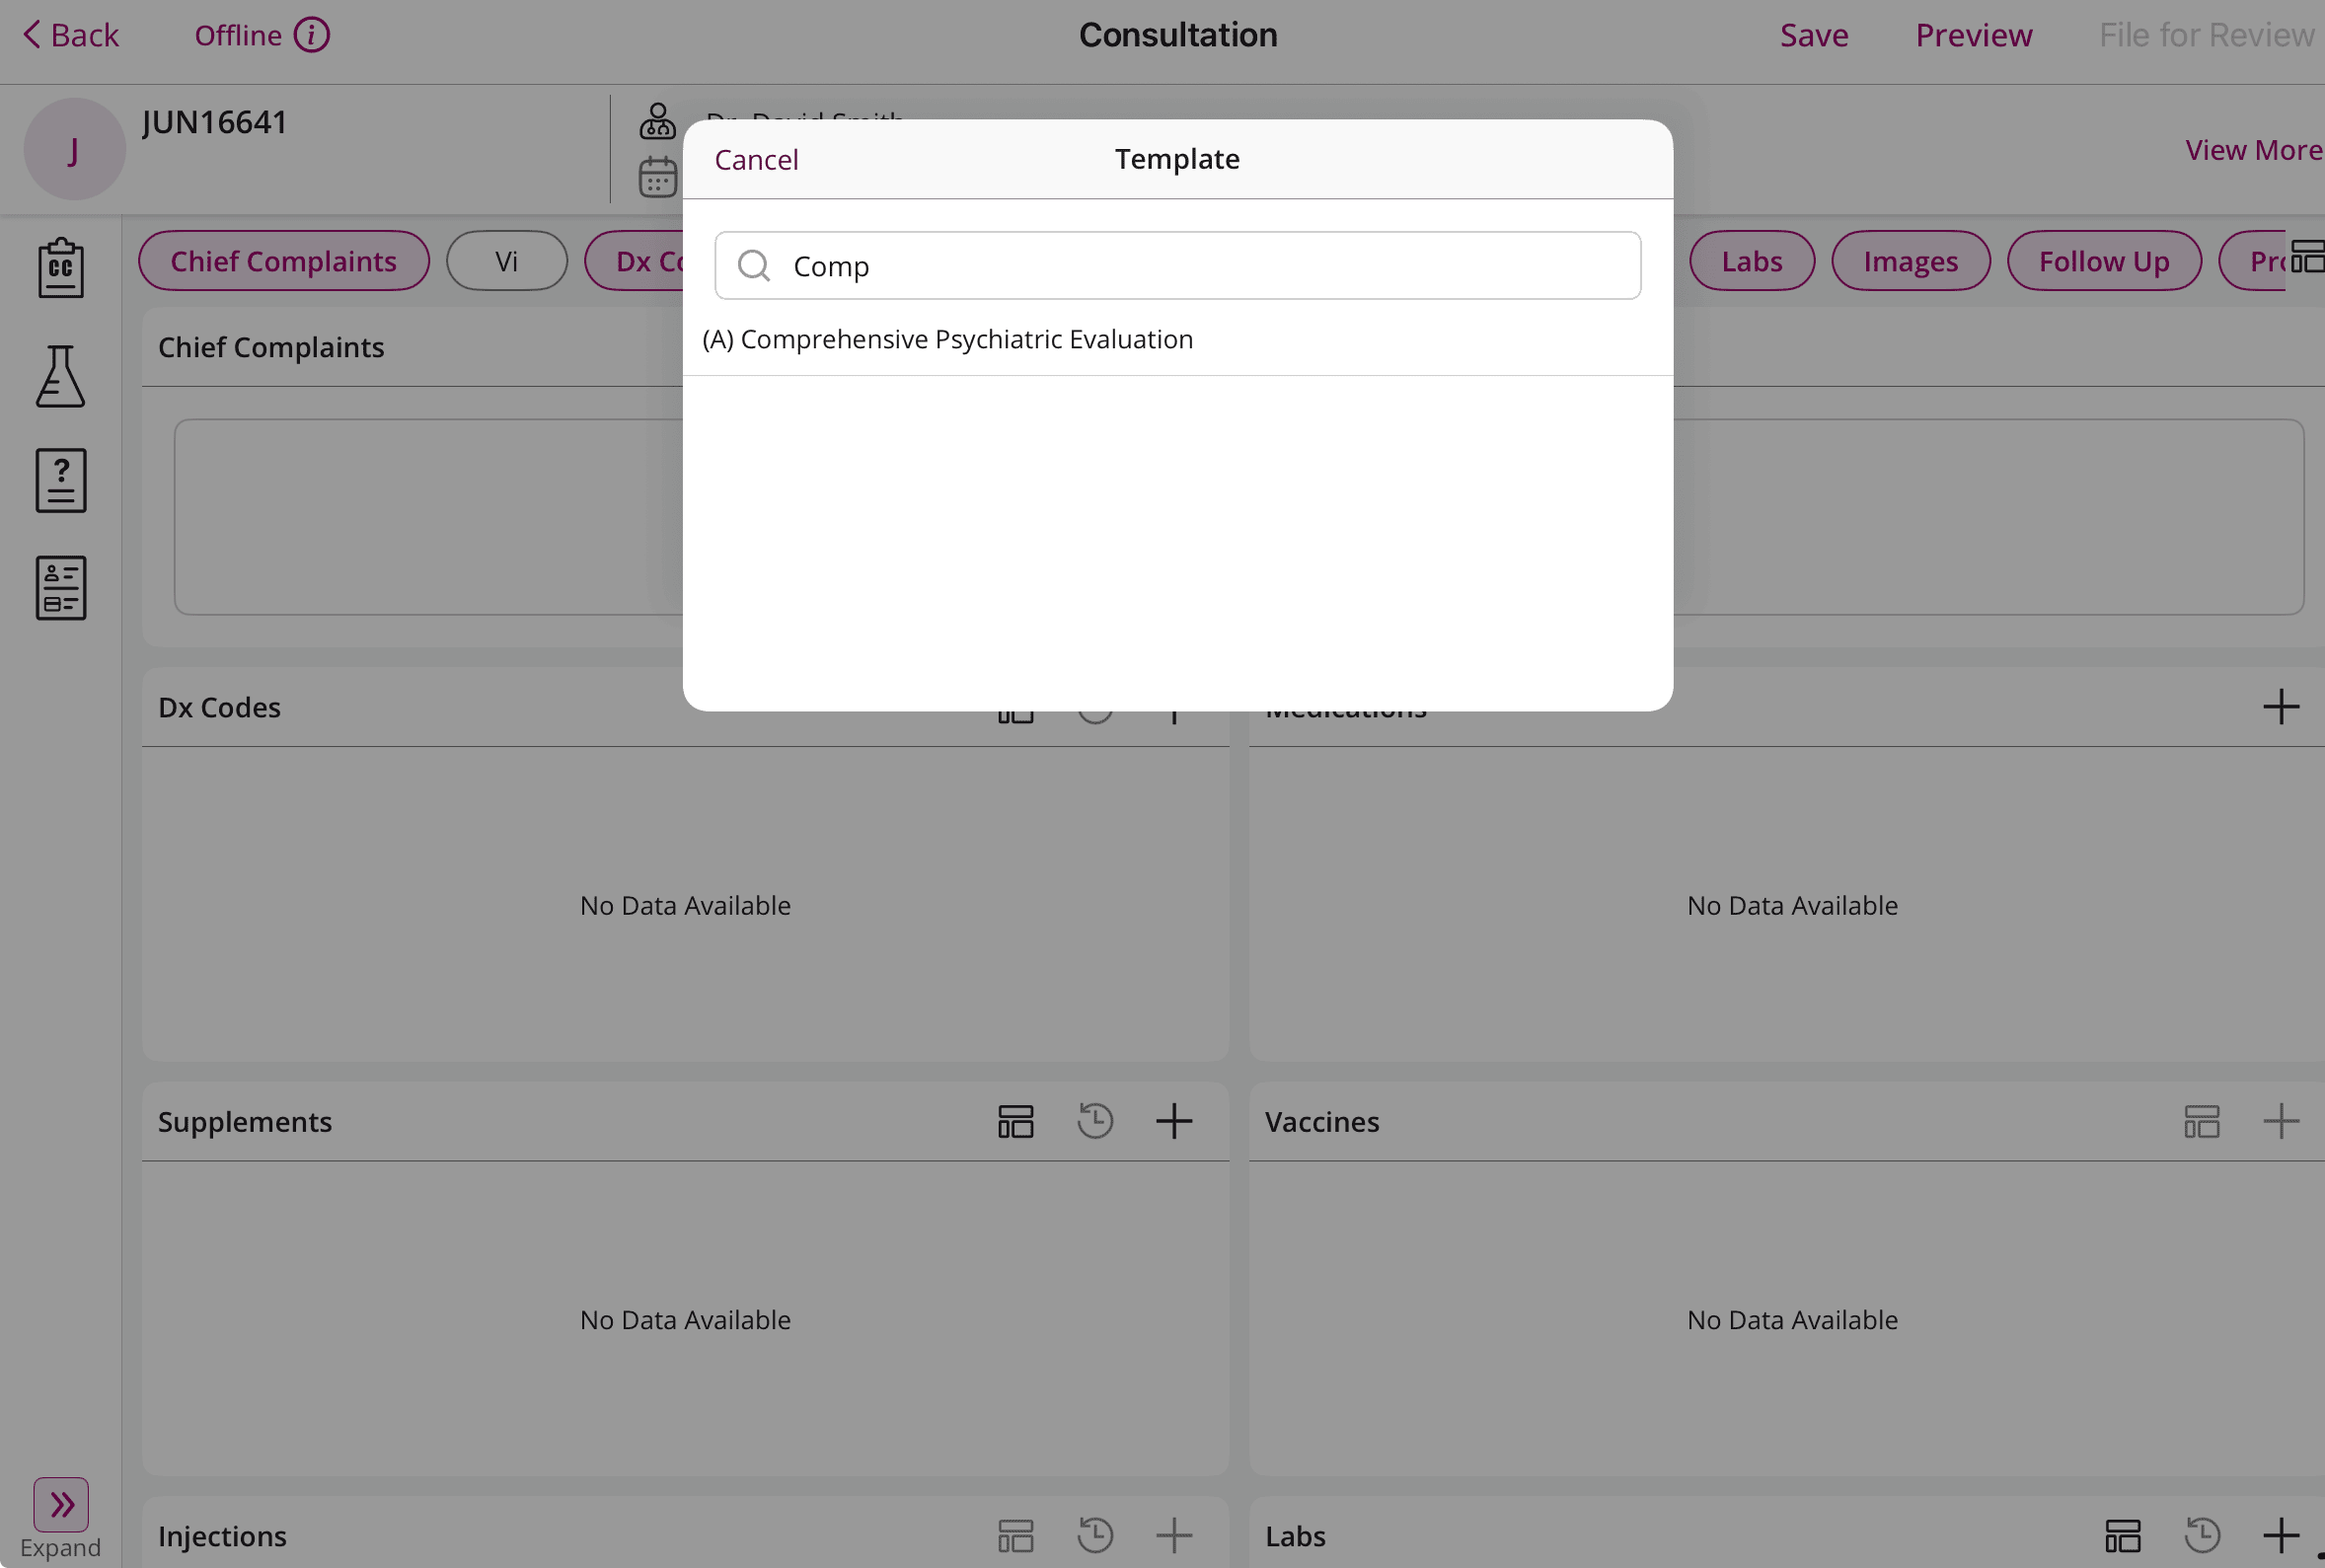
Once done, tap 'Save' to save the Encounter locally.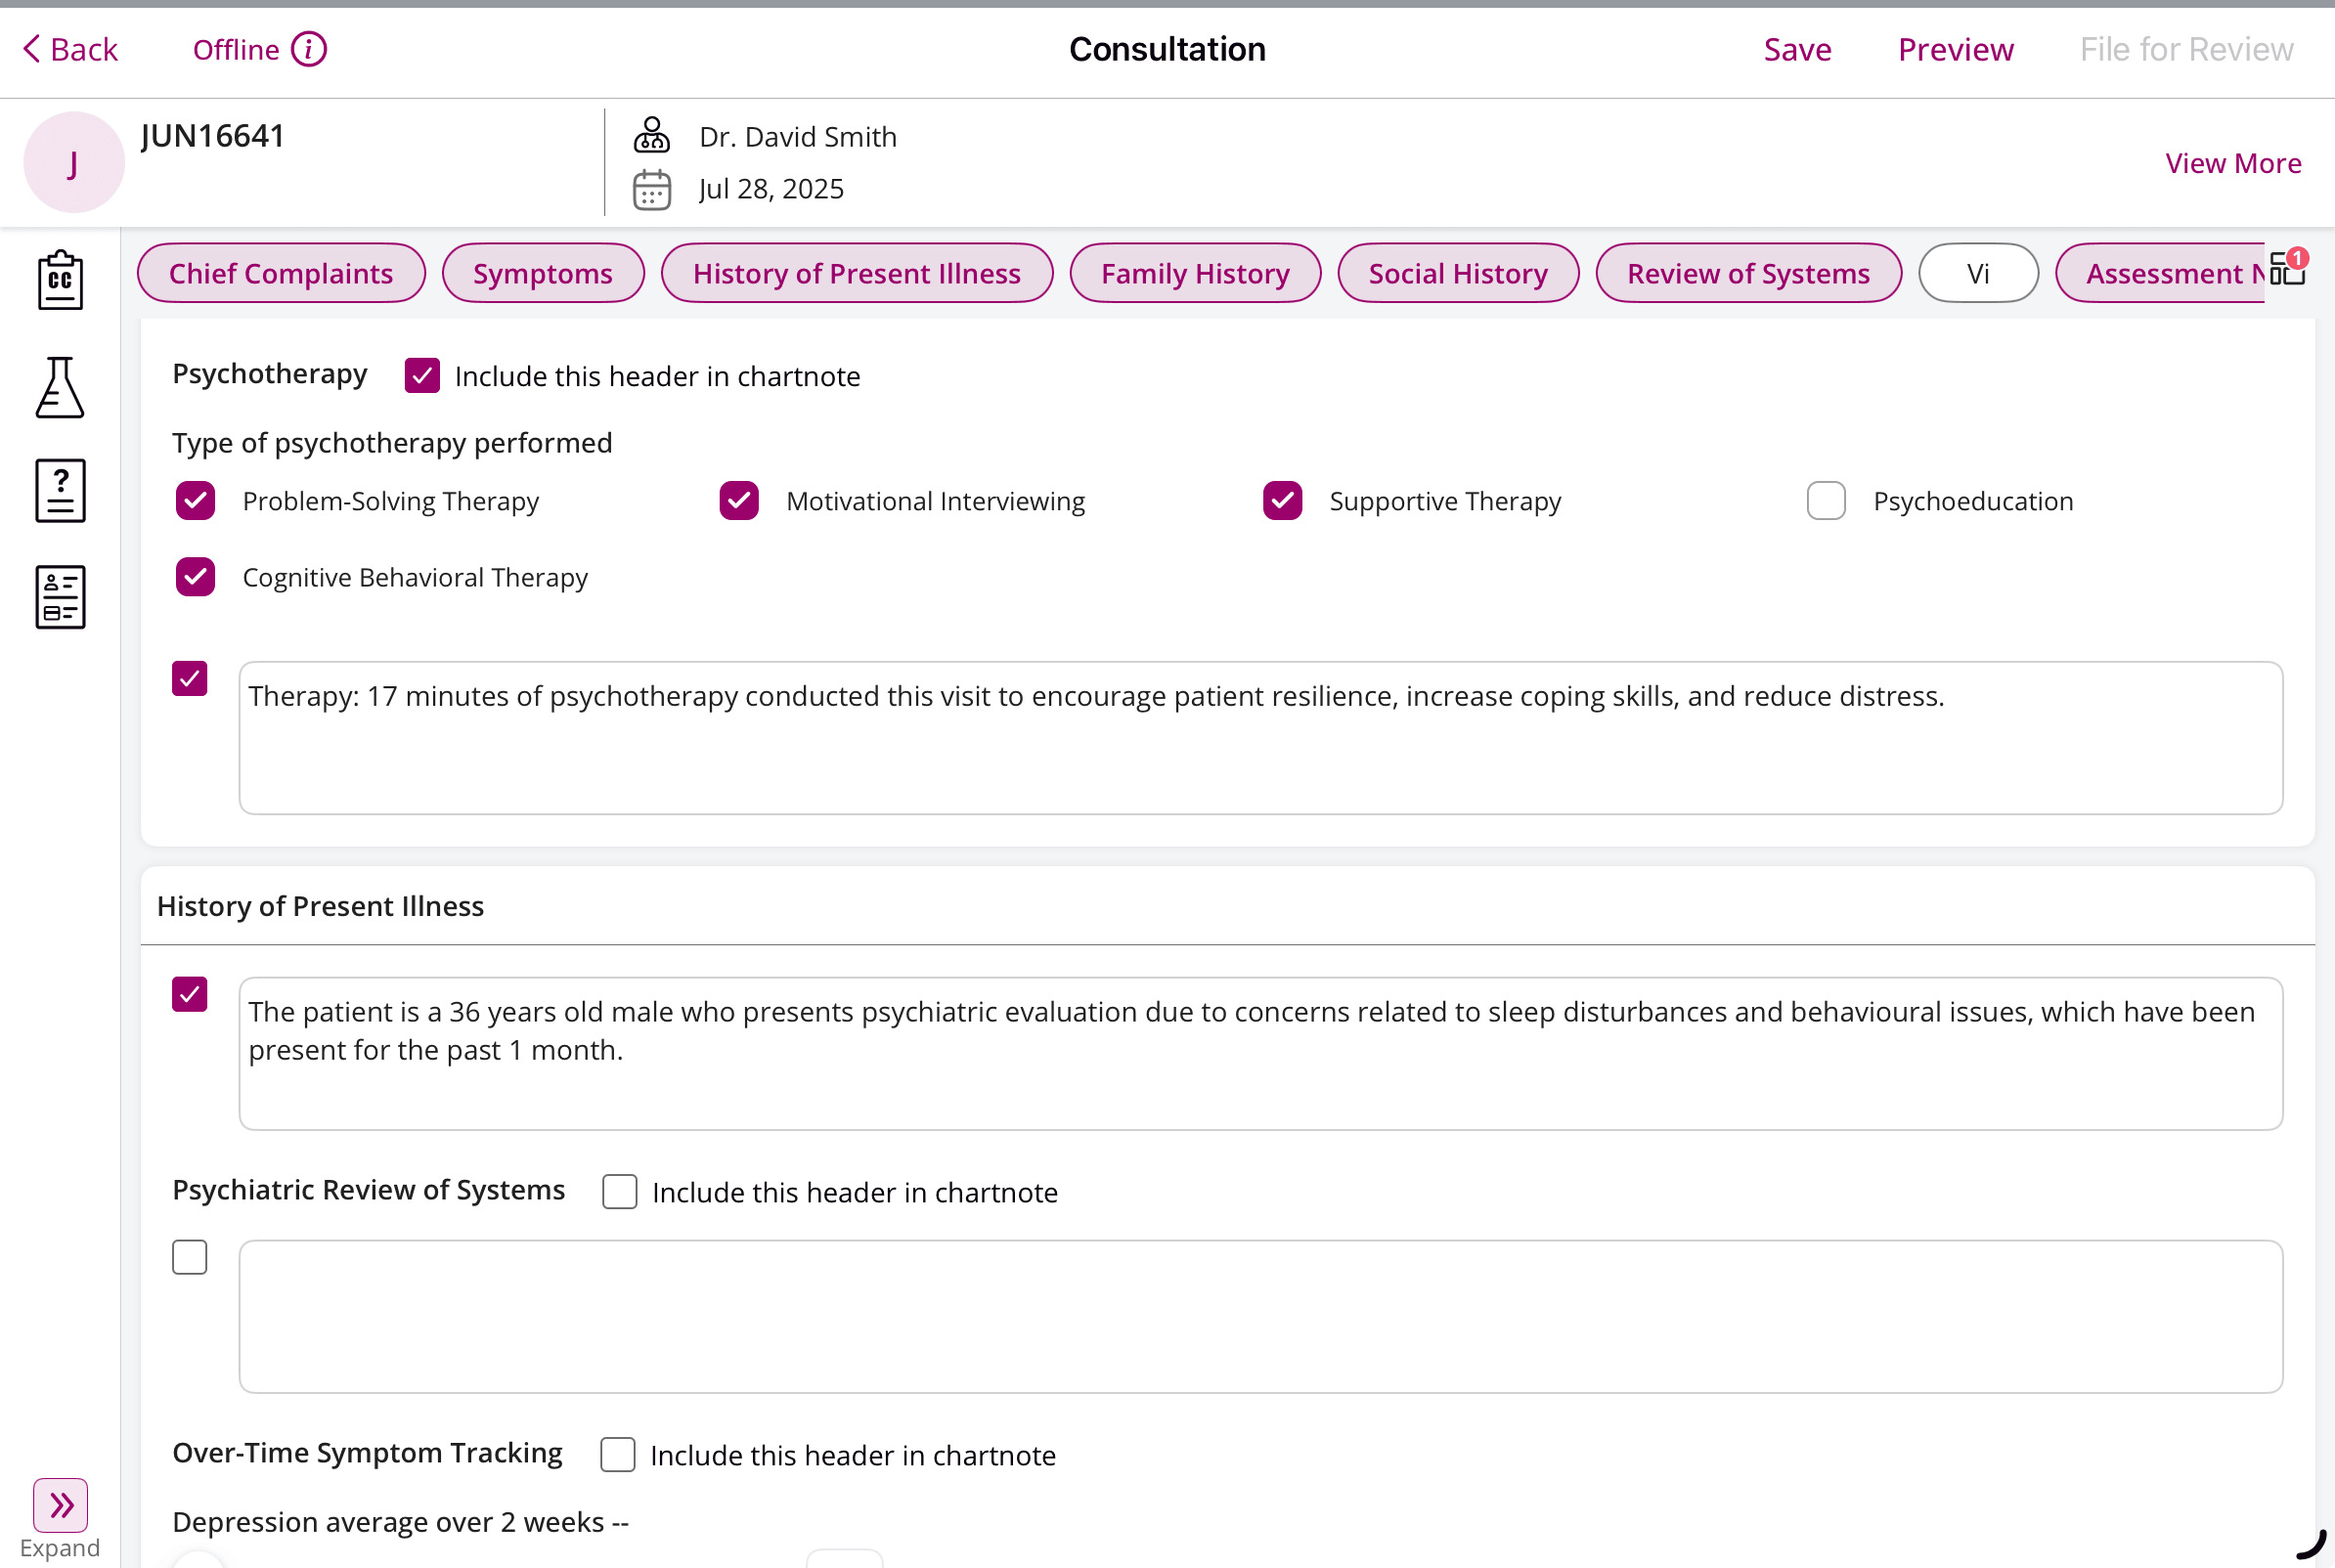
b. Review Offline Encounter and Sync When Online
The Offline Encounters will be available under the 'Review Charts > Offline Charts' section.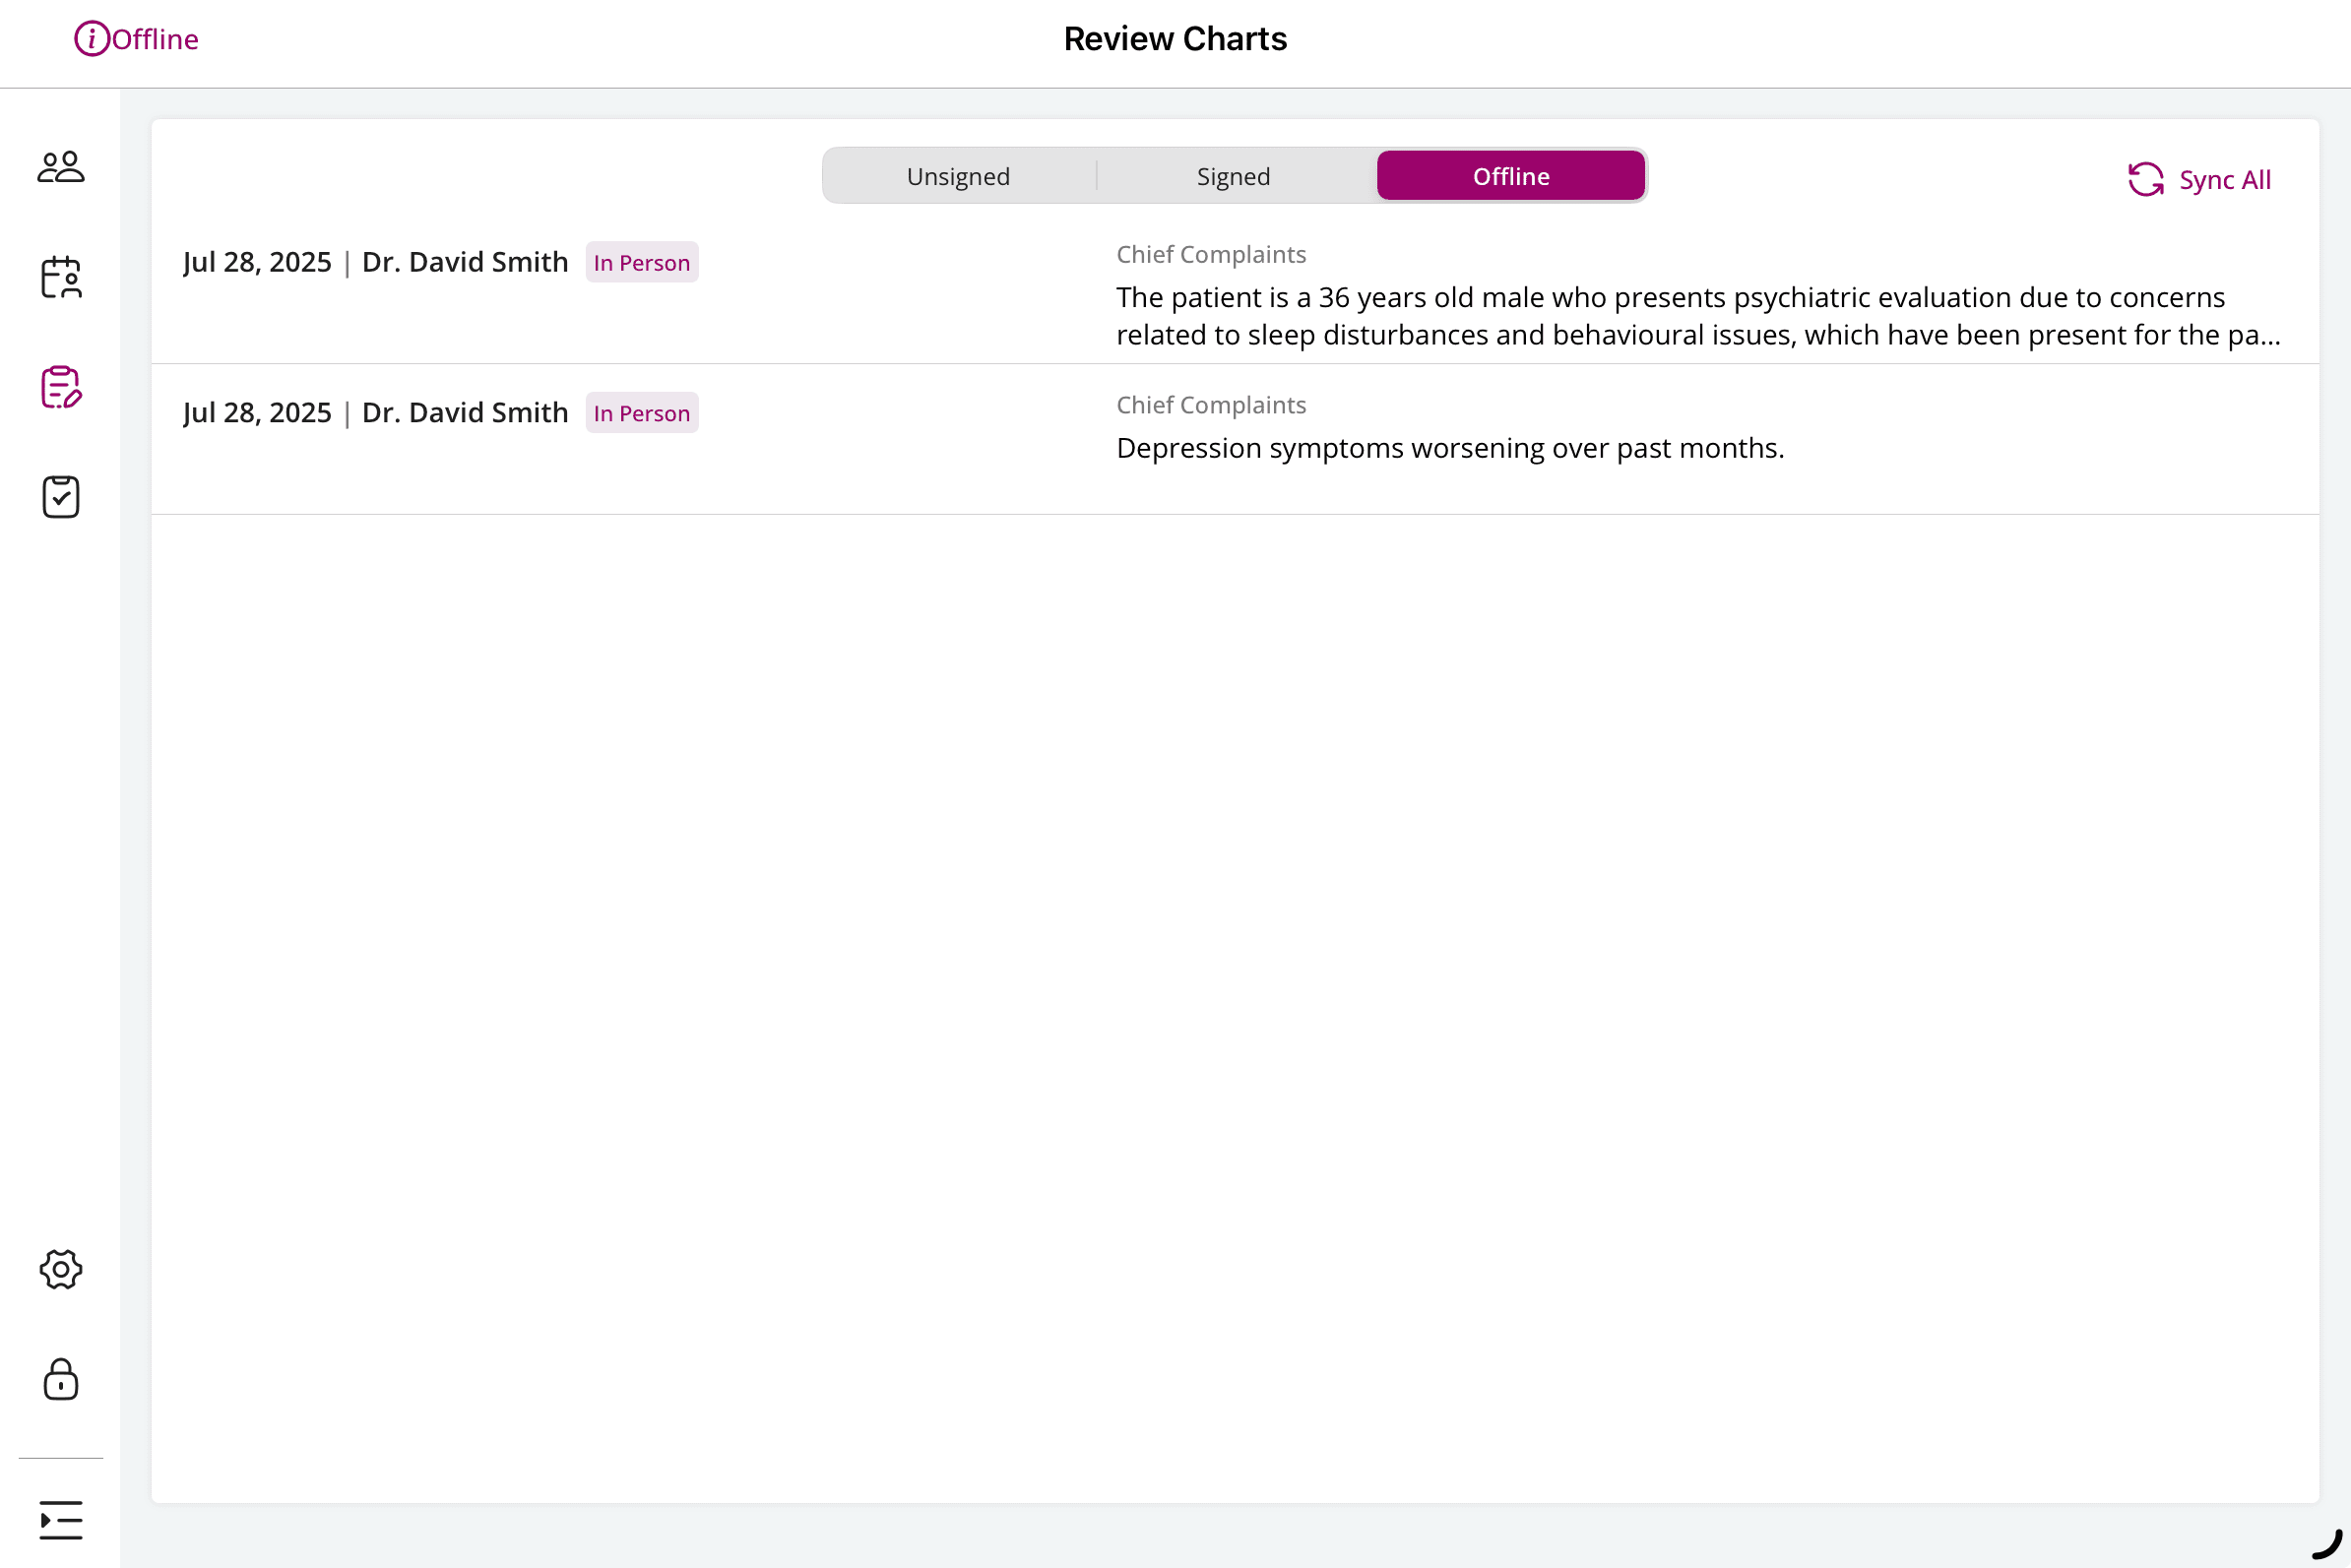
Upon reconnecting to the network, Providers can review, edit, and sync each offline Encounter. Tap 'Sync All' to sync all Offline Encounters at once.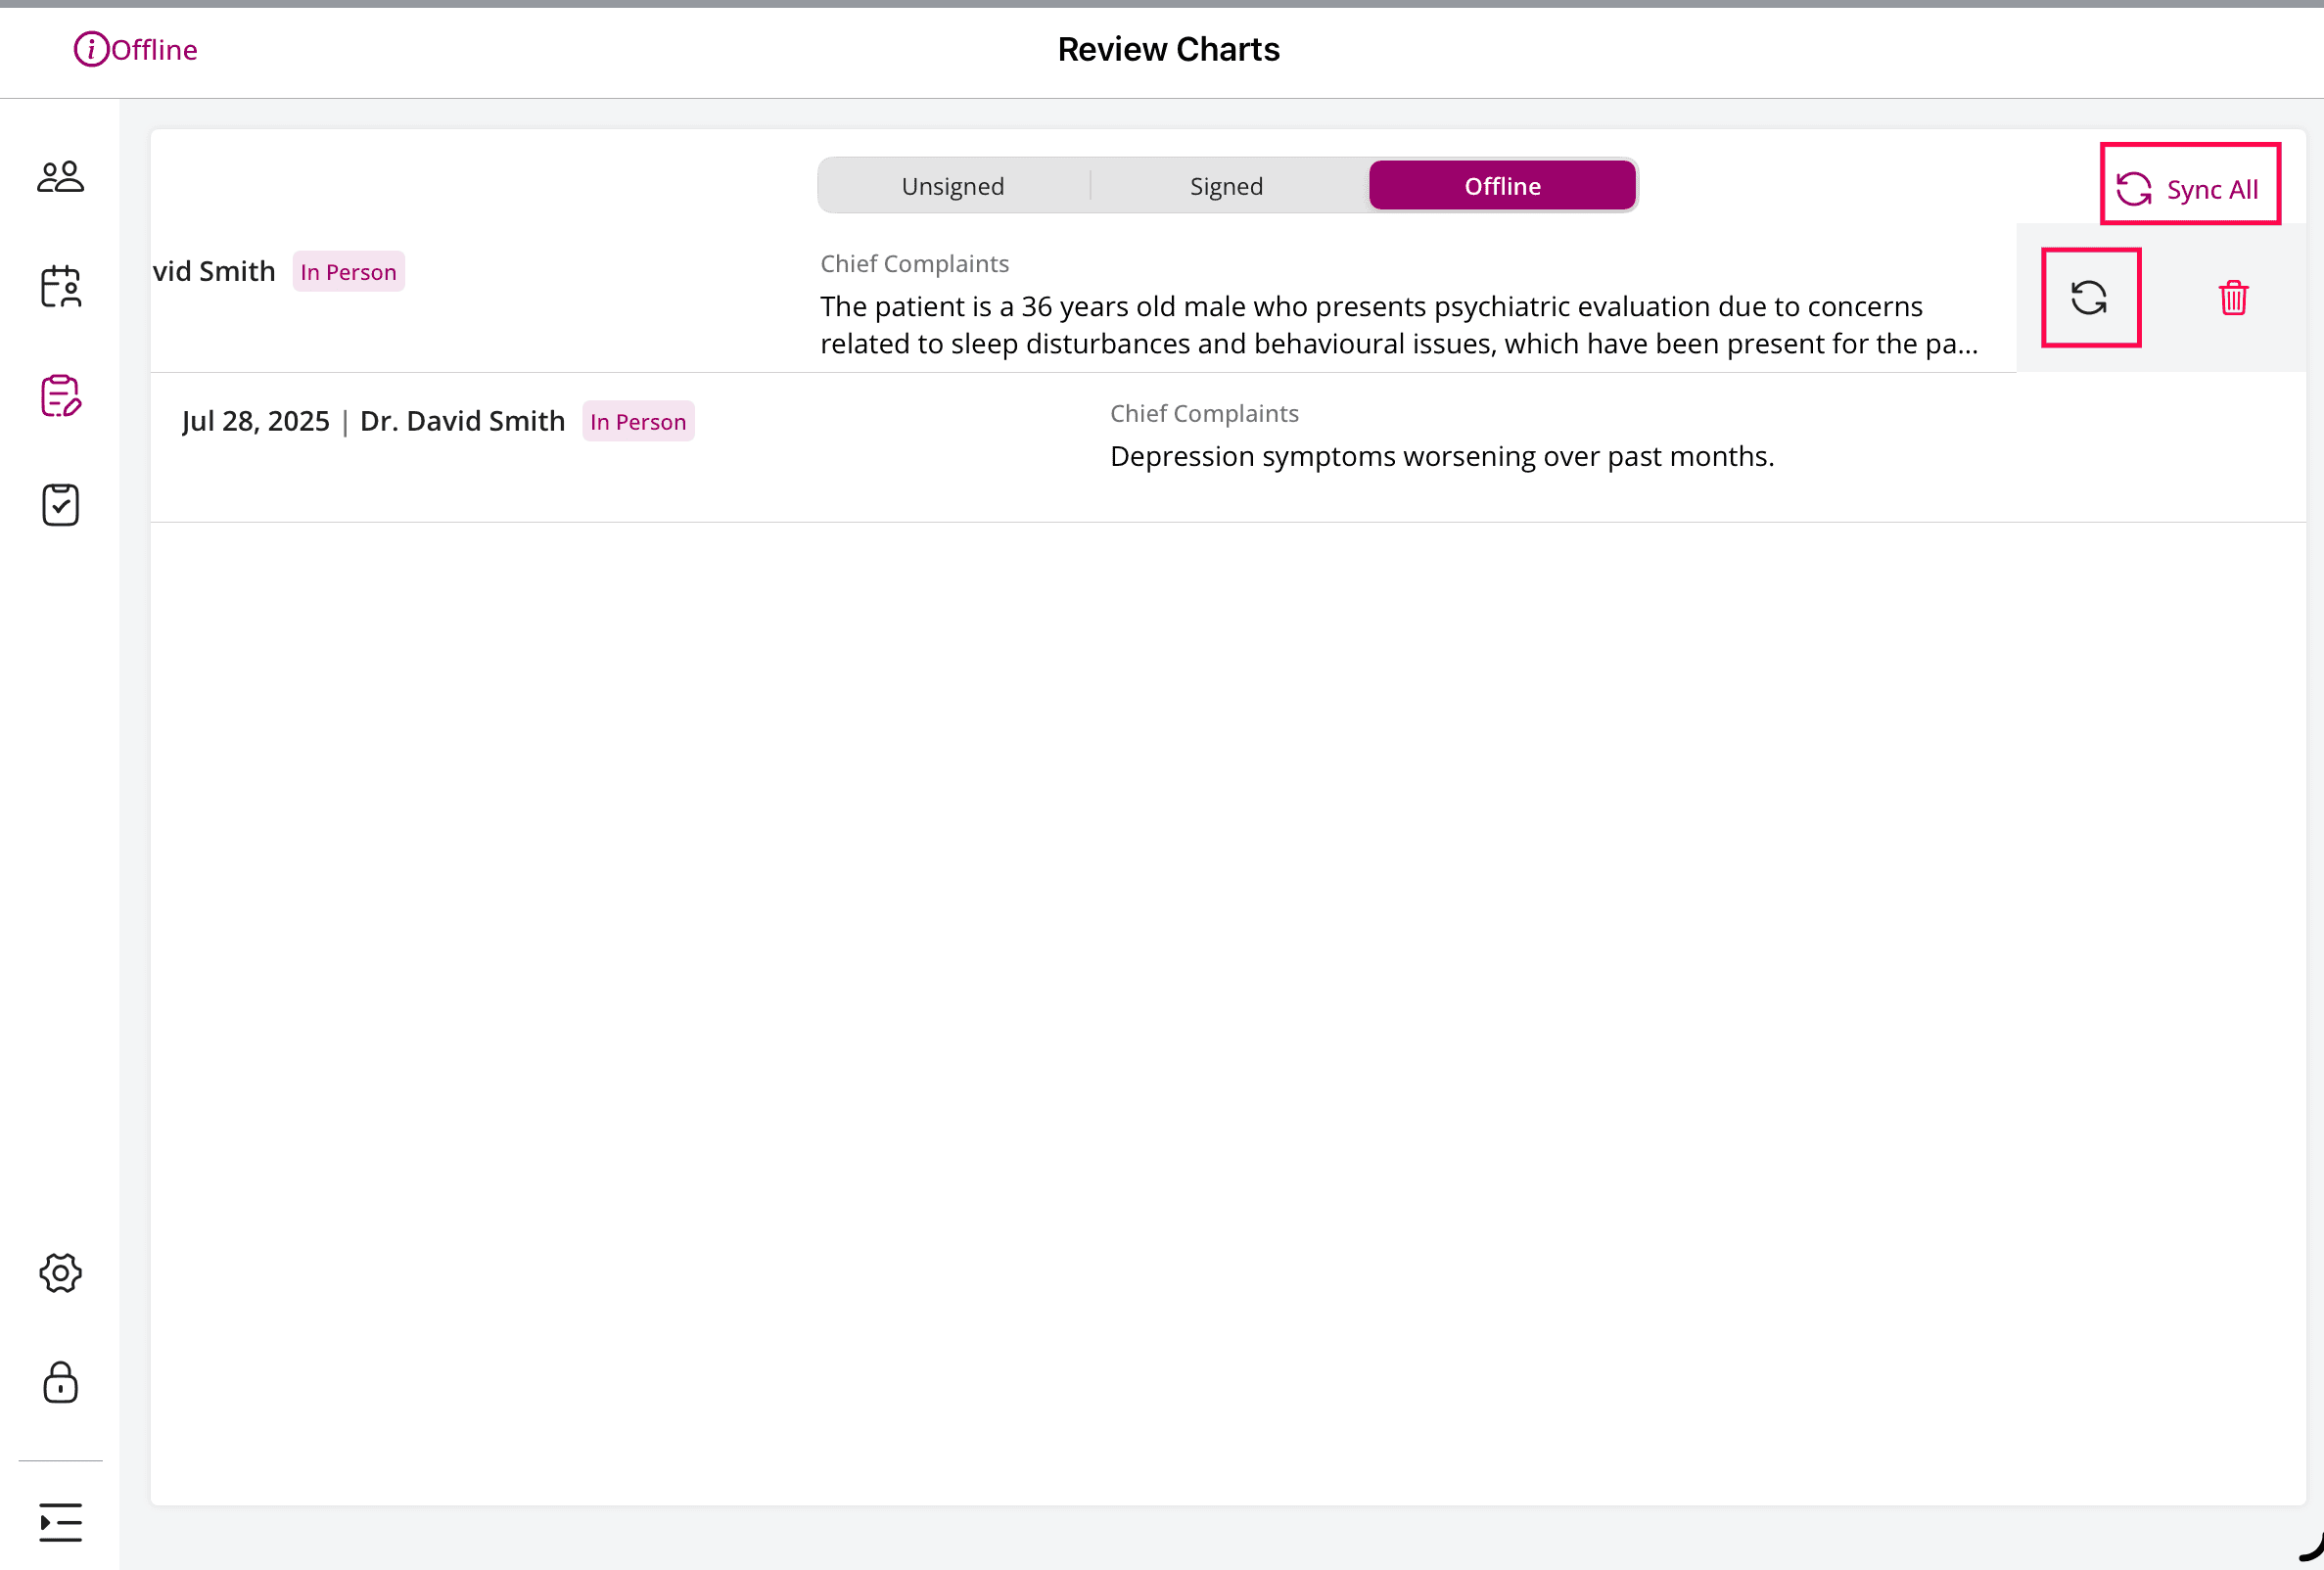
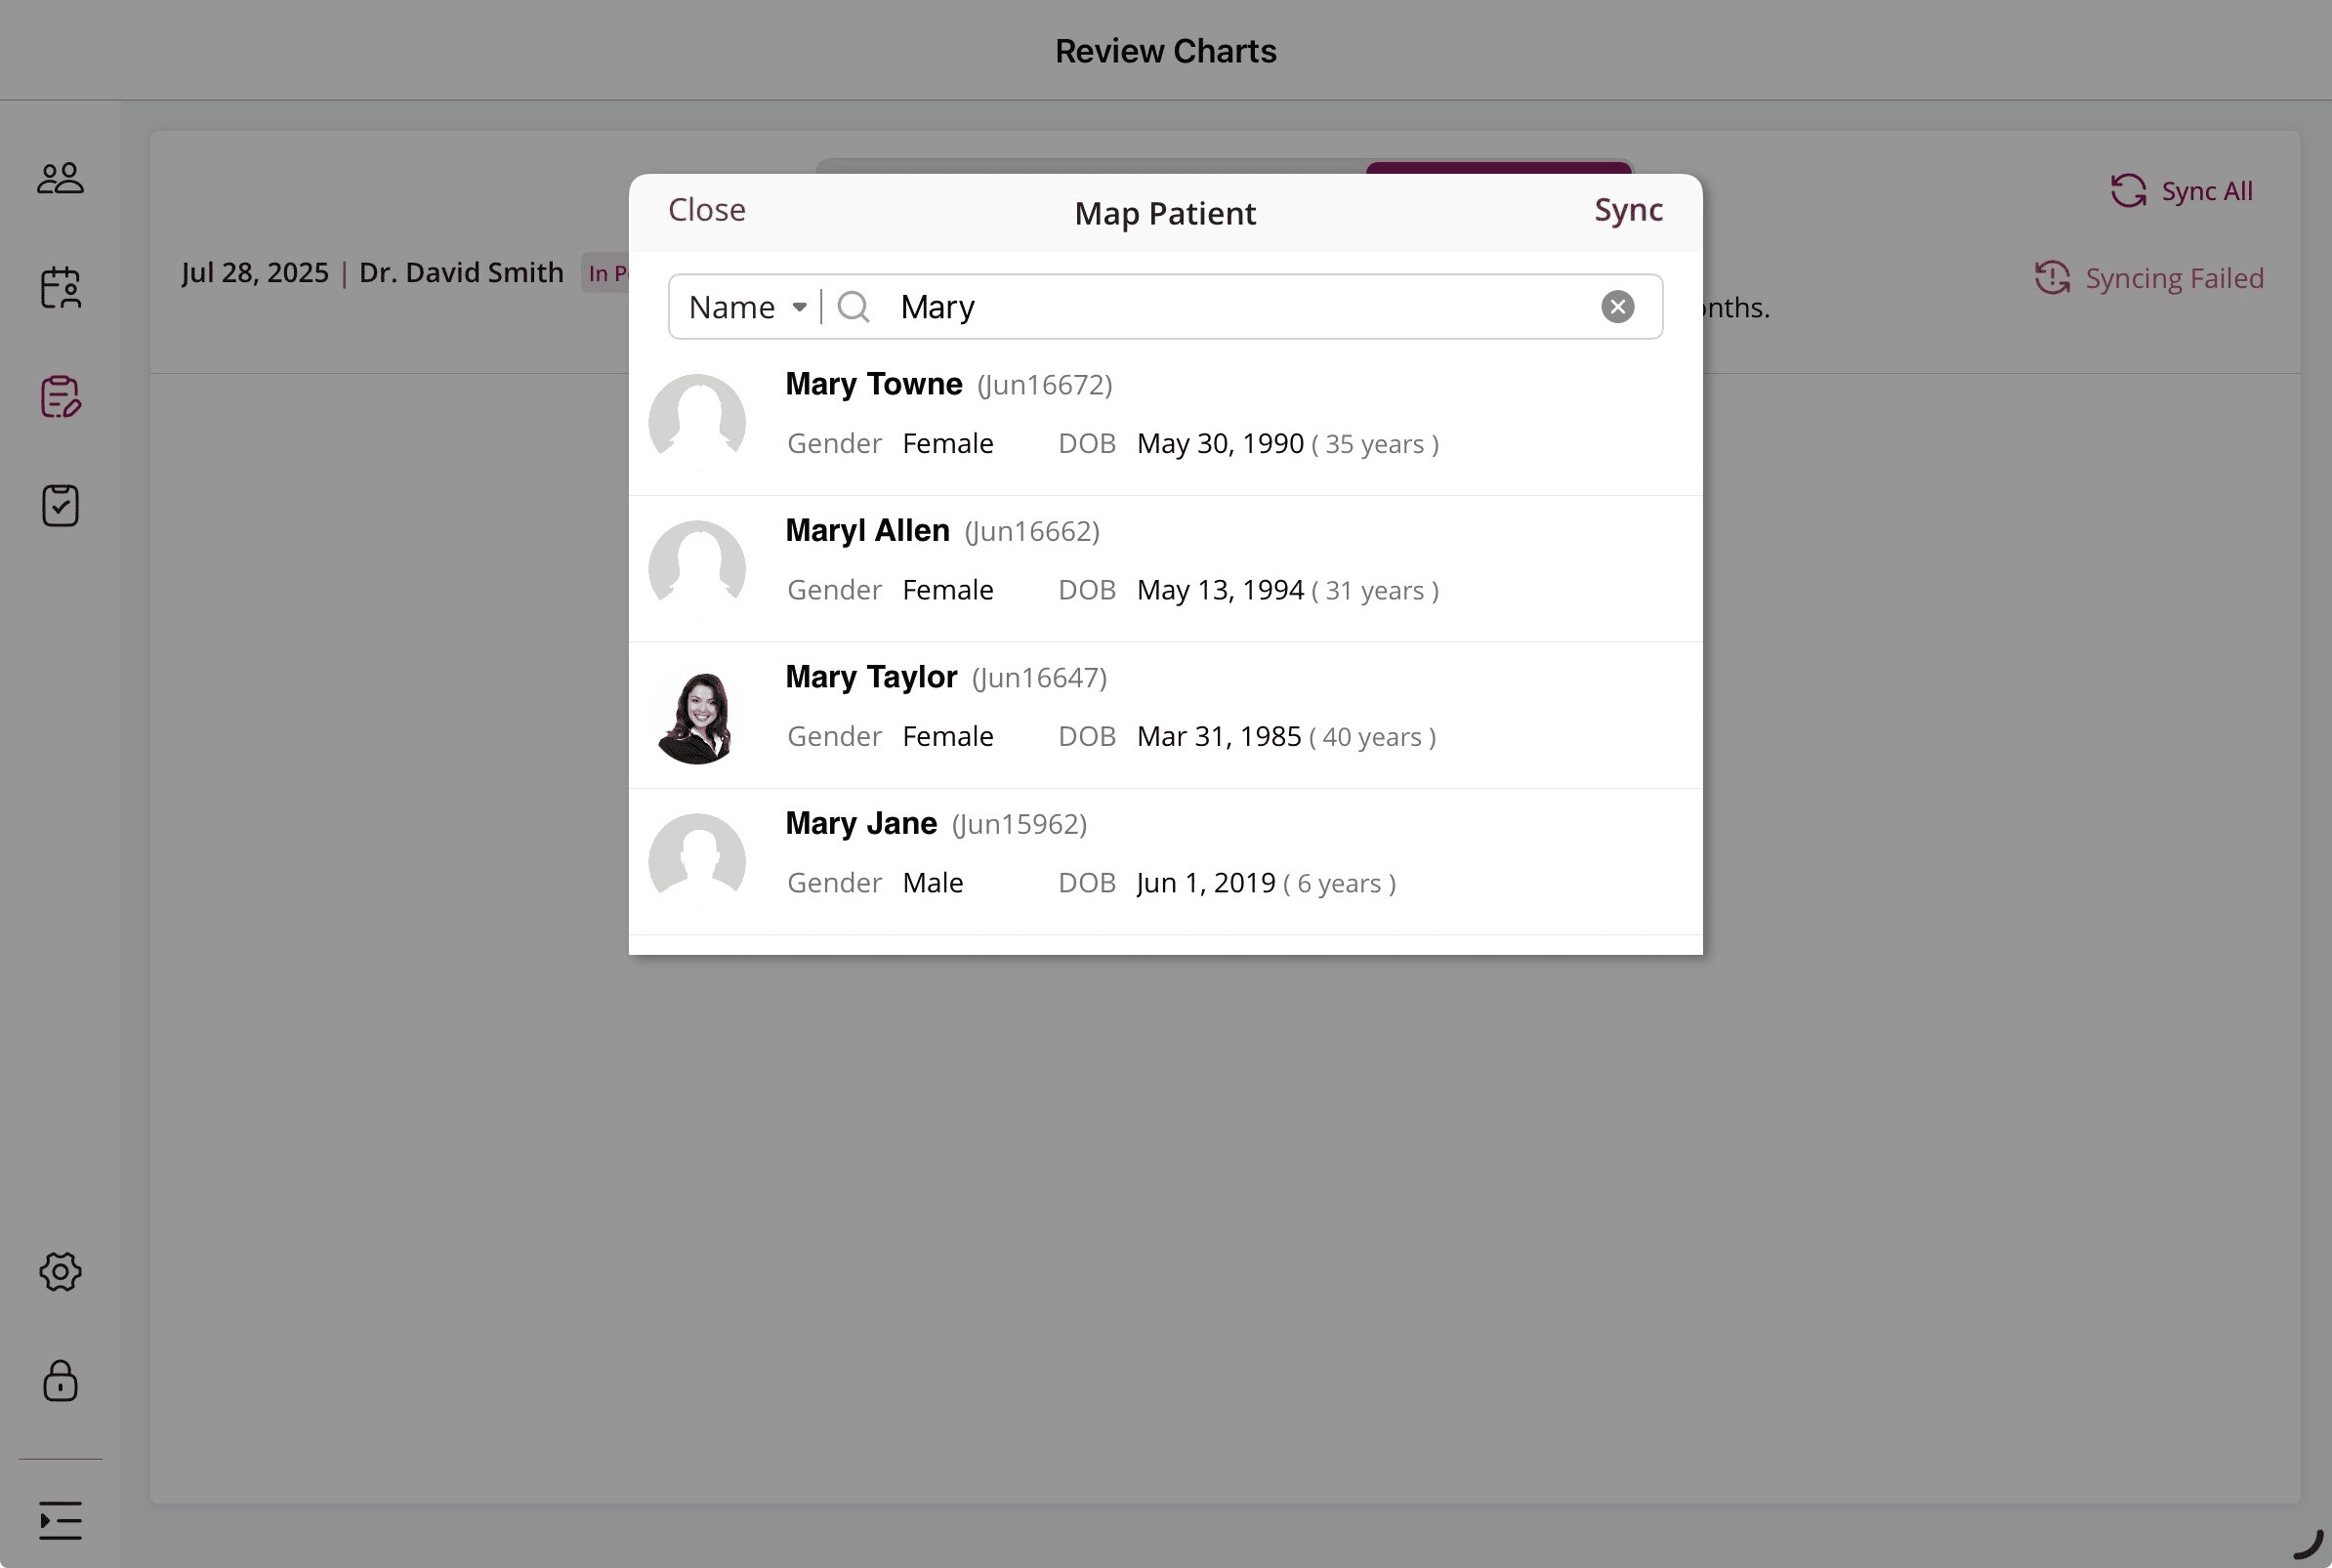
While syncing, when the specified Patient cannot be found, the synchronization fails. You can then search and 'Map' the relevant Patient and sync the Encounter.
8. Manage Tasks
The Charm Chart Note App enables Providers to manage their Tasks within the app.
They can :
- Add a new Task
- Edit Task
- Change Task Status
- Filter Task List
- Delete Task

a. Choose Offline Templates
Providers can select the offline templates to store them locally on their device and use them in the Patients' Chart while working without internet access. This ensures uninterrupted charting during network issues.
- Navigate to 'Settings > Offline Templates'
- Select the templates you want to store locally in your device.

- Tap 'Done' to update the changes.
The selected templates remain available for offline charting and can be synced once the device is back online.
Note: You will be prompted to choose Offline Templates on your first login to the Charm Chart Note App and get saved in Settings.
b. Default Encounter Preferences
Choose the default preferences for Encounter sections. The selected sections will be available for every Encounter.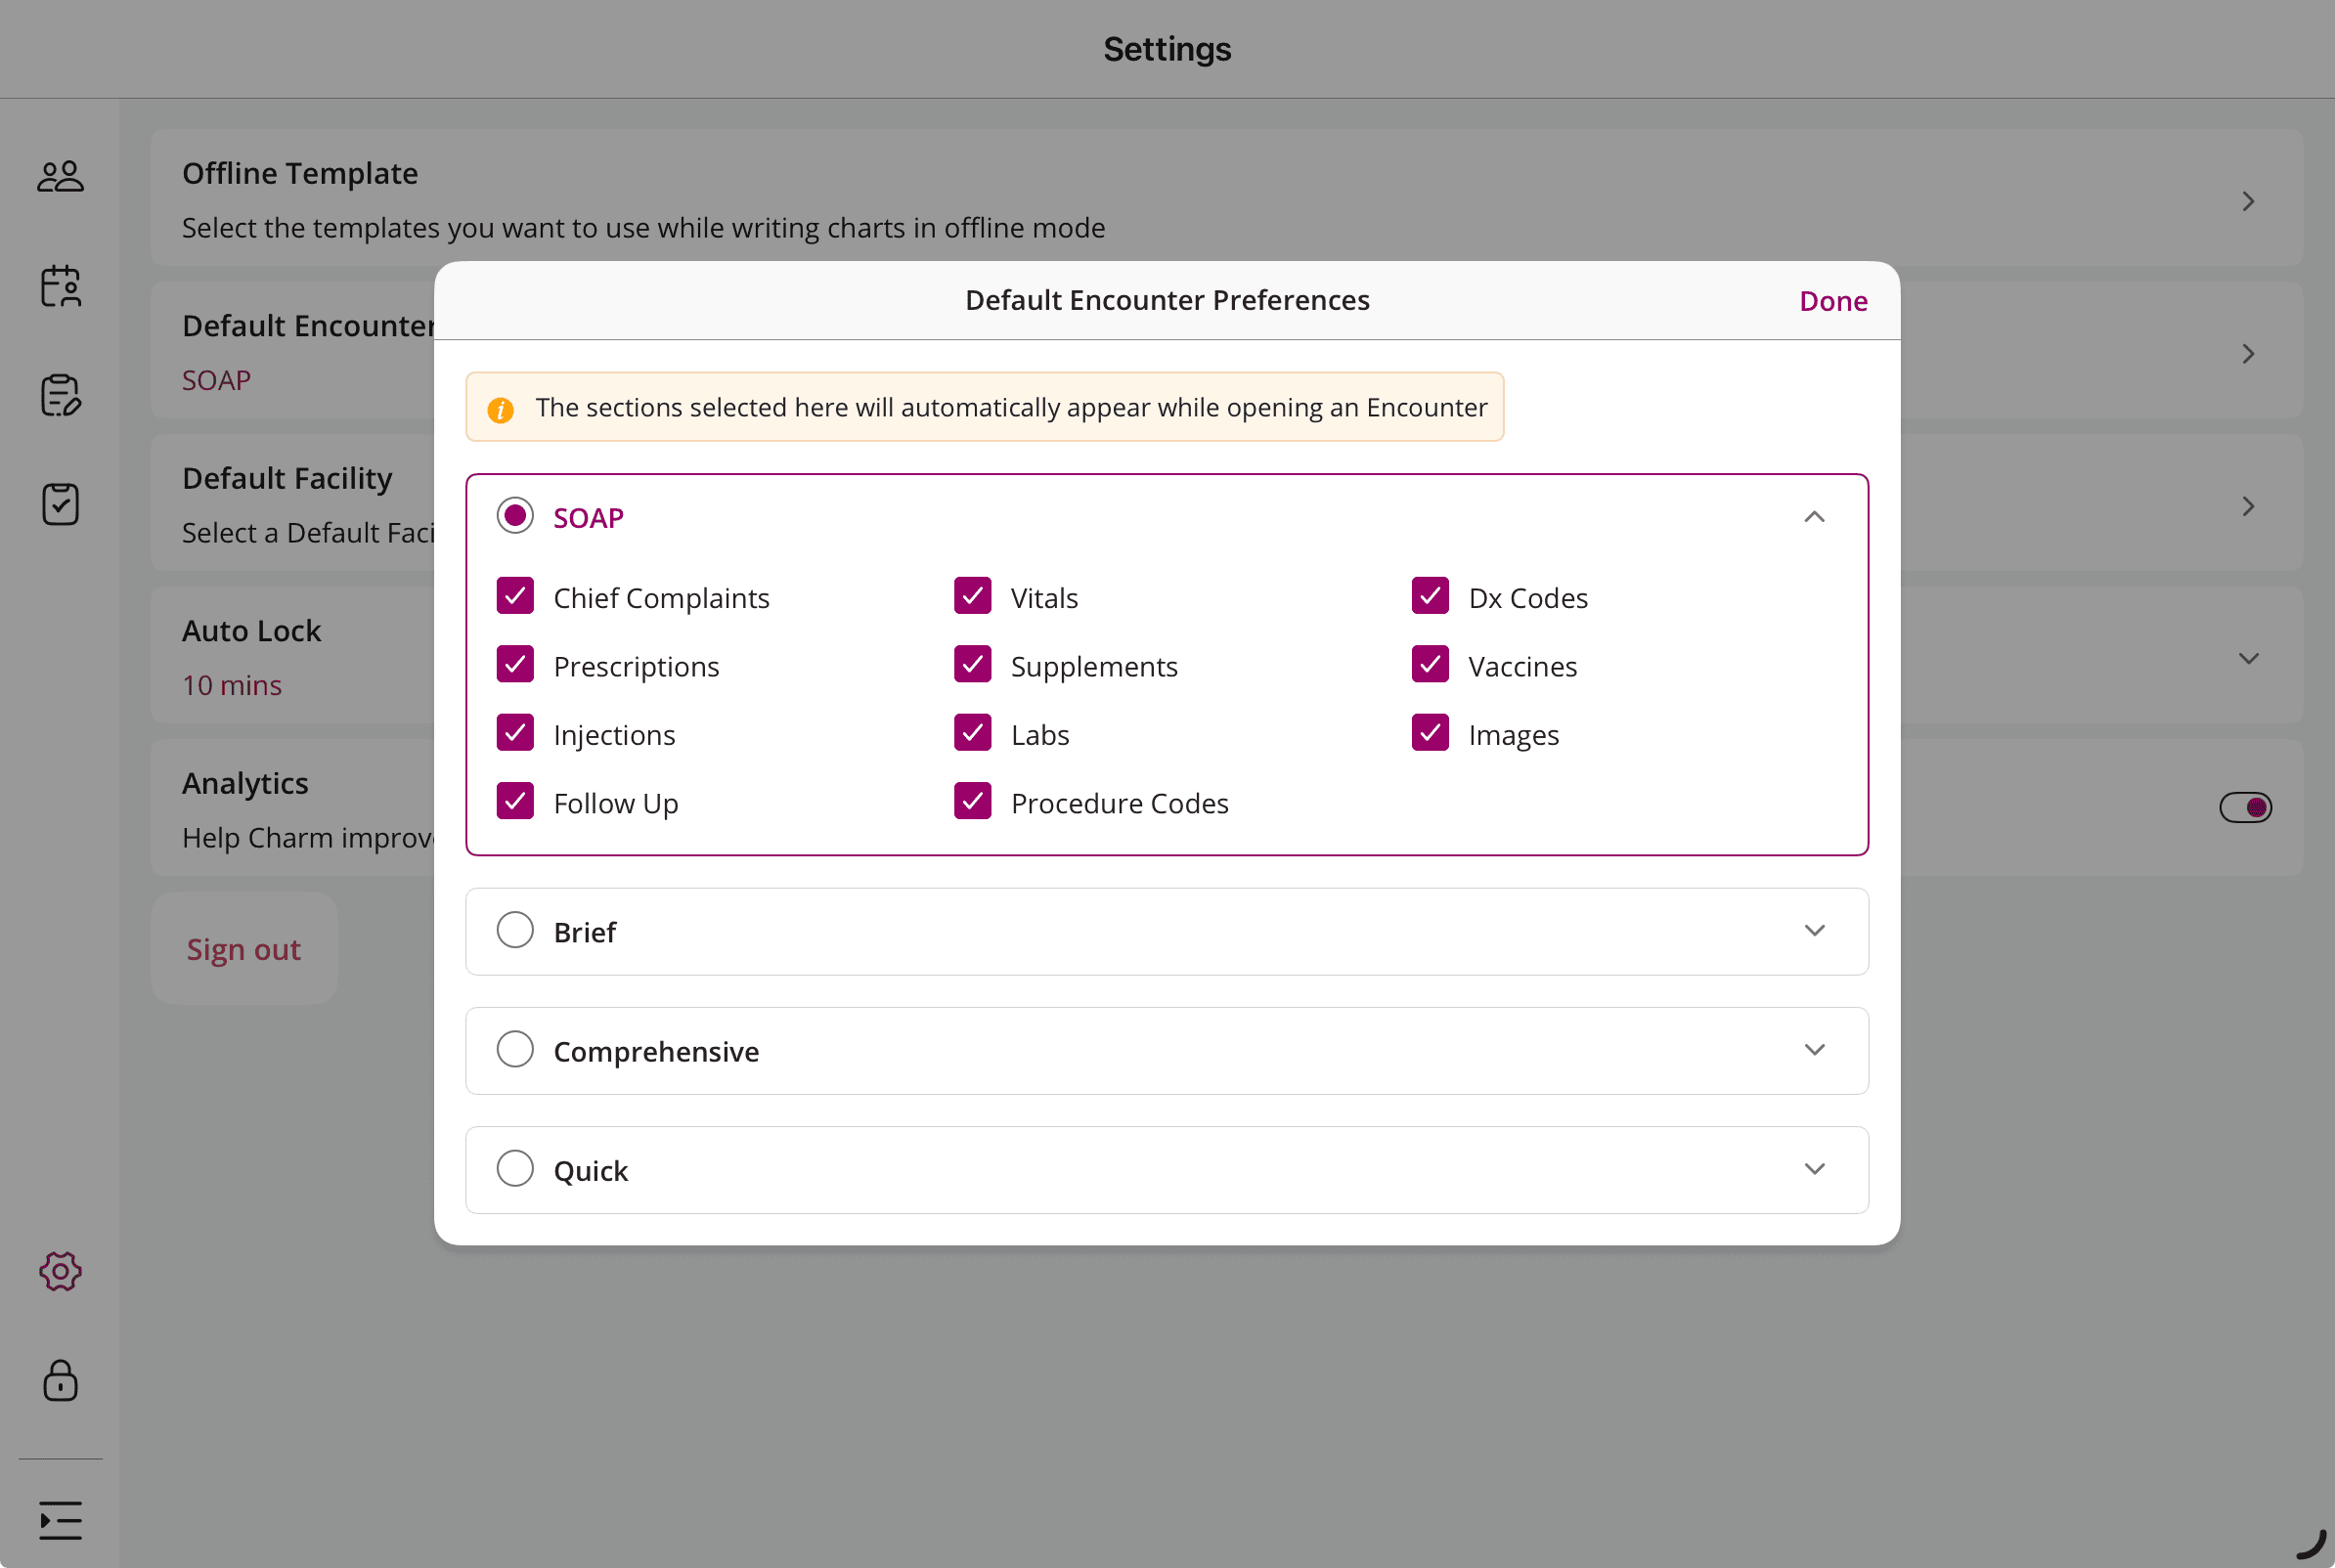
Note: You will be prompted to select the Encounter preferences for the first encounter upon login to the Charm Chart Note App.
c. Default Facility
Select a default facility when logging in to the Charm Chart Note app.
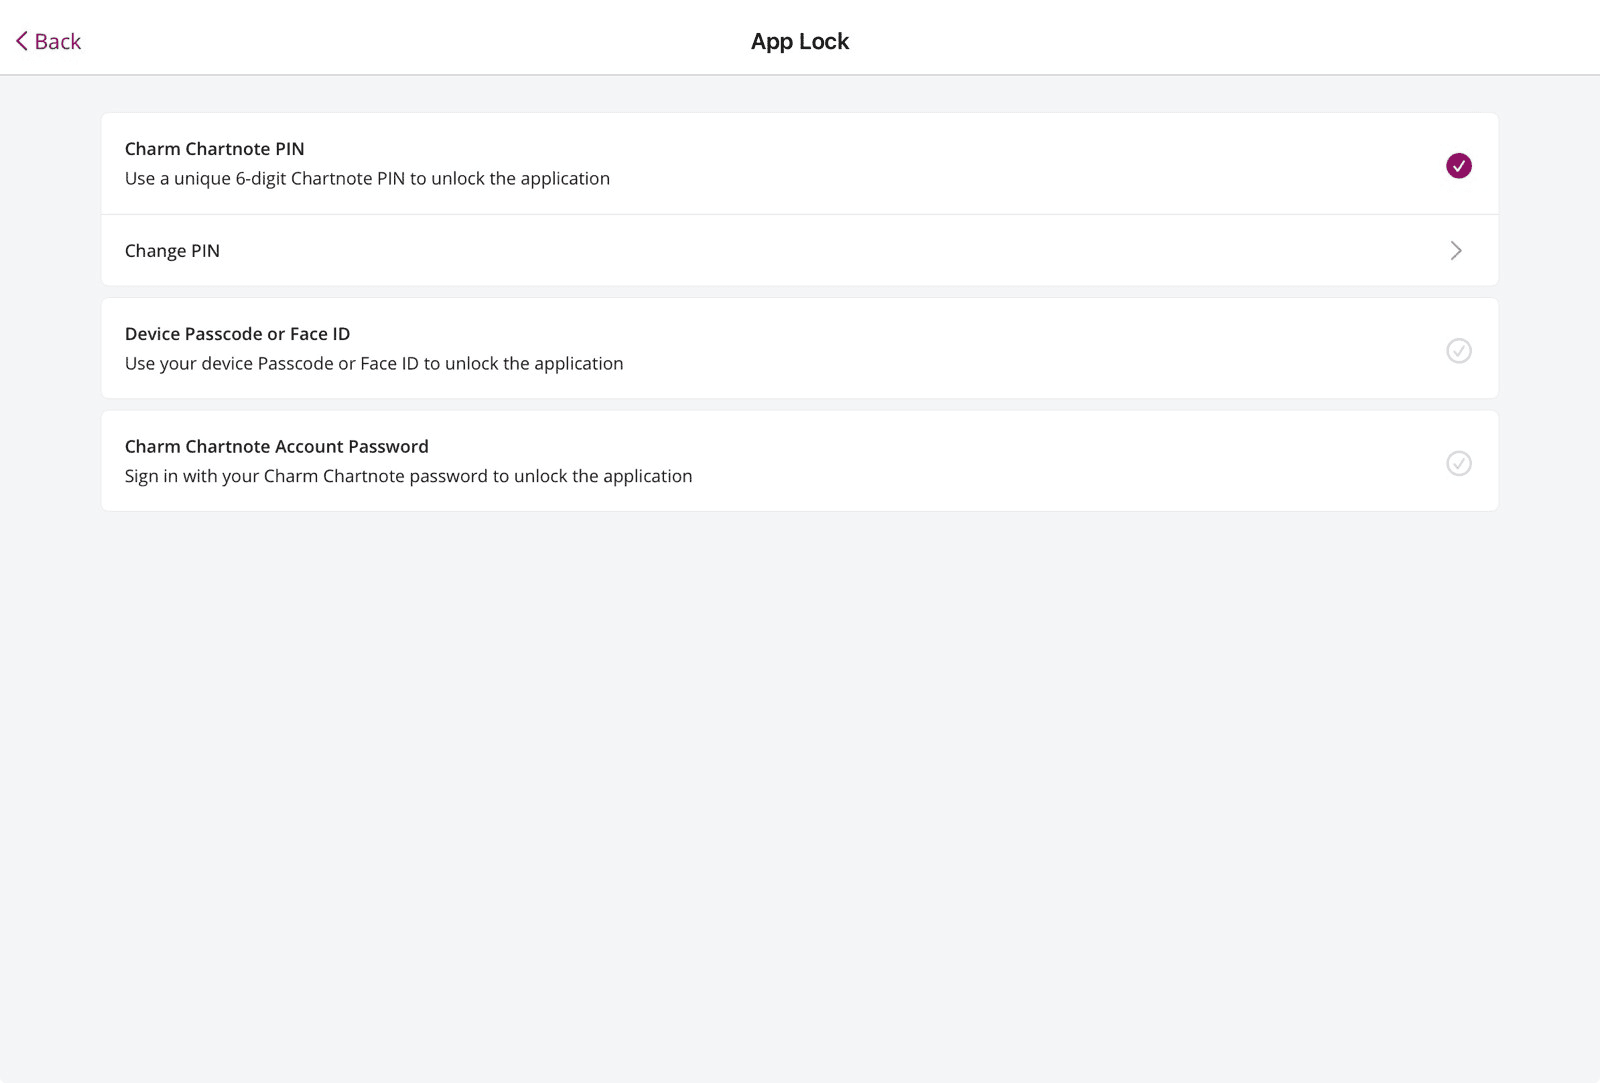
d. App Lock
Practice members can choose their preferred App Lock method from the following options.
- Charm Chart Note PIN
- Device Passcode or Face ID
- Charm Chart Note Account Password
