Features
1-on-1 Chat
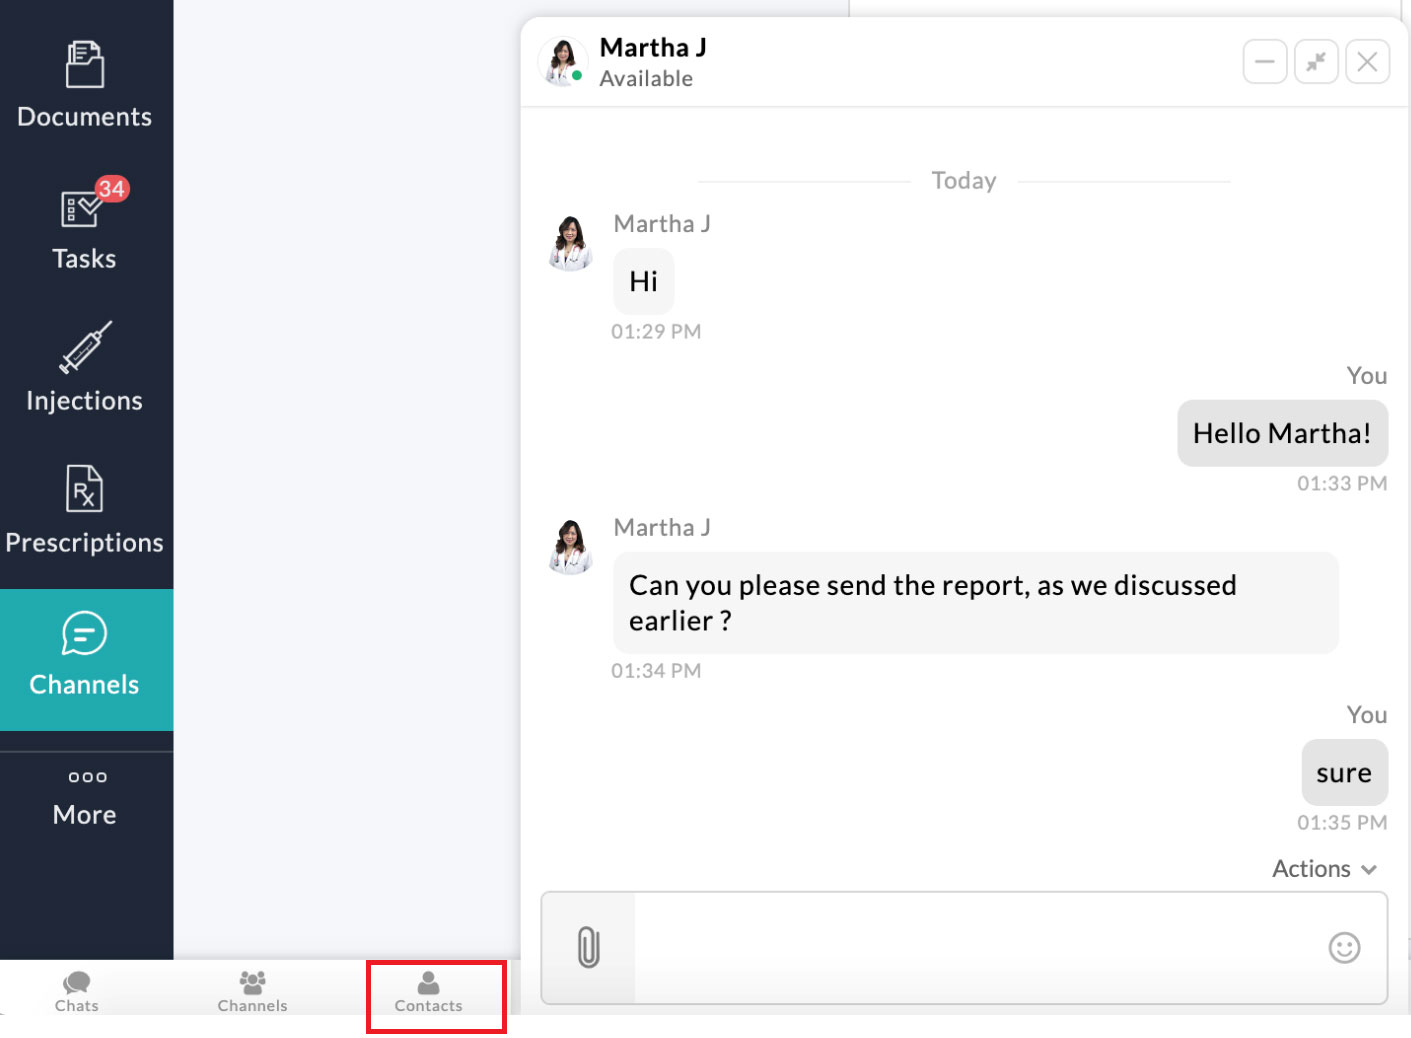
You can initiate 1-on-1 chat with your practice members from the chat bar located at left-bottom of your Charm Account. Go to the ‘Contacts’ tab, search for the member with whom you want to communicate and start the conversation.
Document Sharing
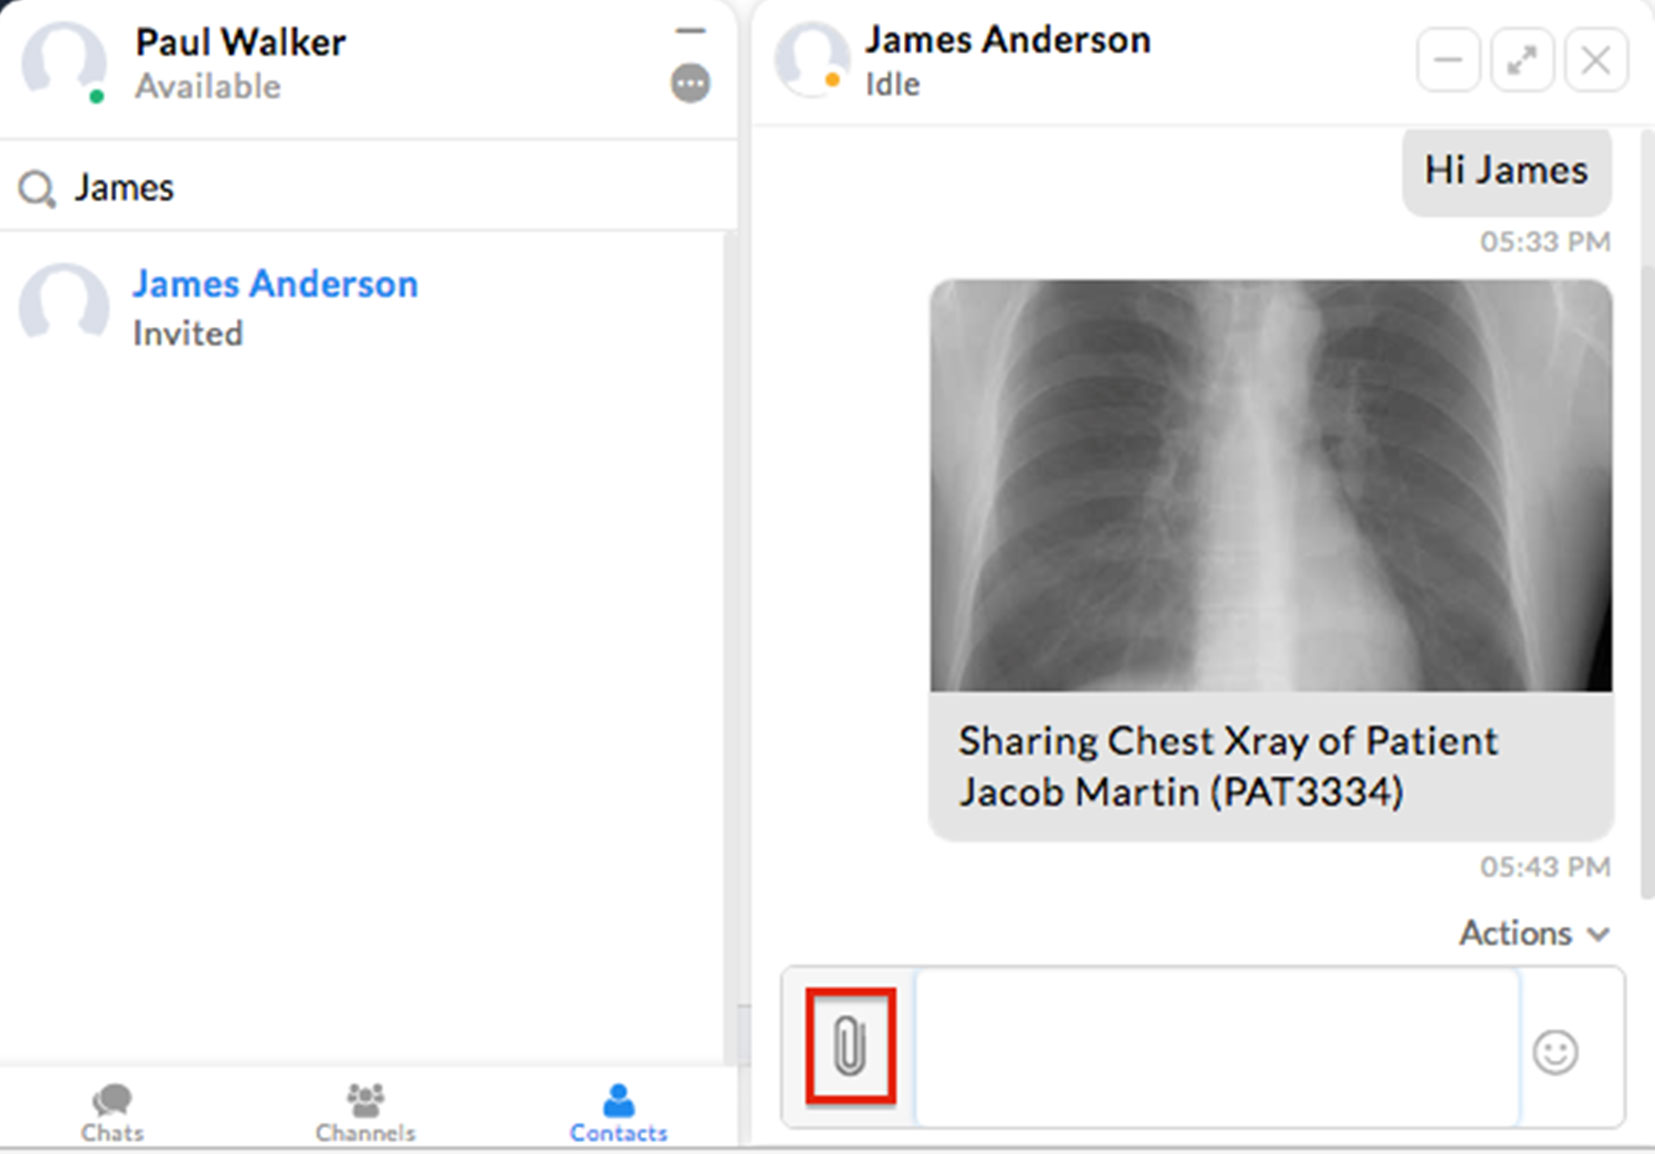
You can securely share documents like X-rays, photos, etc. of patients, with other care team members. To share document, click on the ‘Attachment’ icon on the chat window and select the file to be shared. The file gets instantly shared and accessible to the member. If you are using the mobile, you can instantly take a photograph of the document to be shared and send it.
Group Chat
- The Group Chat feature allows you to bring more people to a conversation.
- To create a group chat, click on the ‘Smart Chat’ text on the chat bar, or use the shortcut key ‘Ctrl+Space’.

- The smart chat window lists the already created chats, contacts, and channels. Click on the ‘Bulb’ icon on the top right corner to know the syntax to create a group chat.
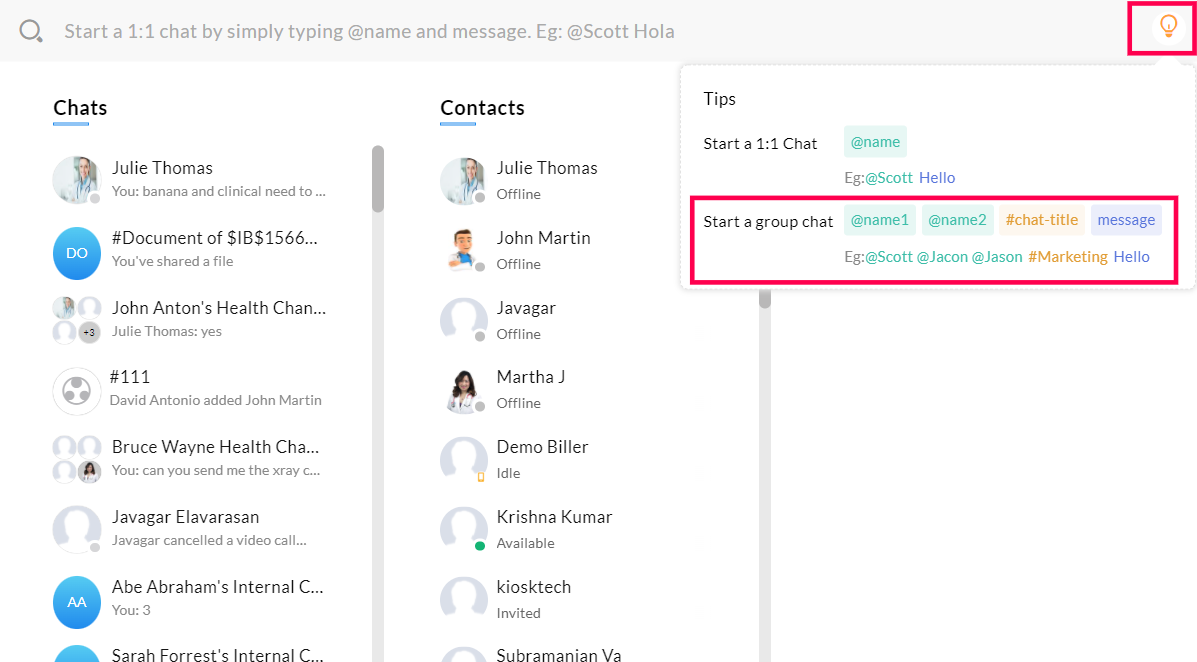
- Use the ‘@’ key to select members to be added to the group chat and the ‘#’ key to specify the group title. If required, you can give a chat message and press the enter key.

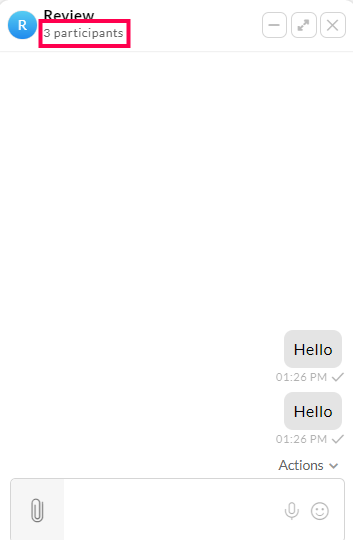
- Once a group chat is created, you can view the members using the ‘Participants’ link on the top of the chat window.
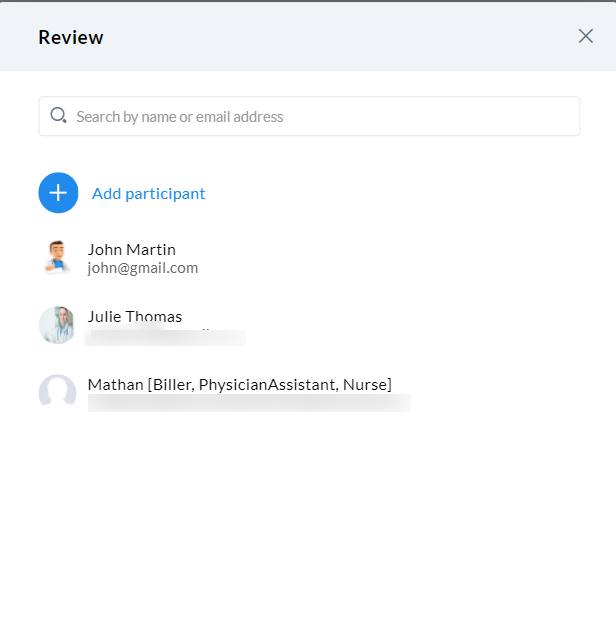
- To add a new member to the group chat, click on the 'Participants' link. Click on the '+Add participant' button and add the member.
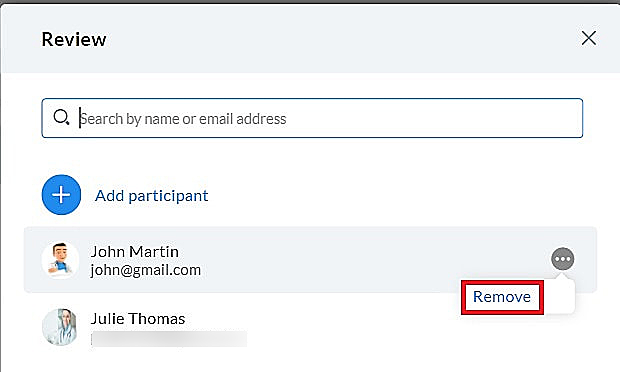
- To remove a participant from the group, click on the 'More Options' (...) icon against the participant and select the 'Remove' option.
Audio/Video Calls
You can make Audio/video calls to your Practice members from the Chat window.
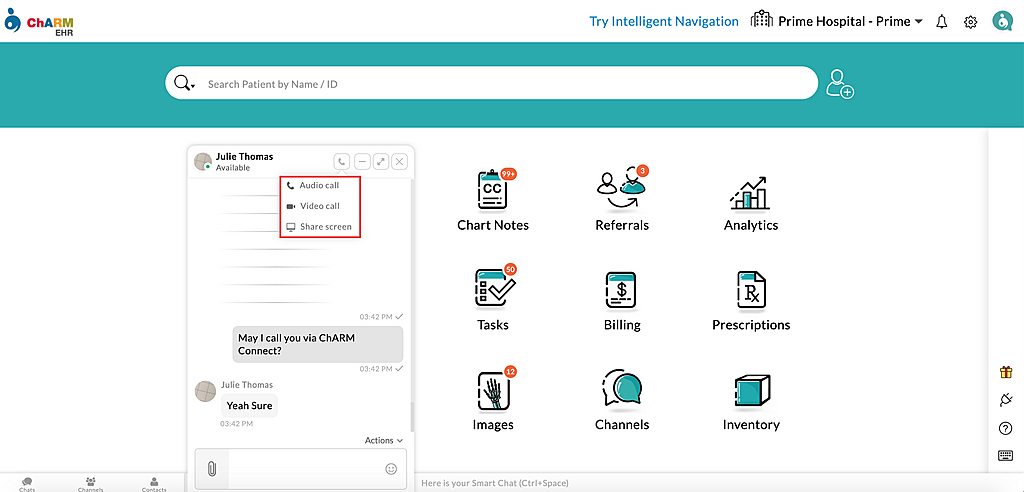
Click on the 'Call' icon and select the 'Audio call' or 'Video call' option. For the first time, you need to grant permission to access your device's microphone and camera. Accept to initiate the call.
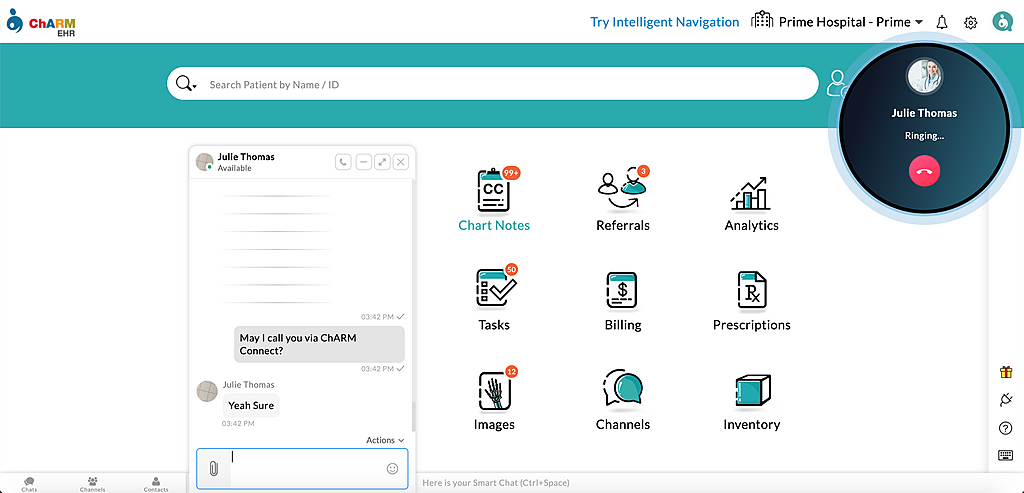
The receiver of the call gets a notification on their Charm account.

Once the receiver accepts the call, you can speak to them.
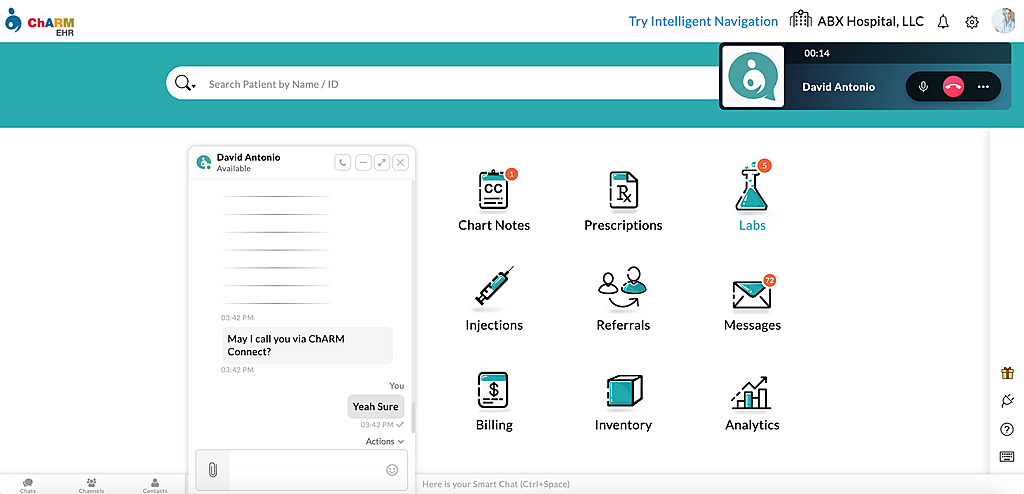
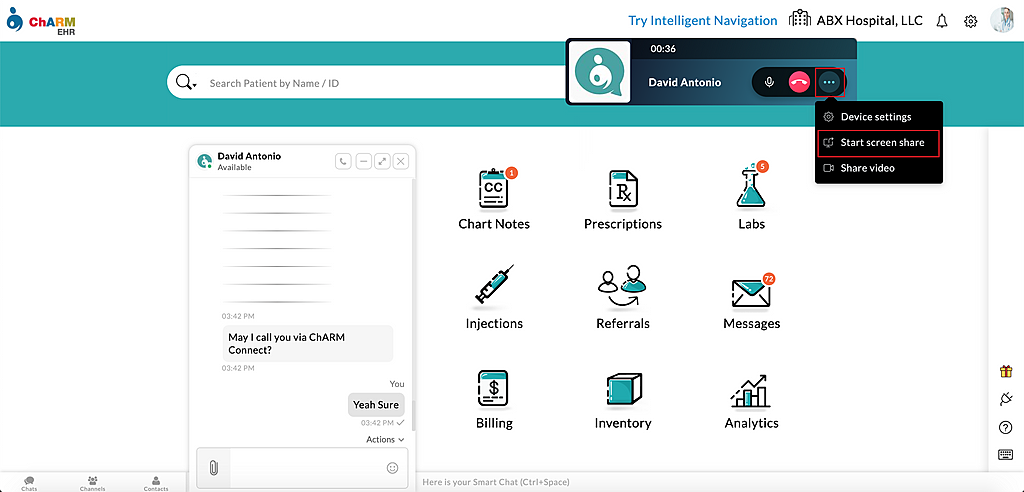
You can also share your computer screen during the call. To share your screen, click on the 'More Options' (...) icon in the call window and then click on the 'Start screen share' menu.
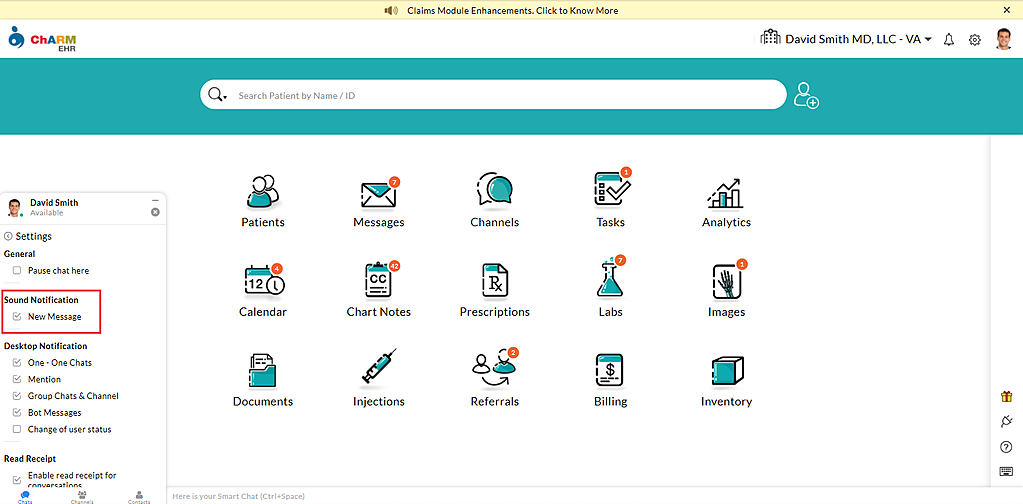
To get a ringtone while receiving audio/video calls, enable the sound notification option in the chat settings. Click on the three dots shown on the chat bar and go to the 'Settings' menu.

In the settings, enable the 'Sound notification' option for New Message.
Voice Messages
Besides the text messages, now you can also send Voice Messages to the Practice members and the Patients. This will be handy to share some instructions quickly without typing them.
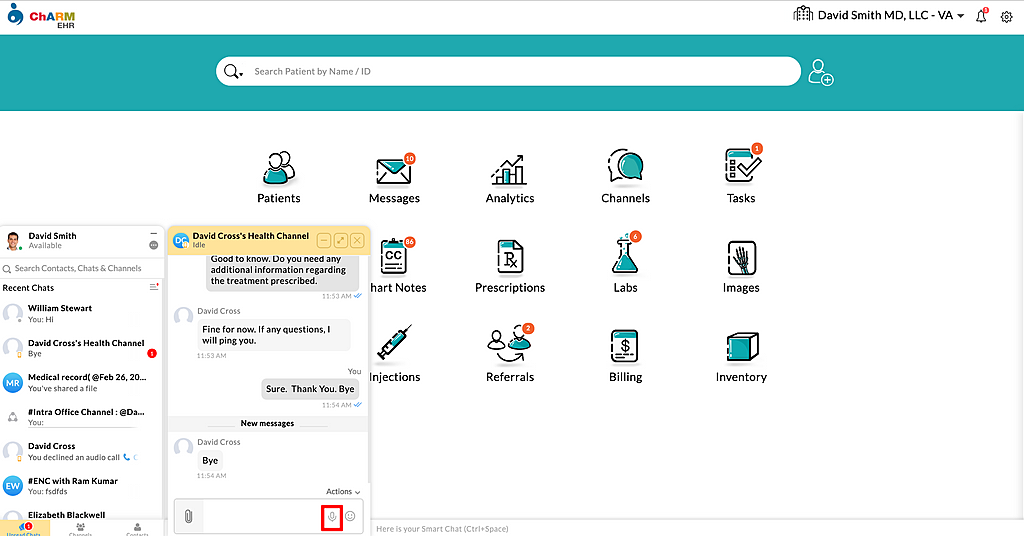
To send a voice message, click on the 'Mic' icon provided on the chat window.
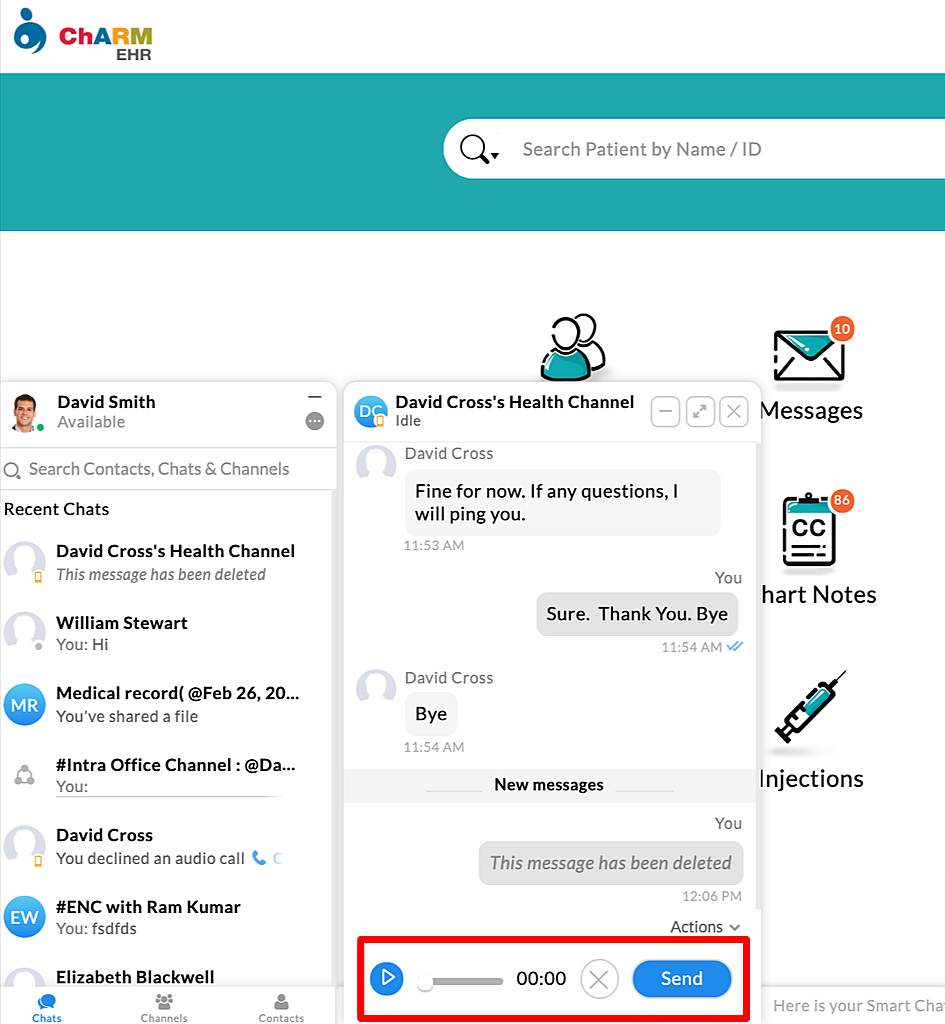
Record the message and then click on the 'Send' button.
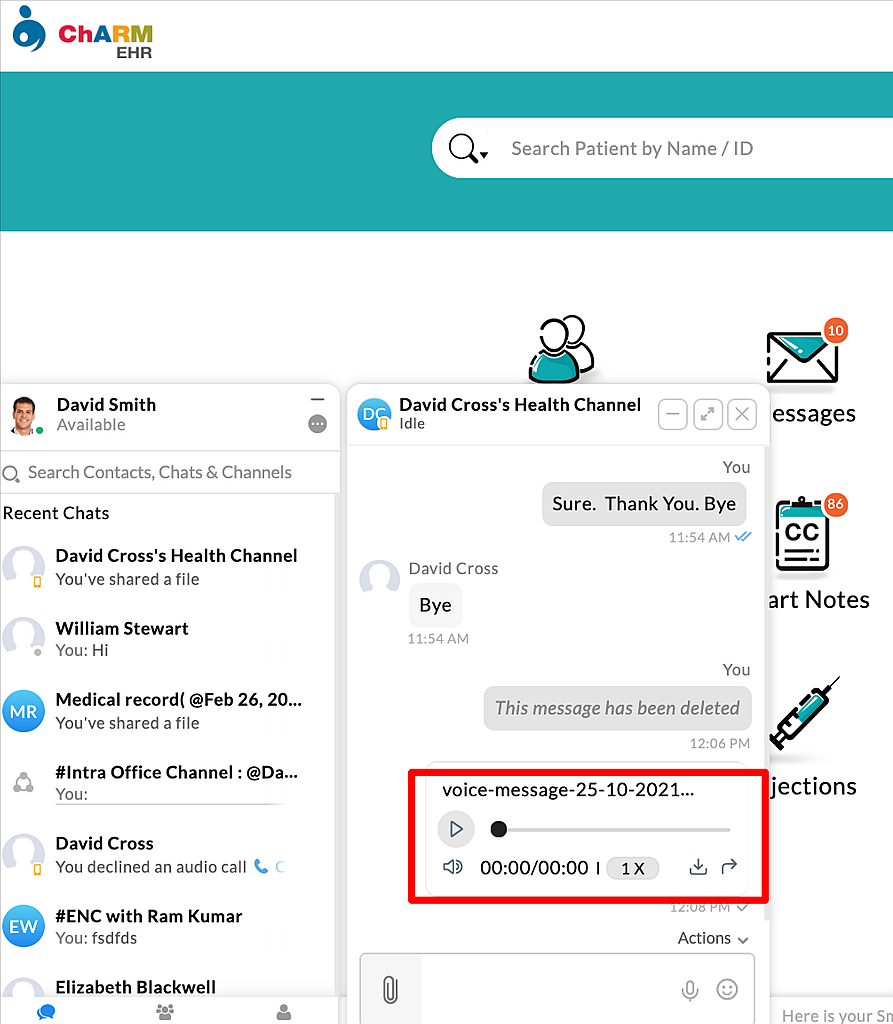
The voice message sent will be listed along with the other chat messages. Click on the 'Play' button to hear the message, and you can also download it as an audio file.
Office Channels
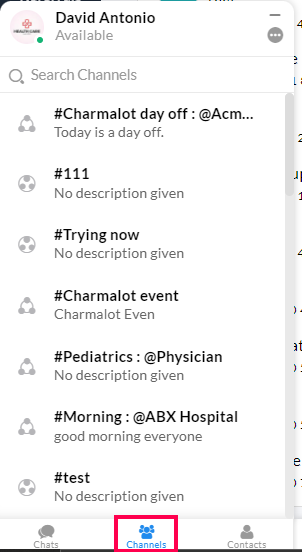
On signing up to Charm Connect, you can streamline all the official communication across your Practice using Office Channels. Go to the 'Channels > Office Channels' section in the Dashboard and click on the '+ Add' icon to create a Channel. The created channels will appear in the Chat bar.
Facility Channel
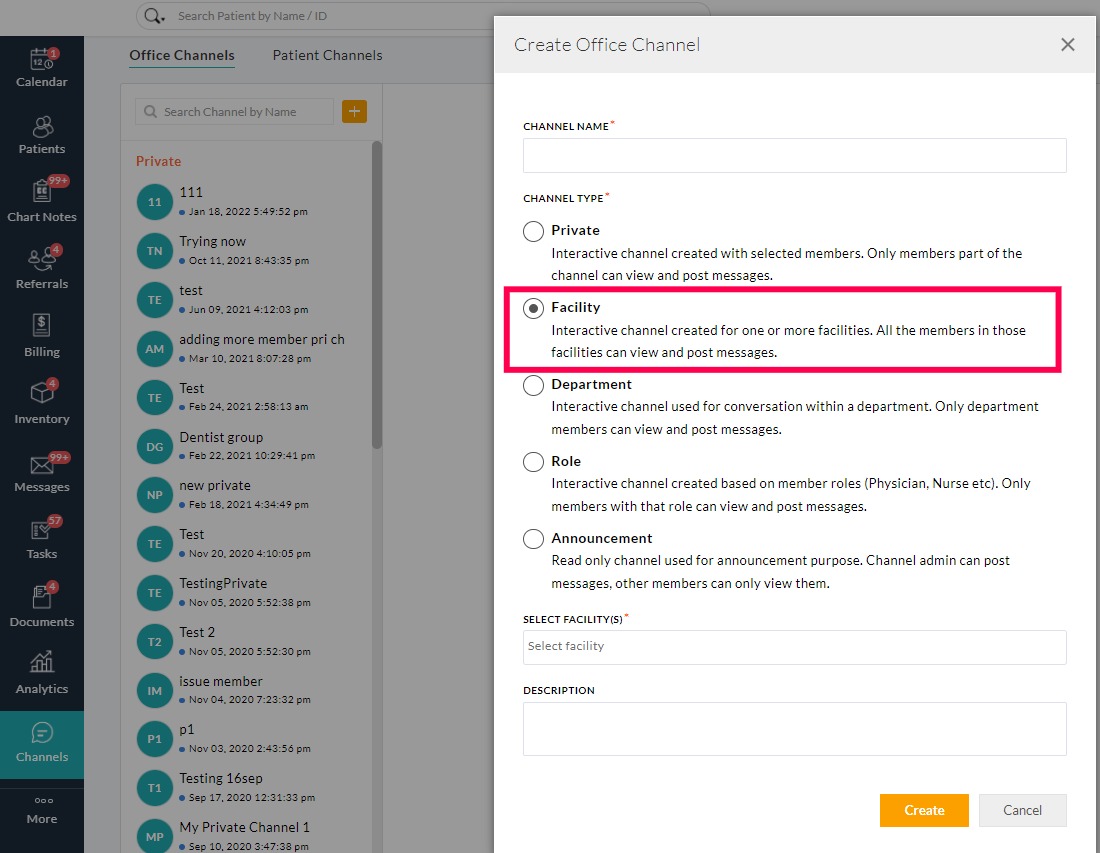
This channel is used for facility wide discussions. All the facility members can access and communicate using this channel. Multiple facility channels can be created based on the topic of discussion. To create the facility channel, follow the steps given below:
- From the EHR Dashboard view, click on the 'Channels' icon. (If you don't see the 'Channels' icon, click on any section and from the left hand side tree, click on the 'More' (...) button and click on 'Customize'. From the 'Customize Member Dashboard' set the 'Channels' option to 'Enabled')
- Choose the 'Office Channels' tab, and click on the '+' button
- Provide a ‘Channel Name’ to the Office Channel.
- Select the ‘Channel Type’ as ‘Facility’
- Search and Select the facilities to be added to the Facility Channel from the ‘Select Facility(s)’ section.
Department Channel
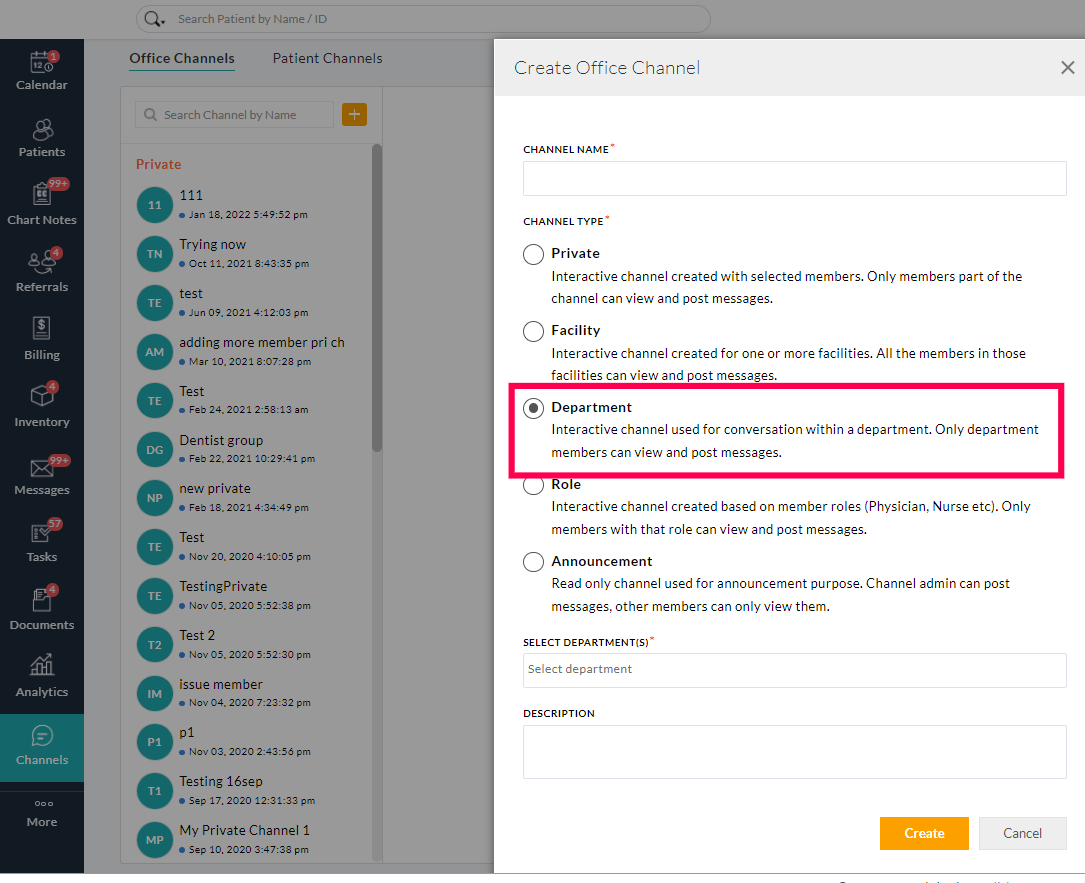
The Department Channel is used for discussions within the members of a particular Department. Only members of the particular Department can view and post messages.
Role Channel
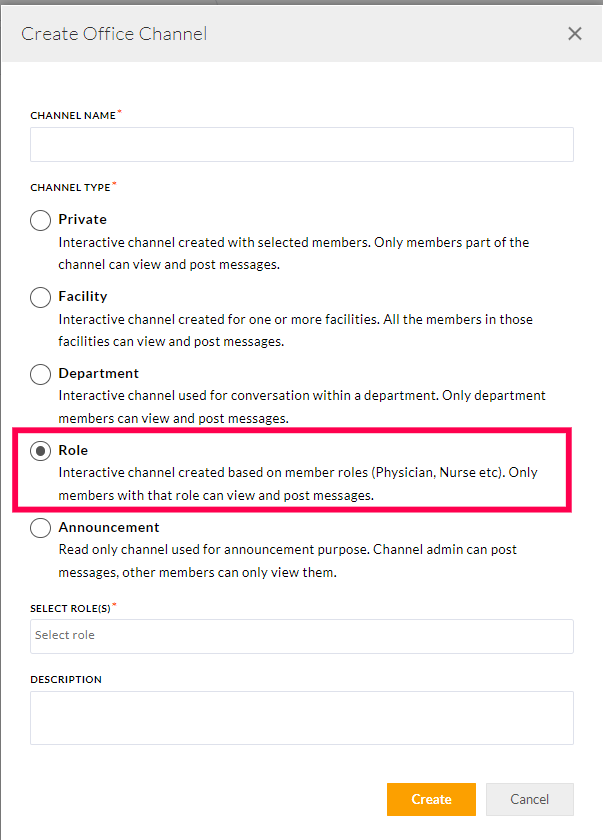
This channel is used for discussion among members of a particular role. For example, you can create a channel for ‘Physician’ role, which is accessible only to the physicians in your practice. To create the role channel, follow the steps given below:
- From the EHR Dashboard view, click on the 'Channels' icon. (If you don't see the 'Channels' icon, click on any section and from the left hand side tree, click on the 'More' (...) button and click on 'Customize'. From the 'Customize Member Dashboard' set the 'Channels' option to 'Enabled')
- Choose the 'Office Channels' tab, and click on the '+' button
- Provide a ‘Channel Name’ to the ‘Role Channel’
- Select the ‘Channel Type’ as ‘Role’
- Search and Select the roles to be added to the Role Channel from the ‘Select Role(s)’ section.
Announcement Channel
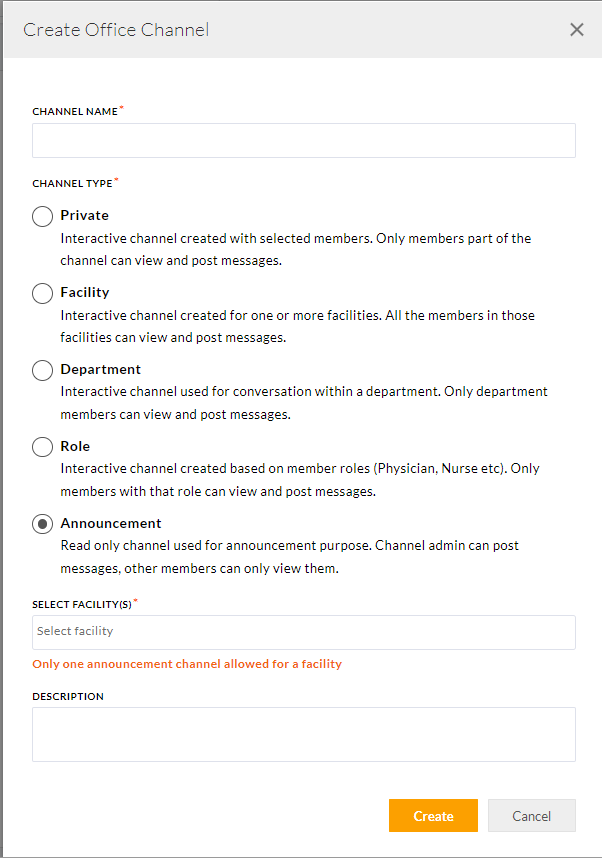
Announcement Channels are ready only channel used for facility level announcements. Only Admins can post message in this channel and others can only view them.
- From the EHR Dashboard view, click on the 'Channels' icon. (If you don't see the 'Channels' icon, click on any section and from the left hand side tree, click on the 'More' (...) button and click on 'Customize'. From the 'Customize Member Dashboard' set the 'Channels' option to 'Enabled')
- Choose the 'Office Channels' tab, and click on the '+' button
- Provide a ‘Channel Name’ to the ‘Announcement Channel’
- Select the ‘Channel Type’ as ‘Announcement’
- Search and Select the facilities which should receive the announcements made from the ‘Select Facility’ section.
Note: Please note that only one announcement channel can be created for each facility.
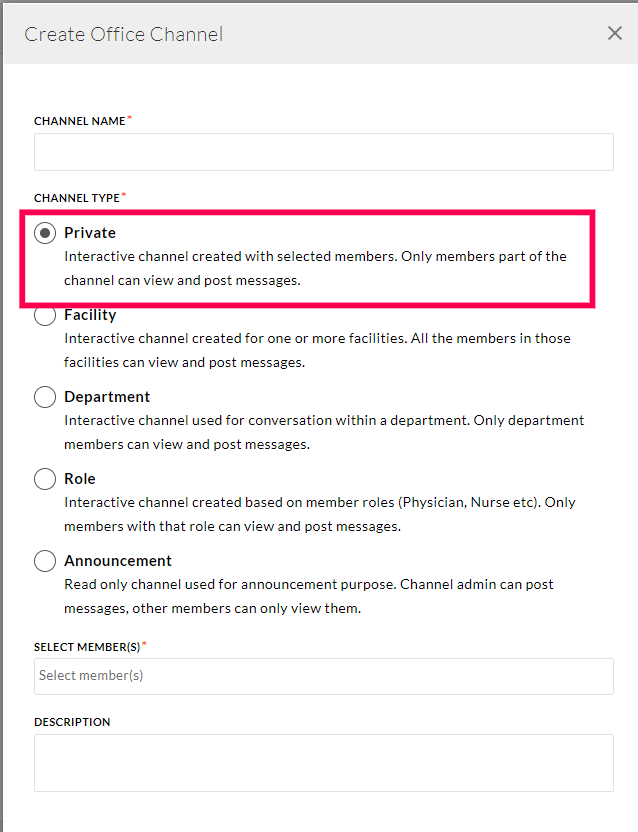
Private Channel
In addition to Facility, Role and Announcement channels, you can also create private channels with selected members of your practice. Private Channels are accessible only to the members who are part of that channel.
Internal Patient Channel
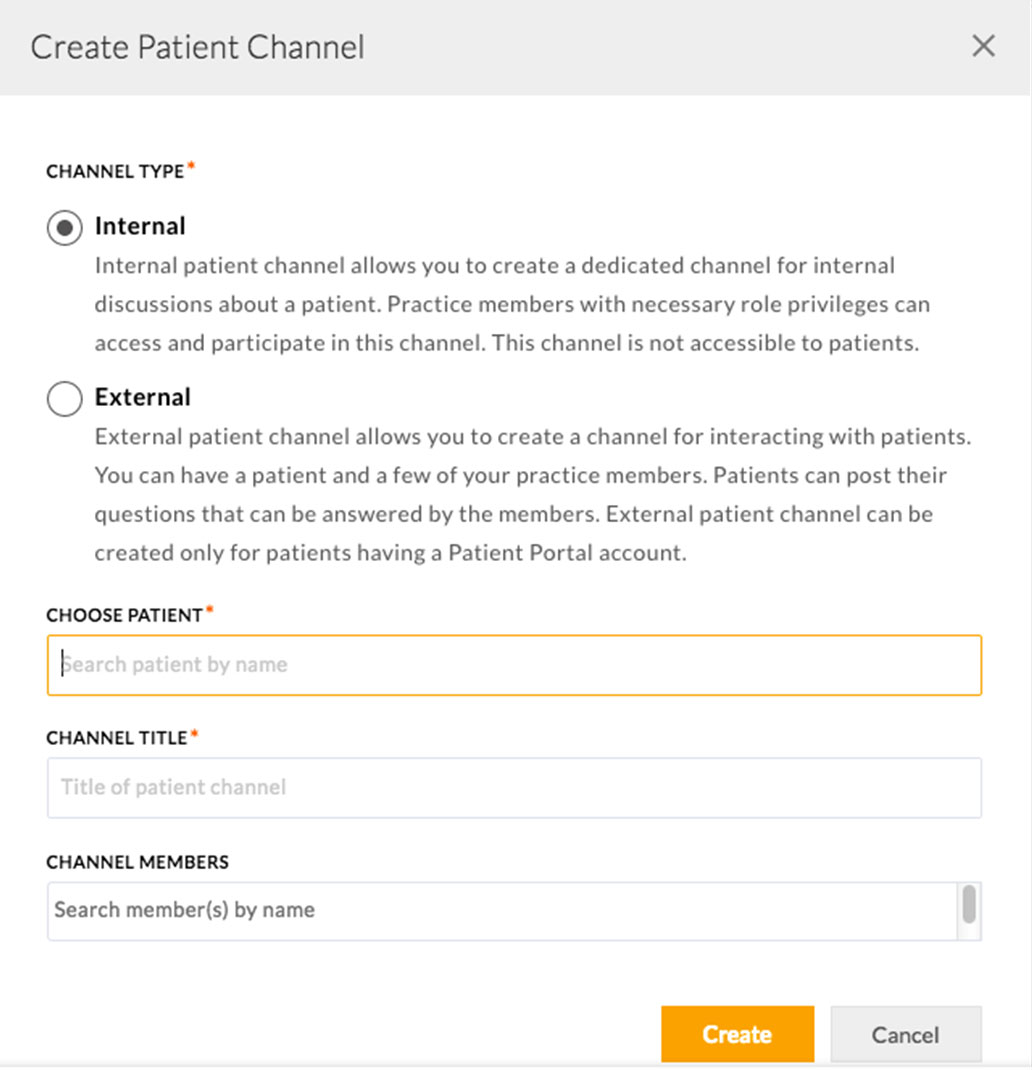
Internal Patient Channel allows you to create a dedicated channel for internal discussions about a patient. Practice members with necessary role privileges can access and participate in this channel.
Note: This channel is not accessible to the patients
External Patient Channel
External Patient Channel allows you to create a channel for interacting with patients. You can have the patient and few of your practice members to be part of this channel. Patients can post their questions that can be answered by the members of this channel.
Note: External Patient Channel can be created only for patients having a ‘Patient Portal’ account.
Patients can do a live chat using this channel from their ‘Patient Portal’ account. Patient coordinators get instant notification whenever the patient post messages in this channel. If required, patient coordinators can bring in providers or other practice members to the channel for answering patients.
- From the EHR Dashboard view, click on the 'Channels' icon. (If you don't see the 'Channels' icon, click on any section and from the left hand side tree, click on the 'More' (...) button and click on 'Customize'. From the 'Customize Member Dashboard' set the 'Channels' option to 'Enabled')
- Choose the 'Patient Channels' tab, and click on the '+' button
- Choose the ‘Channel Type’ as ‘Internal’ or ‘External’
- Search and Choose the patient
- Provide a ‘Channel Title’, viz., ‘John Anton Health Channel’
- Search and add the ‘Channel Members’ who need to be part of this channel.
Contextual Chat
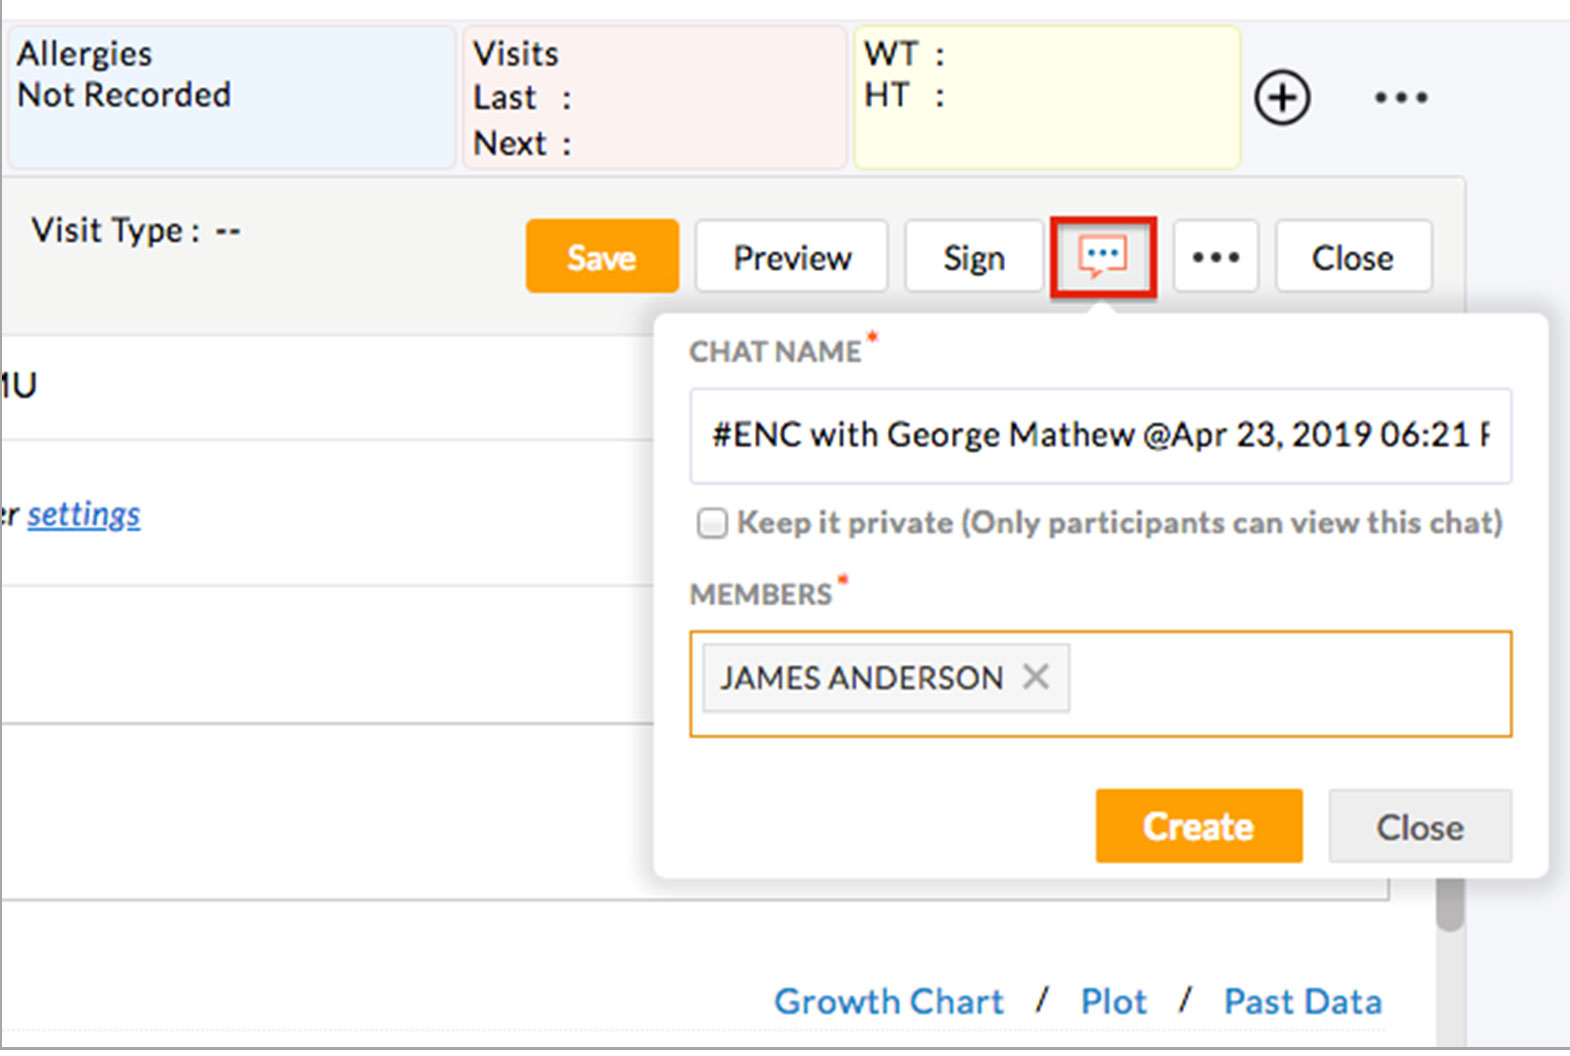
As Charm Connect platform is tightly integrated with CharmHealth EHR, it allows you to start contextual conversations within the EHR workflow. For example, a provider can start a conversation about a patient from the Encounter to discuss the clinical procedures to be performed by the Nurse. Similarly, once the patient checks-in, the front office staff can initiate a conversation from the Calendar section, to notify and discuss with the members concerned.
Contextual Chat is also supported from other sections like Tasks, Labs, Images, Documents, etc. The conversations are tied to that context so that whenever you access a record (Encounter, Appointment, Task, etc.) you can view the related conversations as well.
External Chat
External Chat allows you to converse with CharmHealth EHR users outside your Practice. This feature can be used for discussing the Patient’s medical condition during referral and for sharing medical records with other Practices that use CharmHealth EHR.
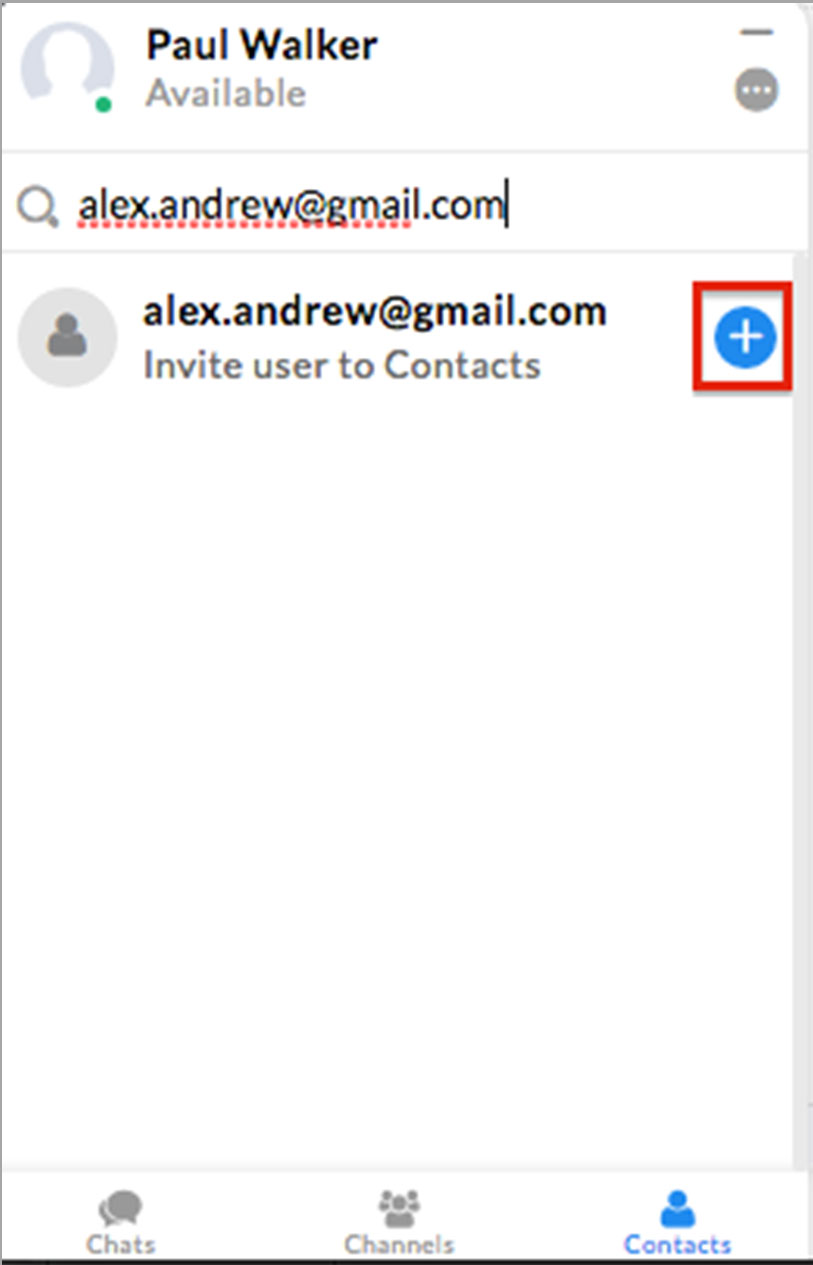
To initiate an external chat, go to the ‘Contacts’ section of the chat bar. Enter the email address of the person with whom you would like to chat and send a chat invitation. You can start the conversation once the other person accepts your invitation.
Message Options
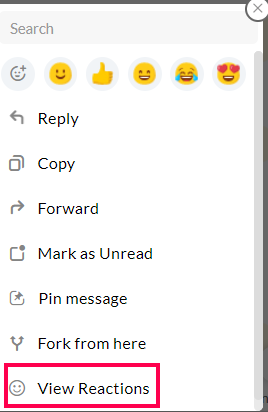
Hover over the message and click on the 'More options' icon. The following options are available.
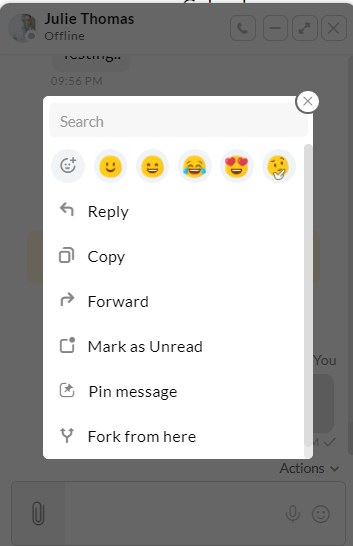
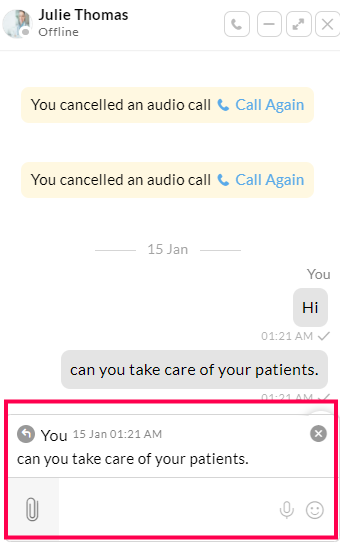
- Reply: You can reply to that particular message. It will quote the message, and then you can type your reply.
- Copy: Copy the message content to your clipboard
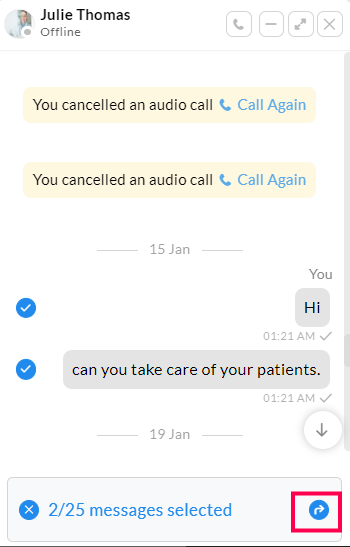
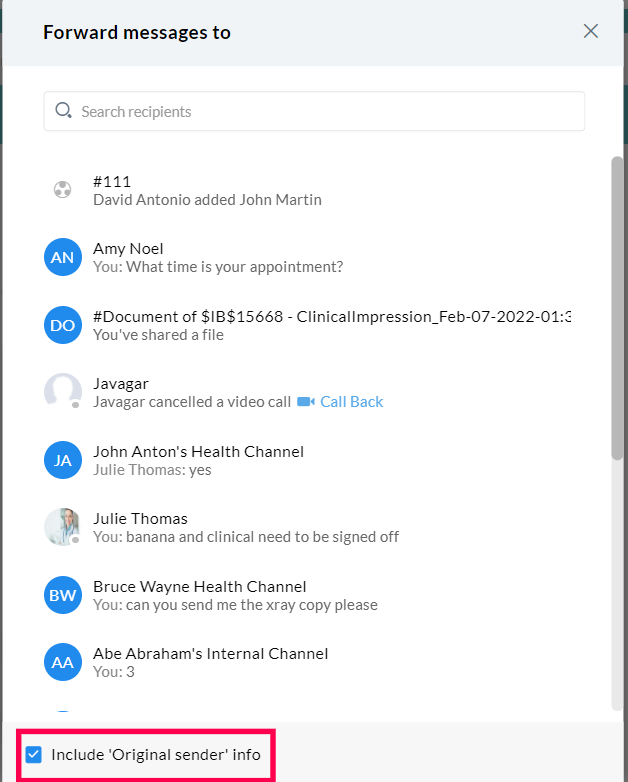
- Forward: You can forward the particular message to other contacts/channels/group chats. You can also select the messages that you need to forward. Click on the 'Forward' arrow and select the recipients to forward. You can include the 'Original sender' information.
- Mark as unread: You can mark the message as unread. The chat window will get closed on the screen, and it will be marked with the unread icon in the left sidebar.
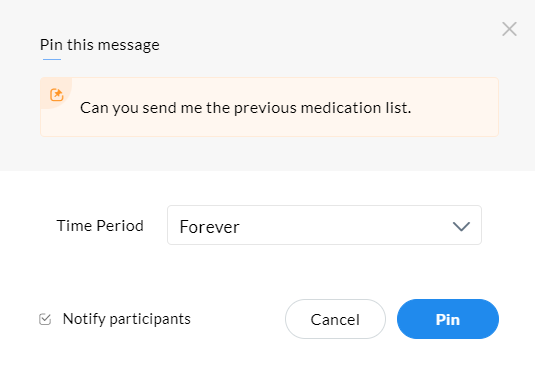
- Pin Message: The important message can be pinned at the top of the Chat window. Clicking on the pinned message will point you to the message in the chat window. Click on the 'Pin Message' option. A pop-up window will open where you can set the period of the pinned message as 1 hour, 8 hours, 1 Day, 1 Week, Forever, and Custom. You can notify the participants in a conversation about a pinned message by clicking on the 'Notify participants' checkbox.
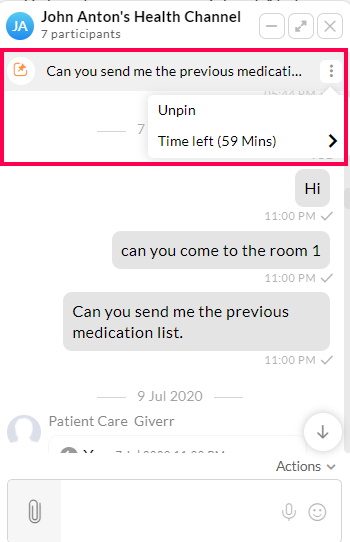
You can unpin the message later by clicking on the 'Unpin' option under the 'More options'(...) icon against the pinned message. The time left for the pinned message will be visible, and you can modify the time period if needed.
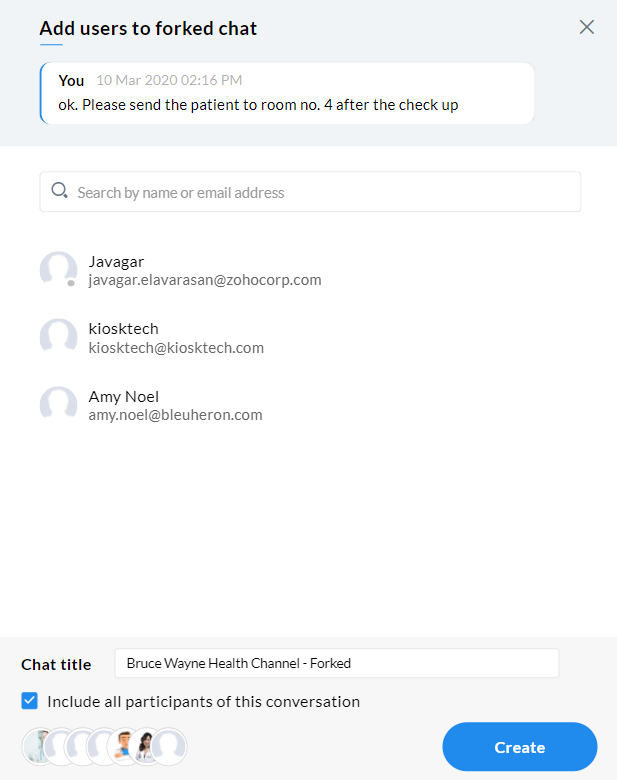
- Fork from here: You can start a new chat from the current message onwards. You can also include other contacts. Click on the 'Fork from here' option. Add users to the Forked Chat. If you need to include the existing chat participants, then enable the 'Include all participants of this conversation' checkbox. Enter the Chat Title and click on the 'Create' button. The new chat that is created by forking will be a standalone chat, i.e. further changes to the old chat will not be reflected in the new forked chat.
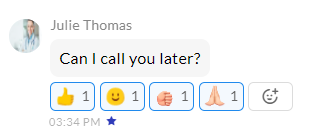
- Add Reactions: You can react to the message with the emojis by clicking on the 'Add Emojis' icon. Your reactions will appear below the message.
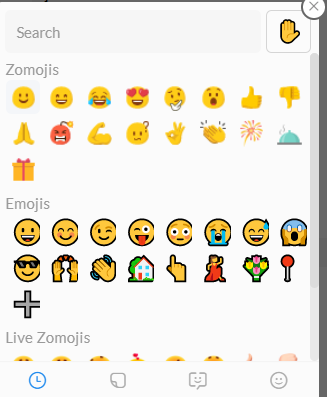
Once the emoticons are added, you can use the 'Add Emojis' icon displayed at the end of the emojis list to add more emojis. The emojis that you have added will appear in blue color. Tap on the emoji to remove your reaction.
Click on the 'View Reactions' options under the 'More Options' icon against the message to view the list of users who reacted to that message.
Actions in Chat Window
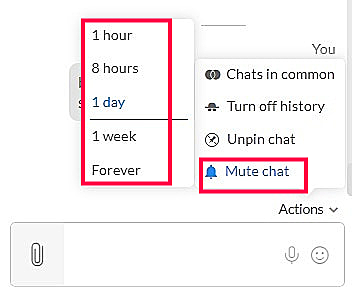
You can do the following actions in a one-one Chat window. Click on the 'Actions' option at the right bottom of your chat window. The following options are available.

- Chats in common: You can view all the recent chats that the member and you have in common. Click on the chat to view the transcripts and continue if necessary.
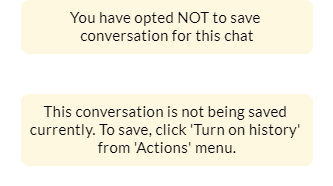
- Turn off History: This option will not save the transcripts in the database. You can Turn on history anytime to save the conversation.
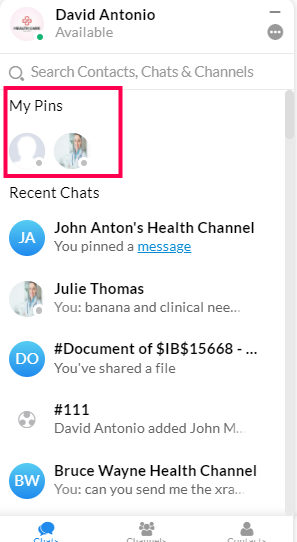
- Pin Chat: To pin a chat for quick access. The pinned chat will appear under the 'My Pins' section. You can 'Unpin' the chat anytime later.
- Mute Chat: The chat can be muted for a certain period or forever. Click on the 'Unmute Chat' option to receive notifications.
In Group Chat
You can do the following actions in the Group Chat window. Click on the 'Actions' option at the right bottom of the chat window. The following options are available.
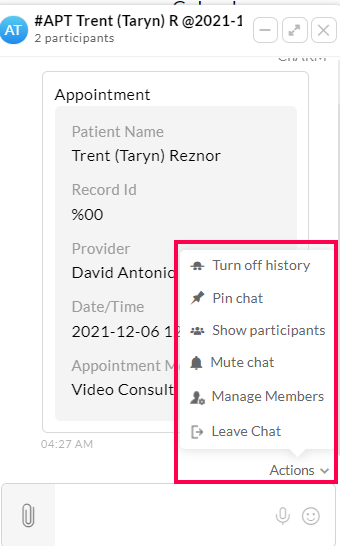
- Show Participants: The list of participants in the group will be shown.
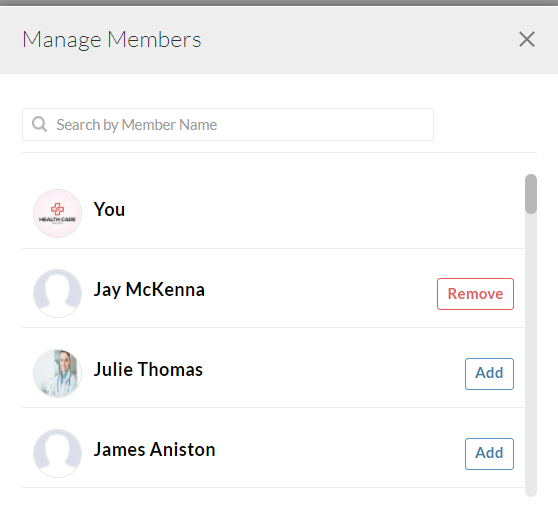
- Manage Members: You can Add or Remove the members in the group.
- Leave Chat: Once you leave the group chat, you cannot perform any actions further in the chat.
In Channels
- Leave Channel: You can leave the Channel by clicking on the 'Leave Channel' option under the 'Actions' menu.
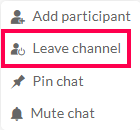
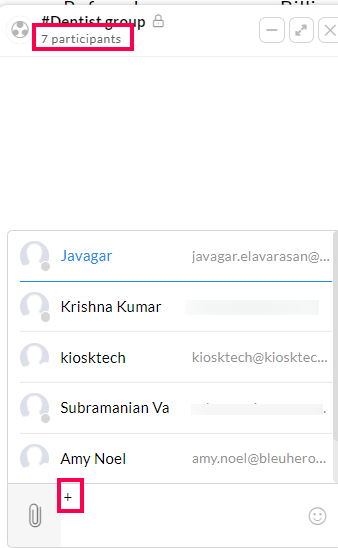
- Add Participant: To add a new member to the chat, use the ‘+’ key in the chat window. You can also click on the 'Participants' link to search or add the participants.
Starred Messages
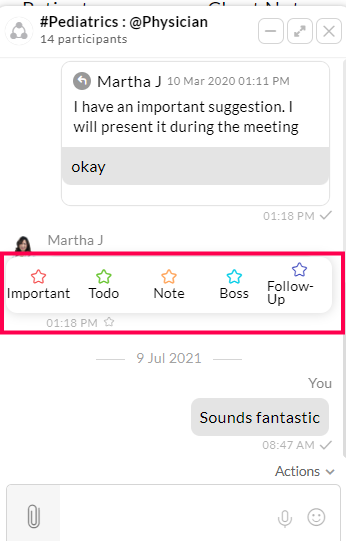
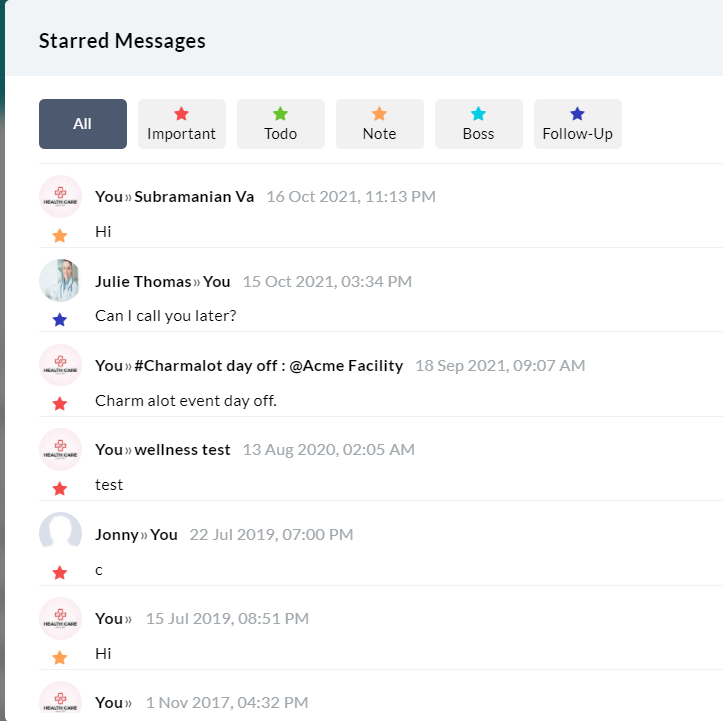
You can bookmark or save important messages by starring them, and it can be accessed anytime under the 'Starred Messages' section. To star a message, hover over the message and click on the Star icon that appears on the left side of the message. Select an option from the category. The star message is divided into 5 categories to streamline your messages. They are Important, To do, Note, Boss, and Follow up.
Patient Chat History
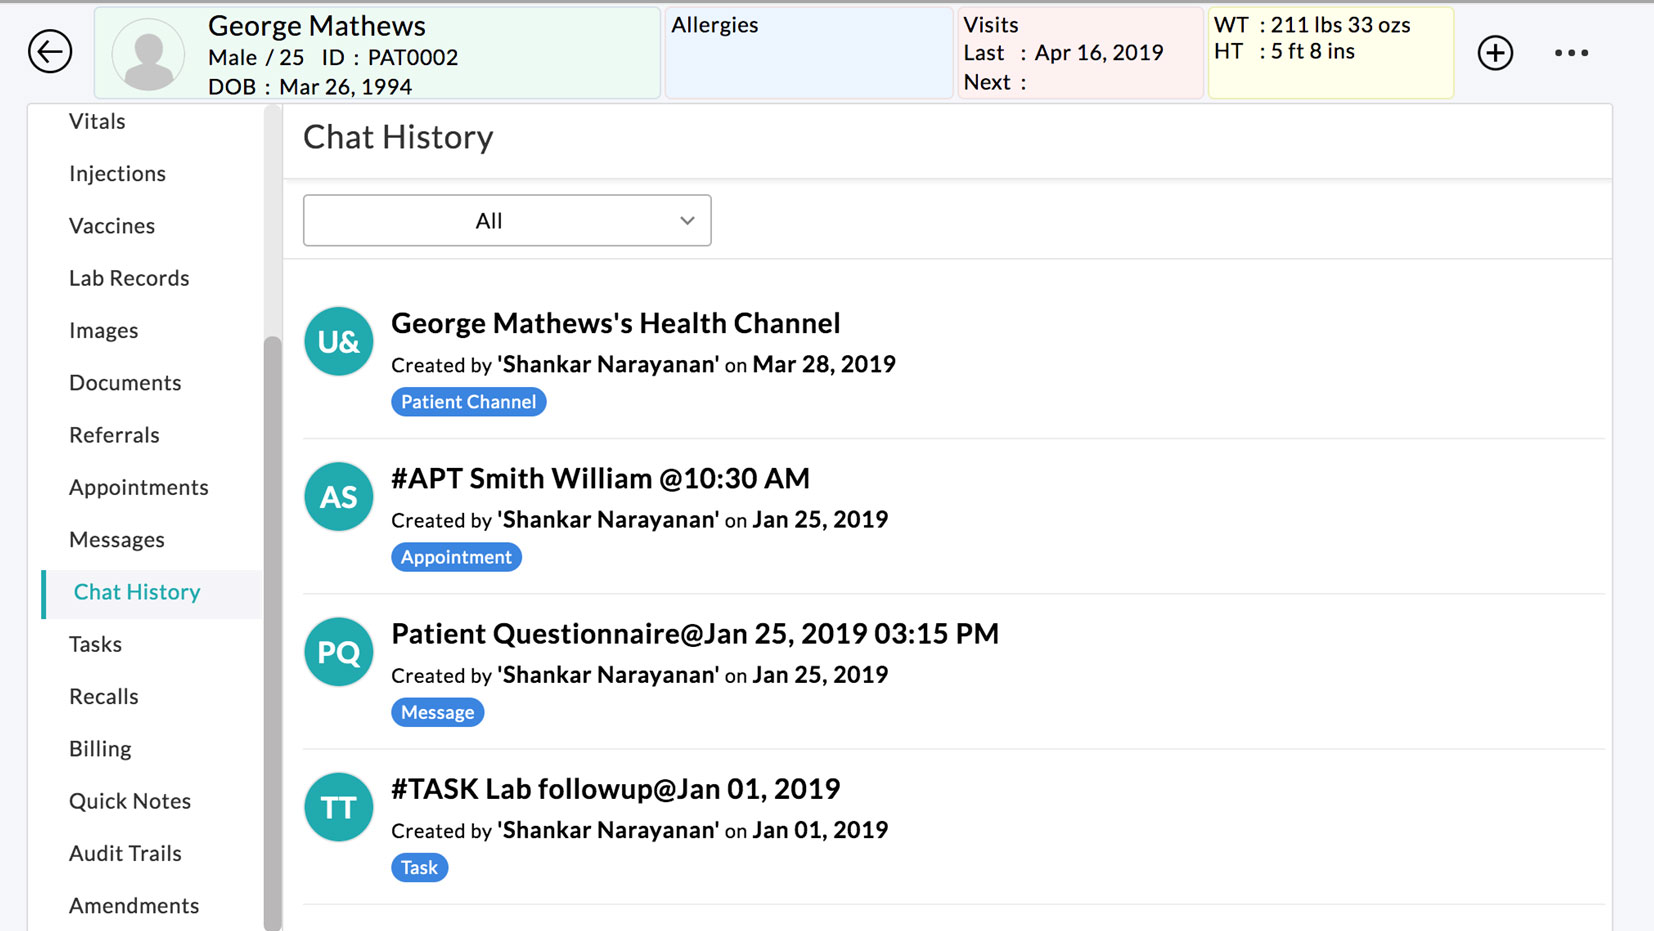
You can view all the discussion around a patient from Patient ‘Dashboard > Chat History’ section. This section lists down all the conversations that happened in the Patient Channel and all other contextual chats related to that patient.
Search Chat History
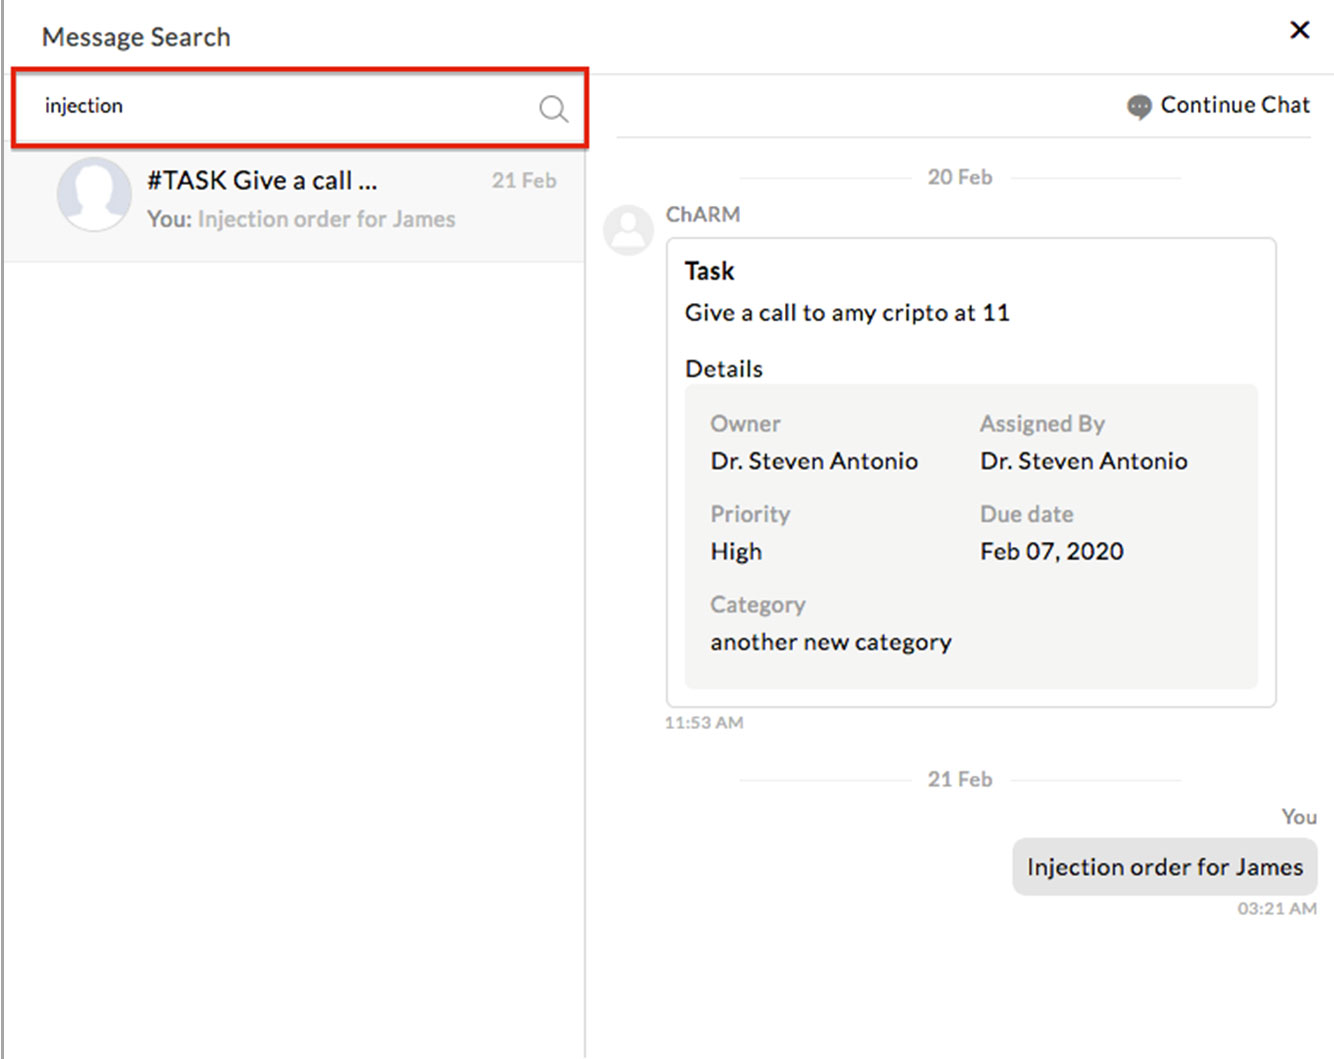
All the conversations you had with the practice members and patients are searchable. To search through the chat history, click on the ‘…’ icon available on the right-corner of the chat window and click on the ‘Message Search’ option.
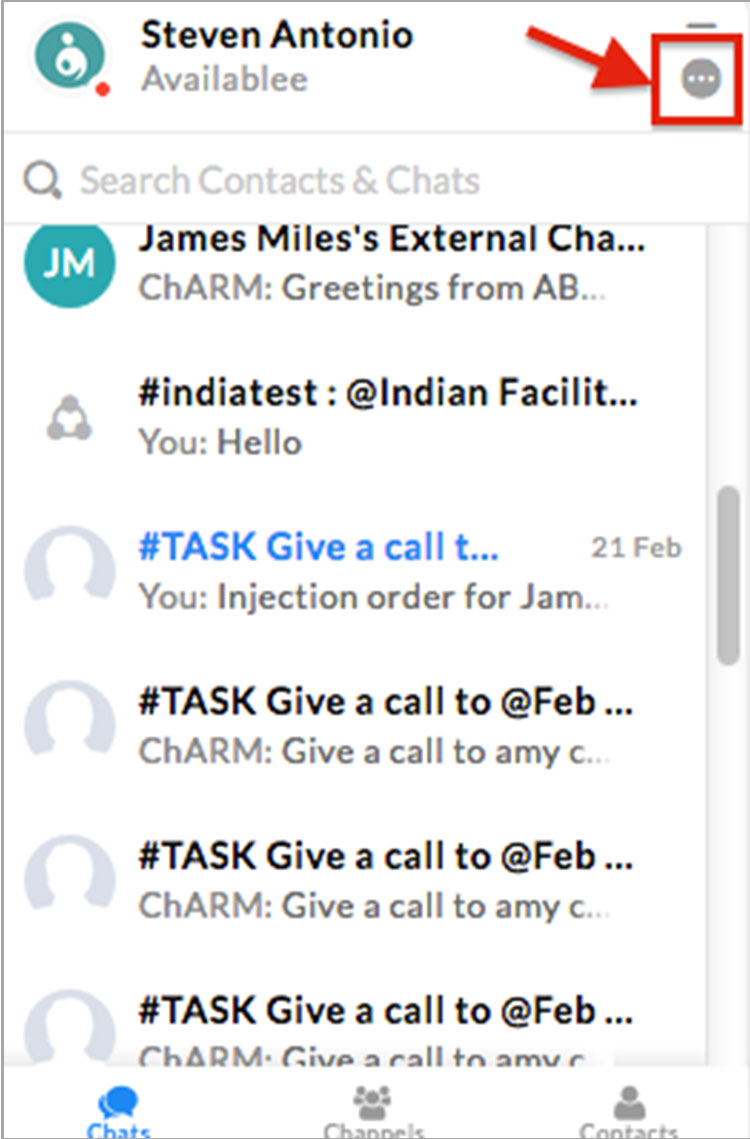
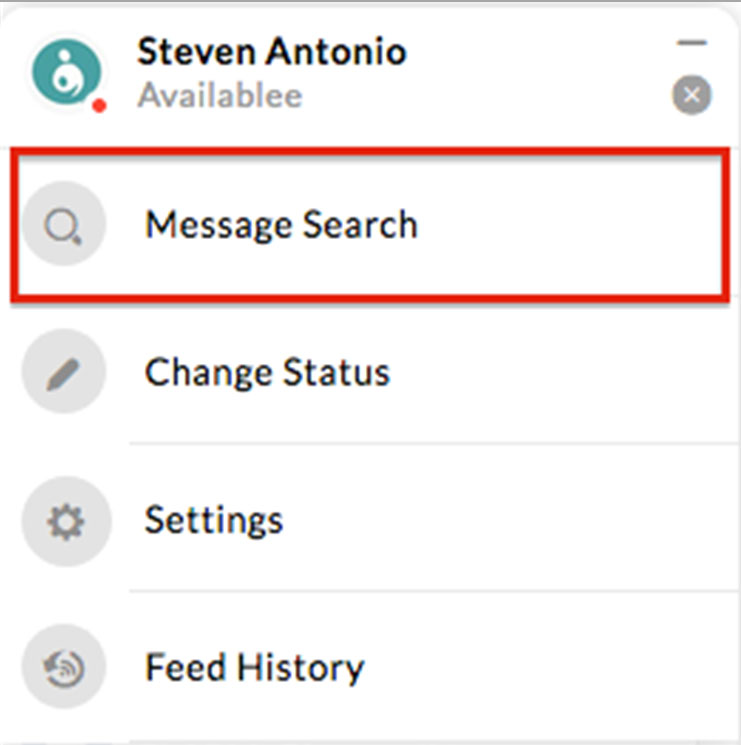
Key-in the word to the searched and press ‘ENTER’. All the previous conversations matching the given keyword are listed. You can view the related message and continue the chat contextually, if required.
