Two-way Text
Two-way Text feature enables Practices to send and receive secure text messages from patients. This HIPAA-compliant feature is available for all Practices across the US and Canada.
You can reduce the time spent answering the phone calls, communicate with patients without a PHR account, store records of the past conversations, delegate, and track the tasks using the feature.
In addition, subscribing to the Two-way Text feature enables you to use the Automated Booking Assistant, which allows Patients to confirm, reschedule, or cancel their appointments by text message.
Let's find out how to:
Enable Two-way Text
You need to subscribe to the 'Text/Voice Notifications' add-on if not done already. Then follow the steps below to enable the Two-way Text feature.
- Login to your CharmHealth EHR account and go to the Settings page.
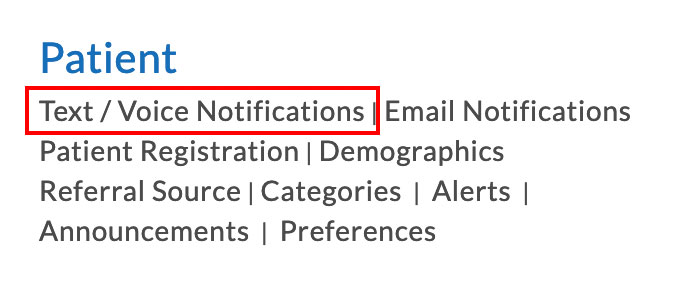
- Select the 'Text/Voice Notifications' tab under the Patient section.
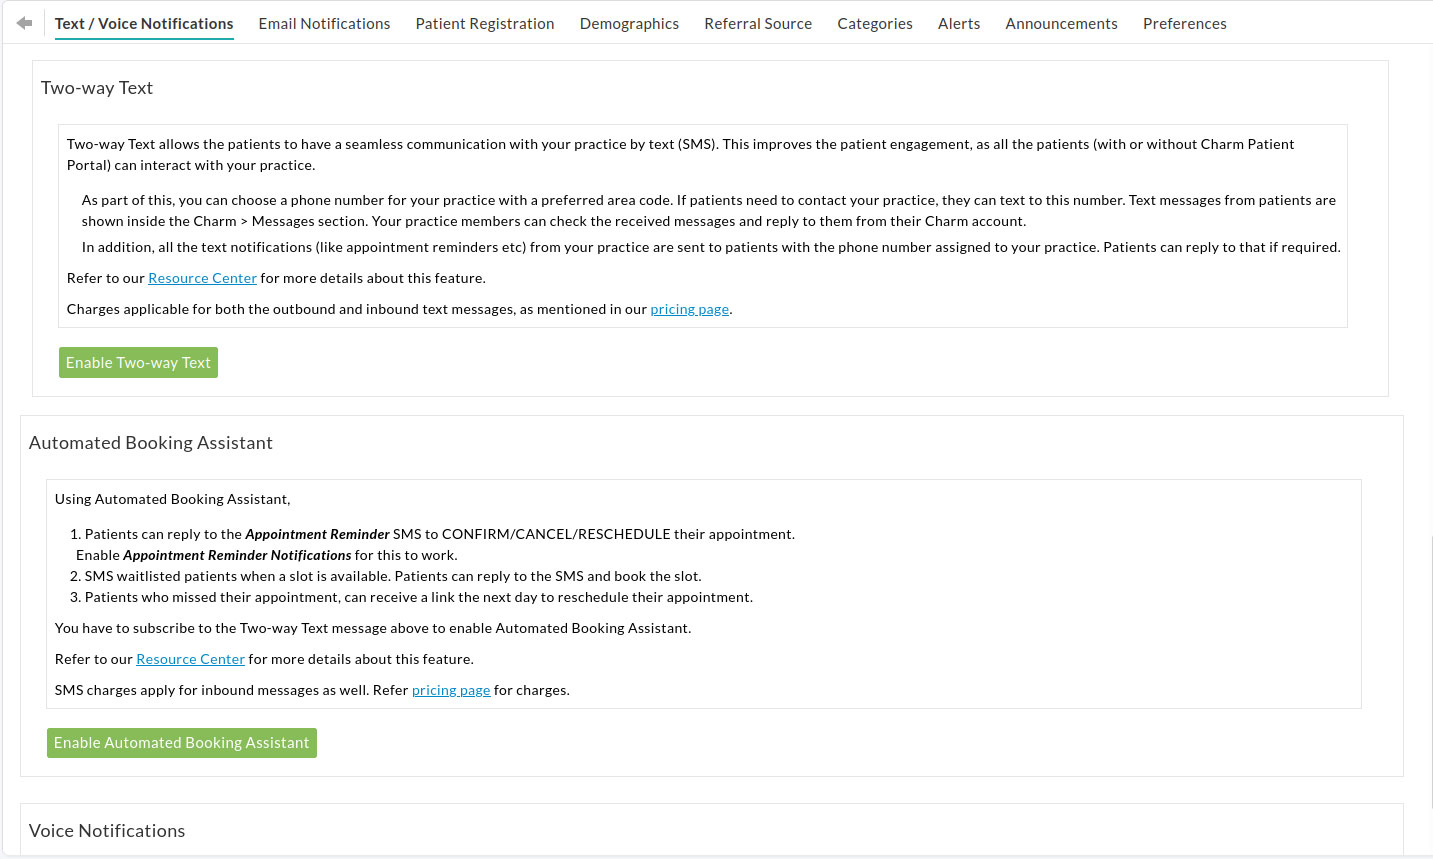
- Click on the 'Enable Two-way Text' button.
- Choose a phone number for your practice next. You can search the available phone numbers by area code. Select your preferred phone number and click on the 'Add' button.

This enables the Two-way Text feature for your account. From then on, the selected phone number delivers all the automated text messages (appointment reminders, billing updates, etc.) from your account to the patient, and they can send reply messages to the same number.
You can also post this phone number on your website and inform the patients to contact you just by sending a text to that number.
- If you want to auto assign the text messages from patients to their respective in-house care team members, choose 'Yes' for the 'Auto-assign patient messages to the in-house care team members' option.
- The 'Auto-assign patient messages to last sender' option gets enabled for your Practice by default. This ensures that Patient messages are auto assigned to the Practice Member who had messaged the Patient within the last week.
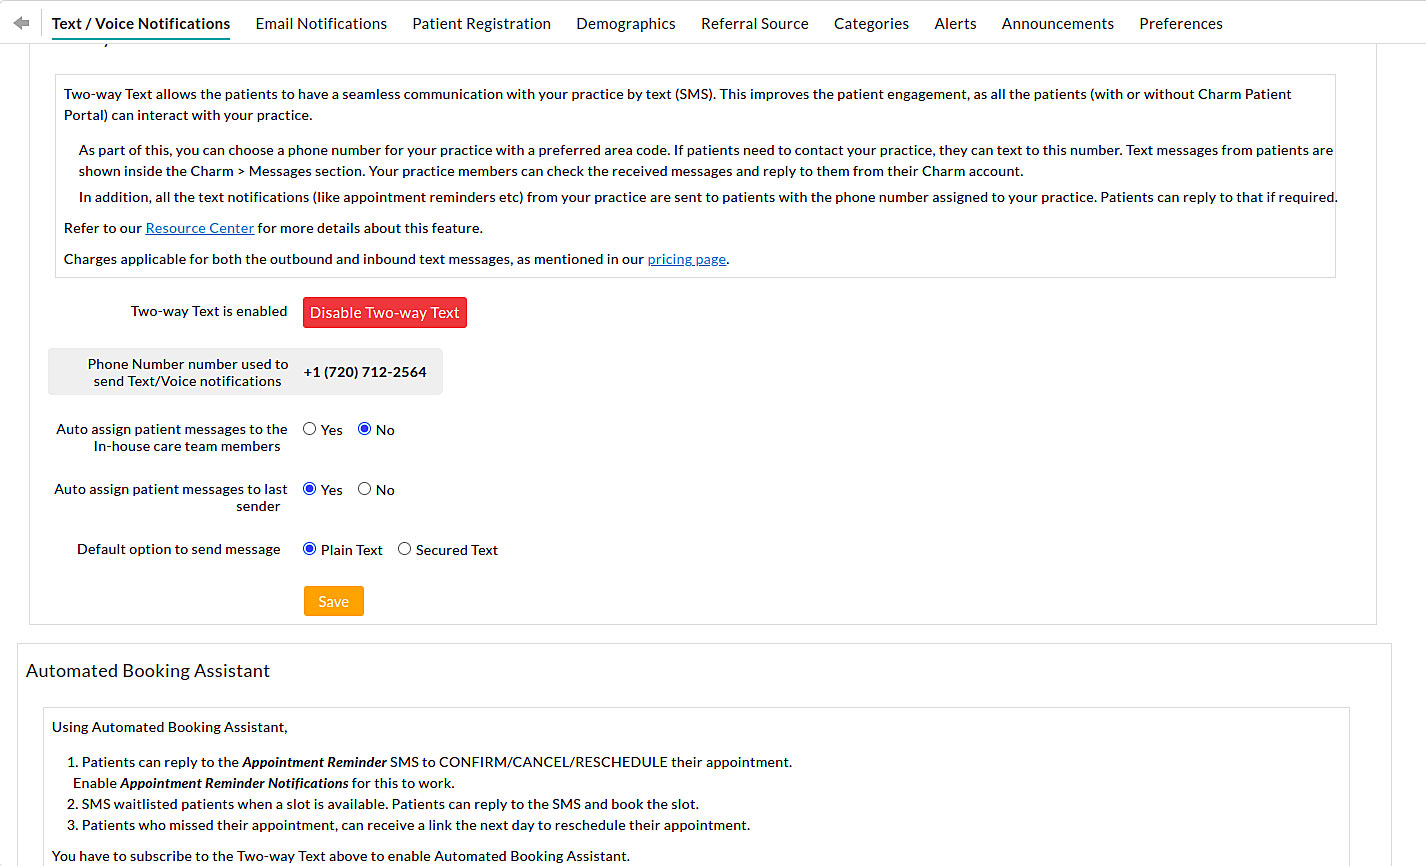
- You can also choose your default messaging option based on Practice preferences.
- Click on the 'Save' button.
Send Text Messages to Patients
You can start messaging the patients soon after enabling the Two-way Text feature. Here are the steps to send a text message to a patient.
- Go to the Messages tab on your dashboard.
- Click on the Text Messages > All section.

- Enter the patient's Name or ID in the search bar and select the patient from the drop-down list.
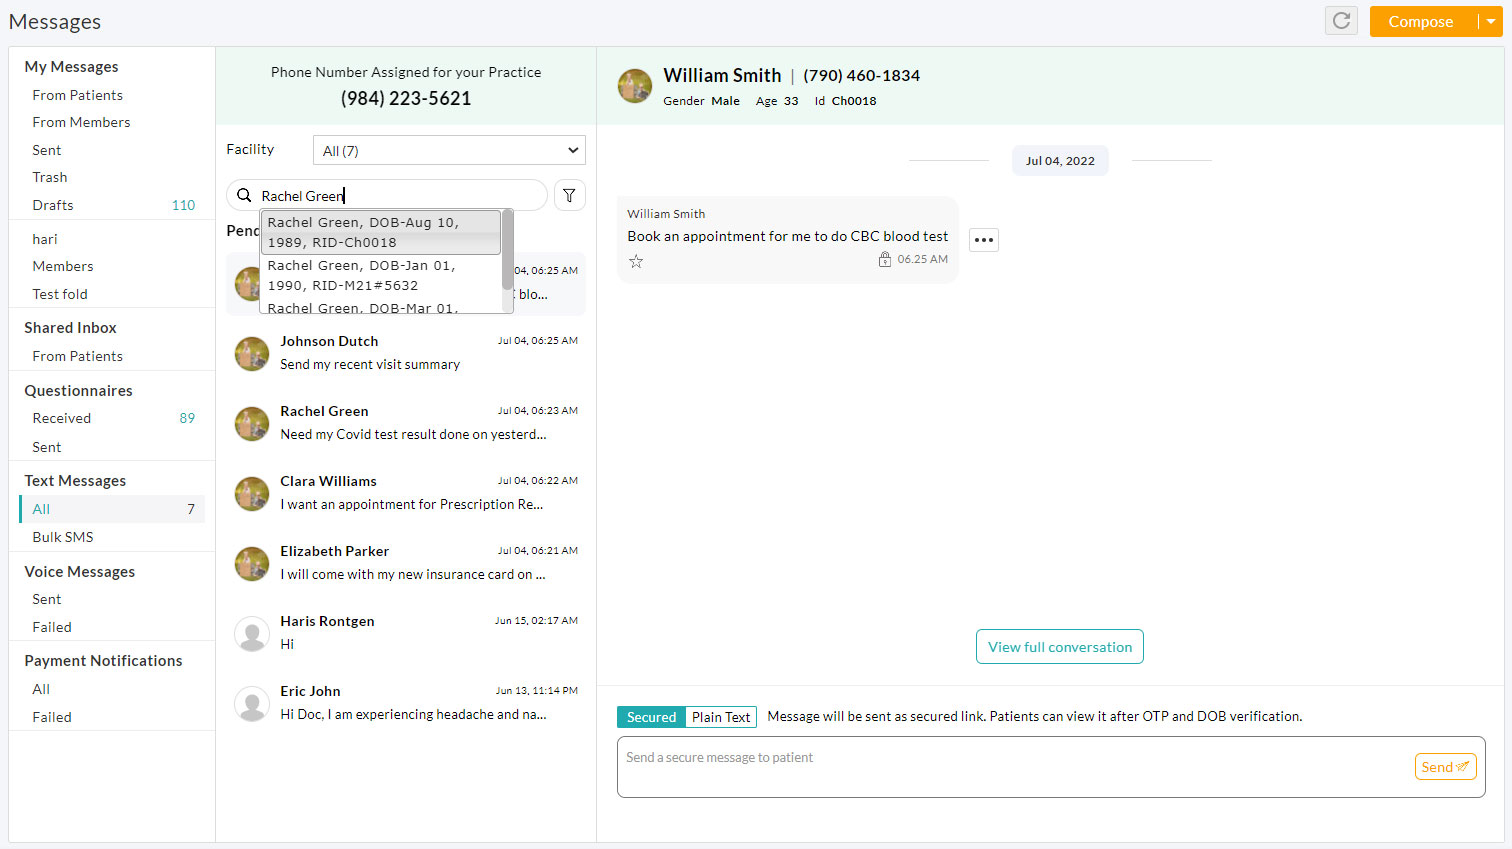
- This opens the conversation view displaying the previous message sent/received to/from the patient.
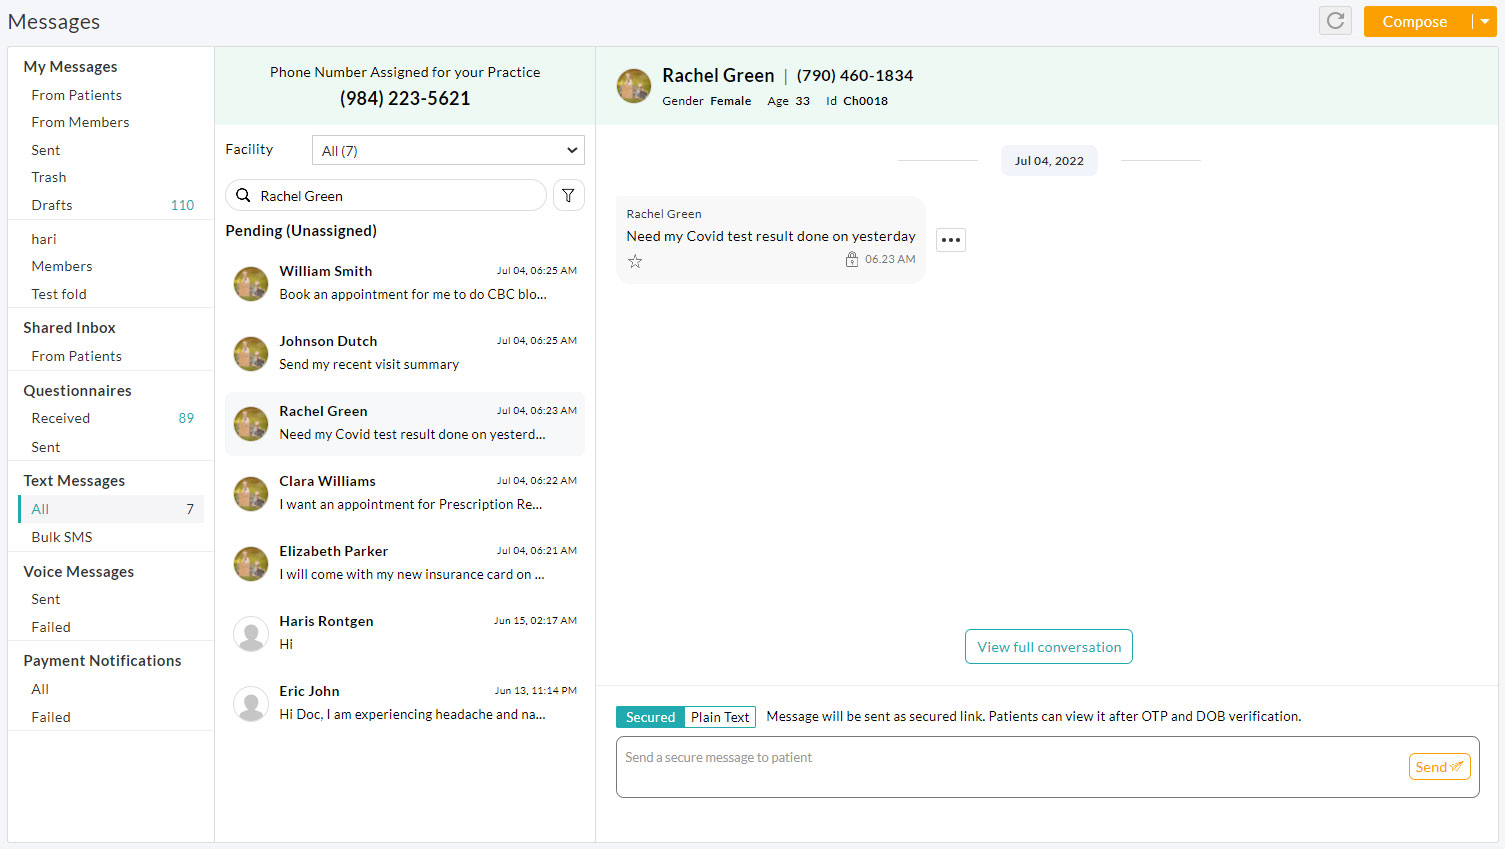
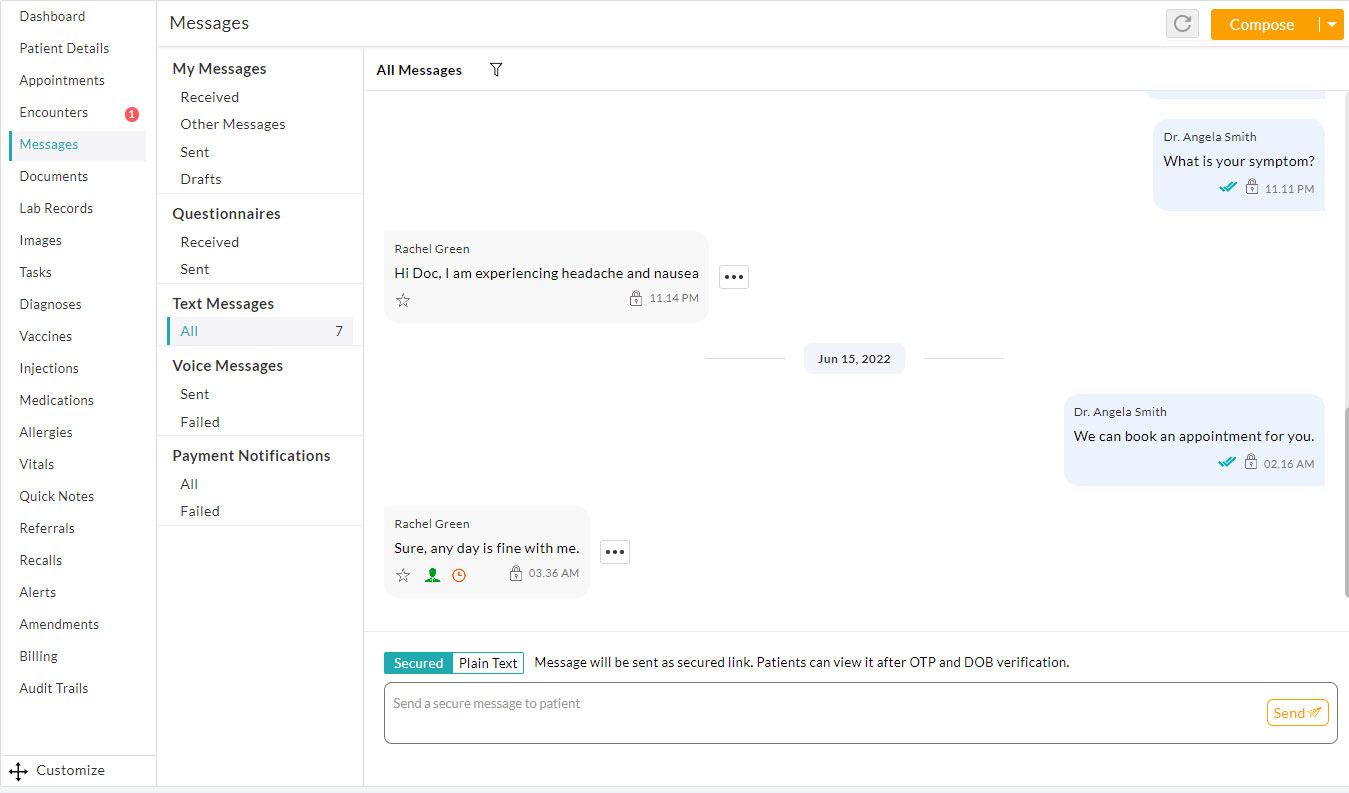
- Use the text box at the bottom of the conversation view to send a text to the patient. You can either send a secured message or a plain text message.

Secured Text Message
You can use the Secured Message option if the message contains PHI. Follow the steps below to send a secured message.
- Select the Secured toggle option
- Enter your message in the text box
- Click on the 'Send' button
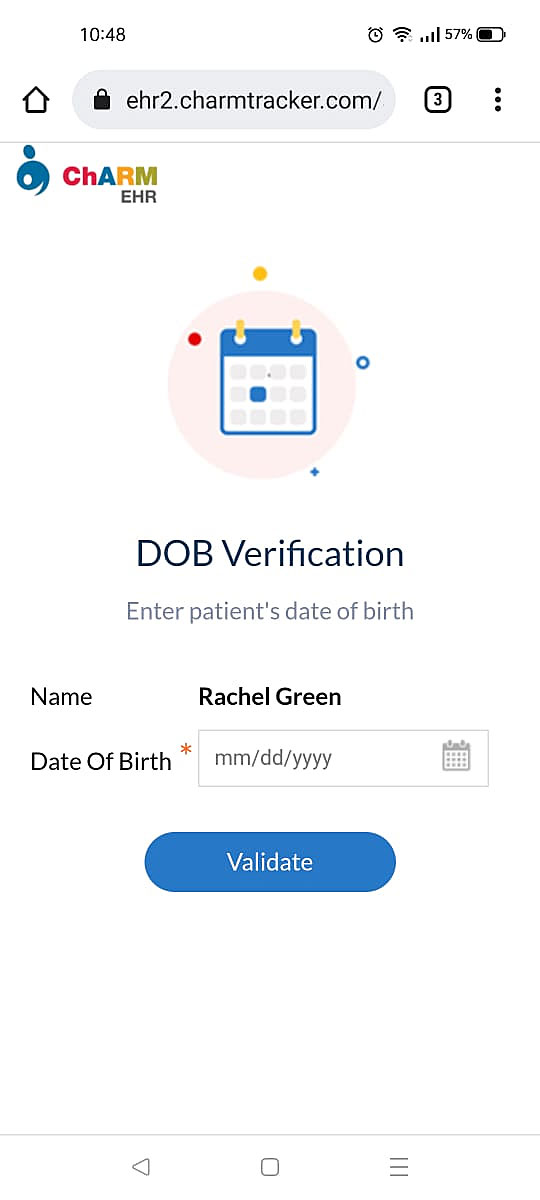
When you send a secure message, patients do not get the actual message content as part of the text. Instead, they get a secure link in the text. They can click on the link, enter the OTP and confirm their date of birth to view the message.The OTP is valid for two hours. After that, patients can use the 'Resend' link to get a new OTP.
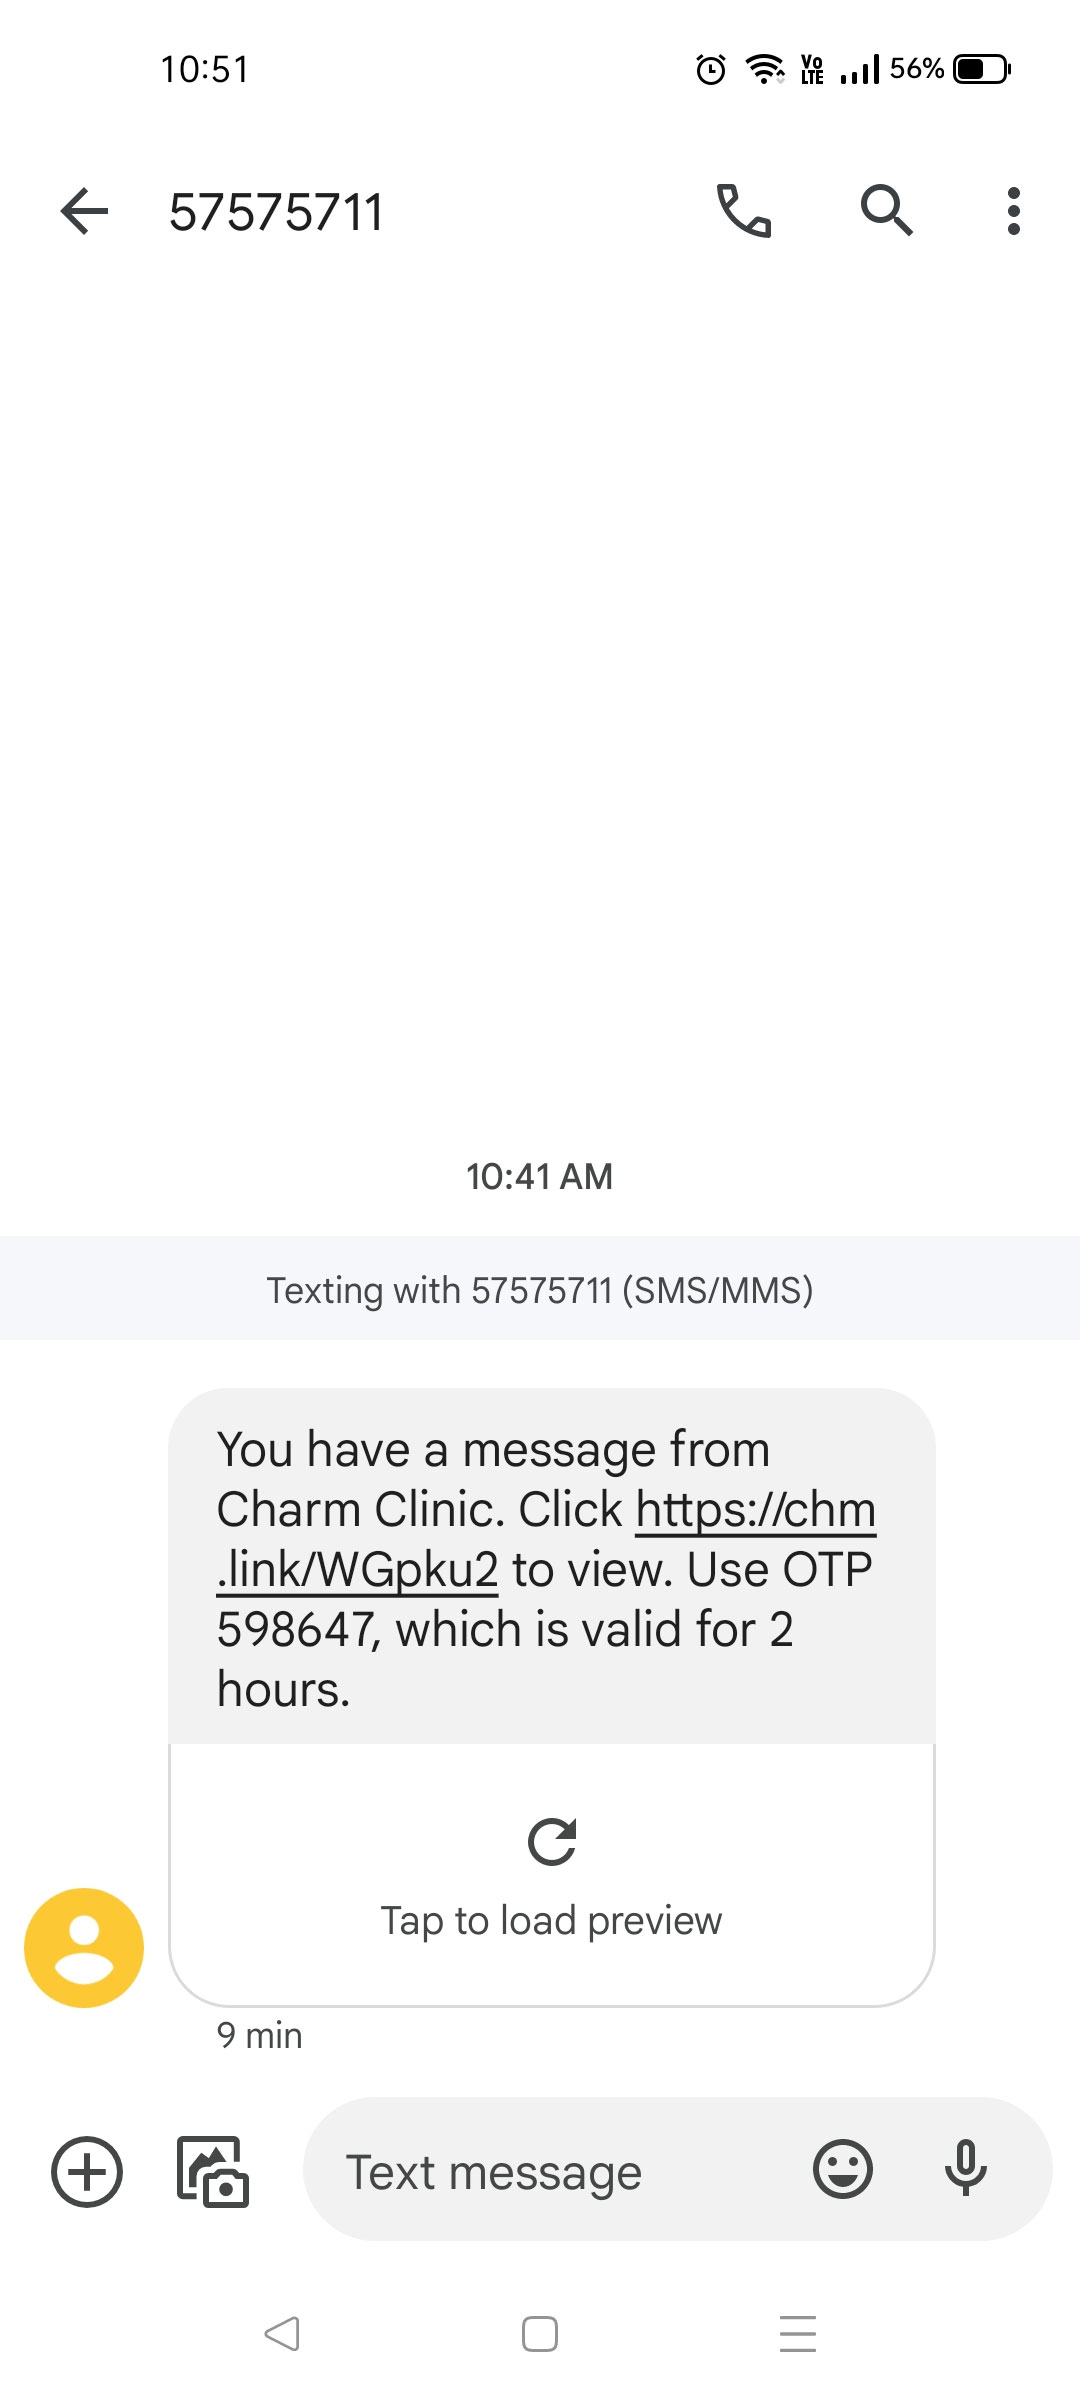
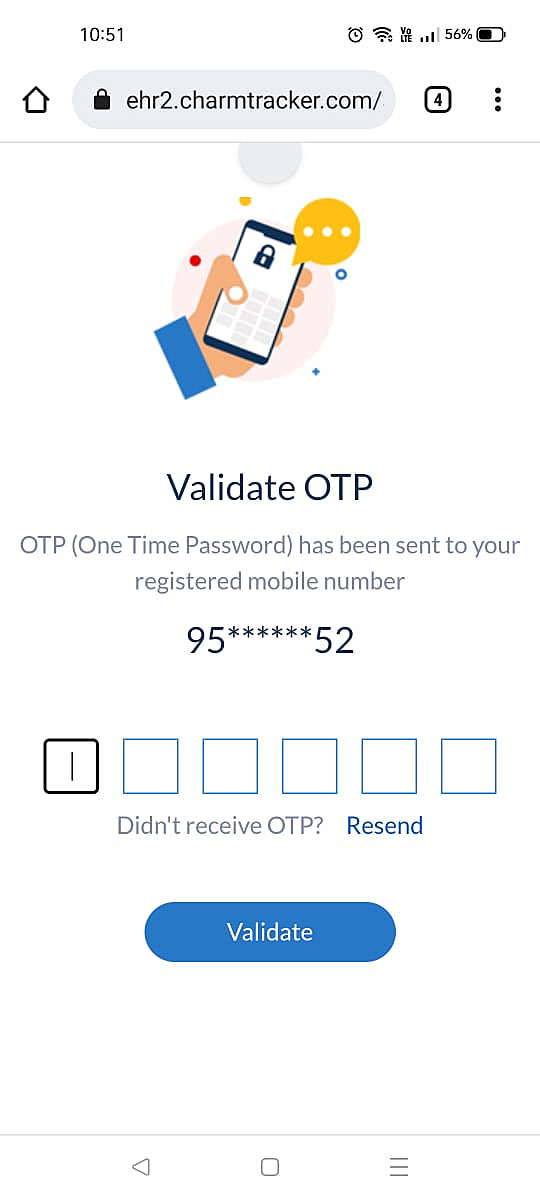
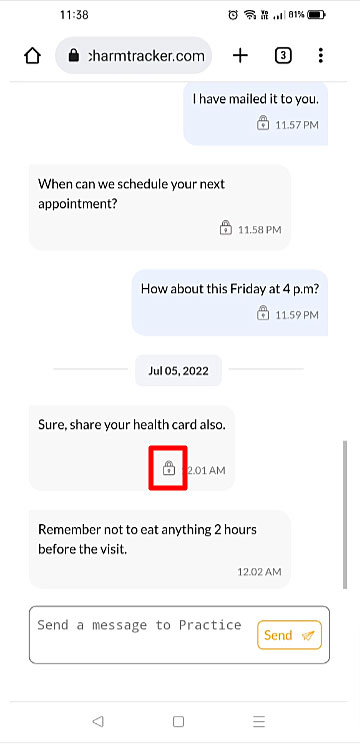
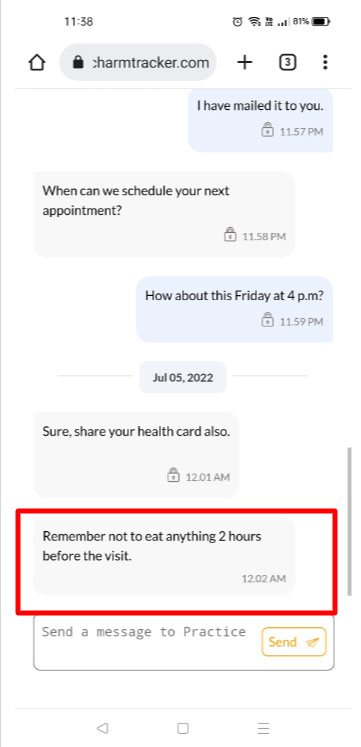
Patients can view all the previous messages sent and received in chronological order and reply to the message securely from this view. A 'Lock' icon indicates secured messages sent/received for Practice reference.
Plain Text Message
You can use the Plain text option if the message does NOT contain PHI. Follow the steps below to send a plain text message.

- Select the 'Plain Text' toggle option.
- Enter your message in the text box.
- Click on the 'Send' button.
When you send a plain text message, patients get the message content as part of the text and can reply to you by text.
In addition, you can also access the text messages sent/received to/from a patient from the Patient Dashboard > Messages > Text Messages section.
Note: You have to enable the Text Notification option under the Patient Demographics > Patient Preferences section to message patients.

Receive Text Messages from Patients
You can view all the text messages sent by patients to your practice number from the Messages > Text Messages > All section. The default view lists all the pending messages that are not assigned to any members.
If you have multiple facilities in your Charm account, you can filter the messages by facility. Click on the 'Filter' icon to sort incoming messages based on your preferences. You can also use the filter icon to filter the messages by different criteria.
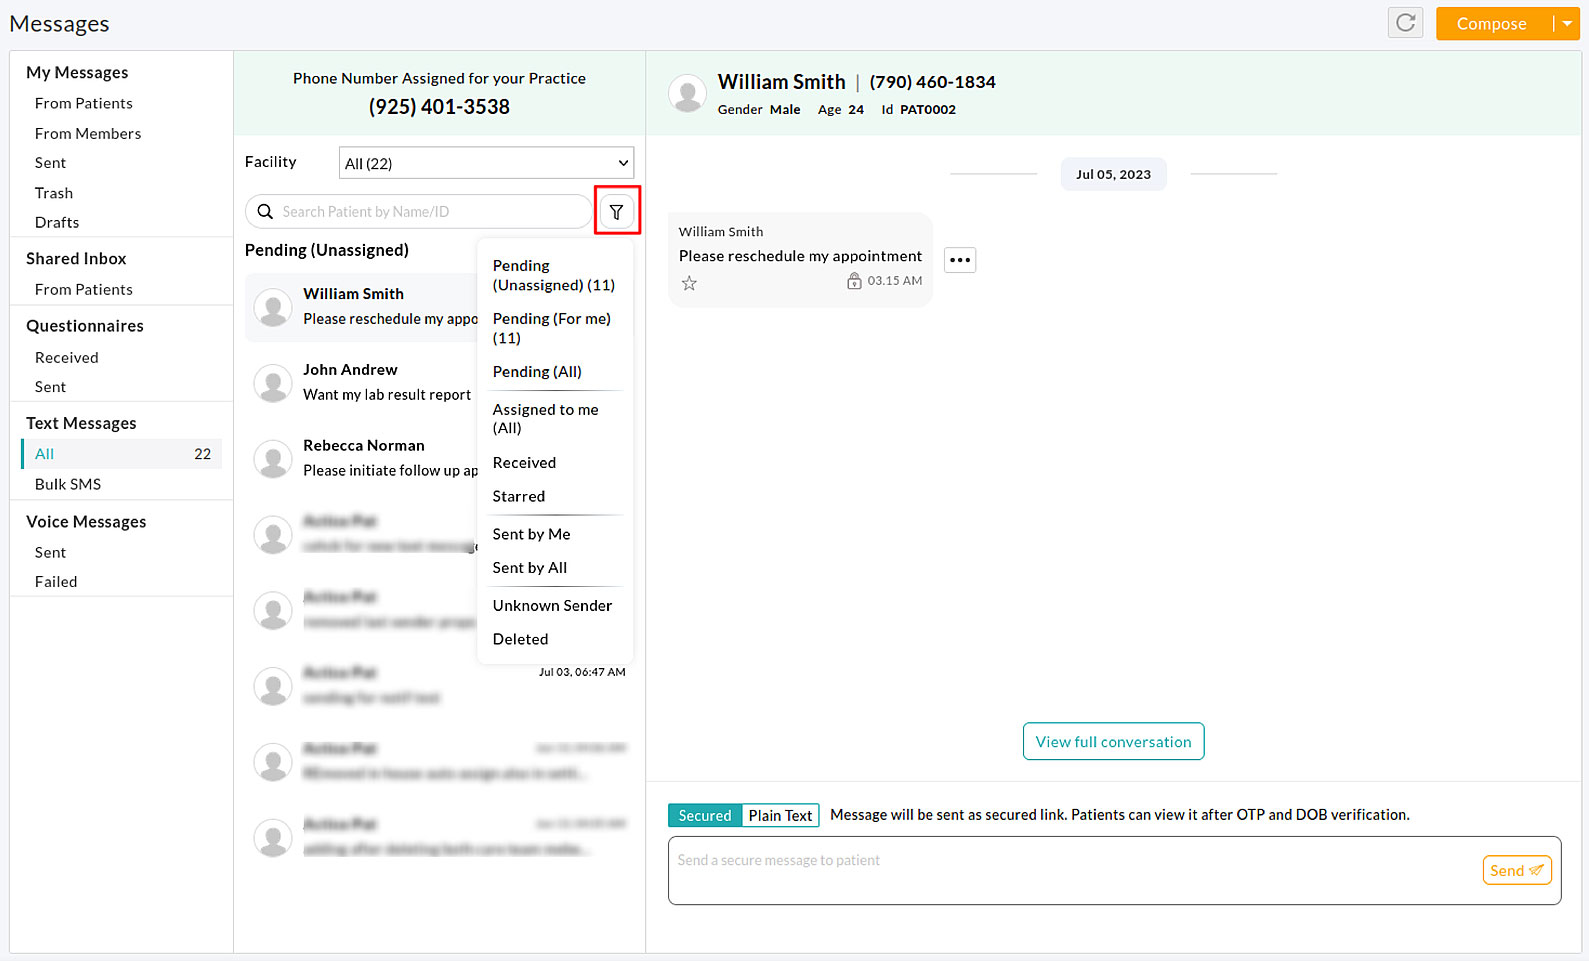
Clicking on the message preview from the left pane opens the entire message on the right pane.
In case the auto-assign feature is enabled in settings, the respective Practice Members can filter and view those messages in the 'Pending (For Me)' section.
The notification count in the 'Text Message > All' section displays the combined number of pending messages in the Pending (Unassigned) and Pending (For Me) sections. This ensures the patients messages are not left unattended.
Note: If you do not see any messages in the Pending (Unassigned) section but the notification count is still present in the 'All' messages section, click on the 'Filter' icon and check the Pending (For Me) folder.
Process the Patient Messages
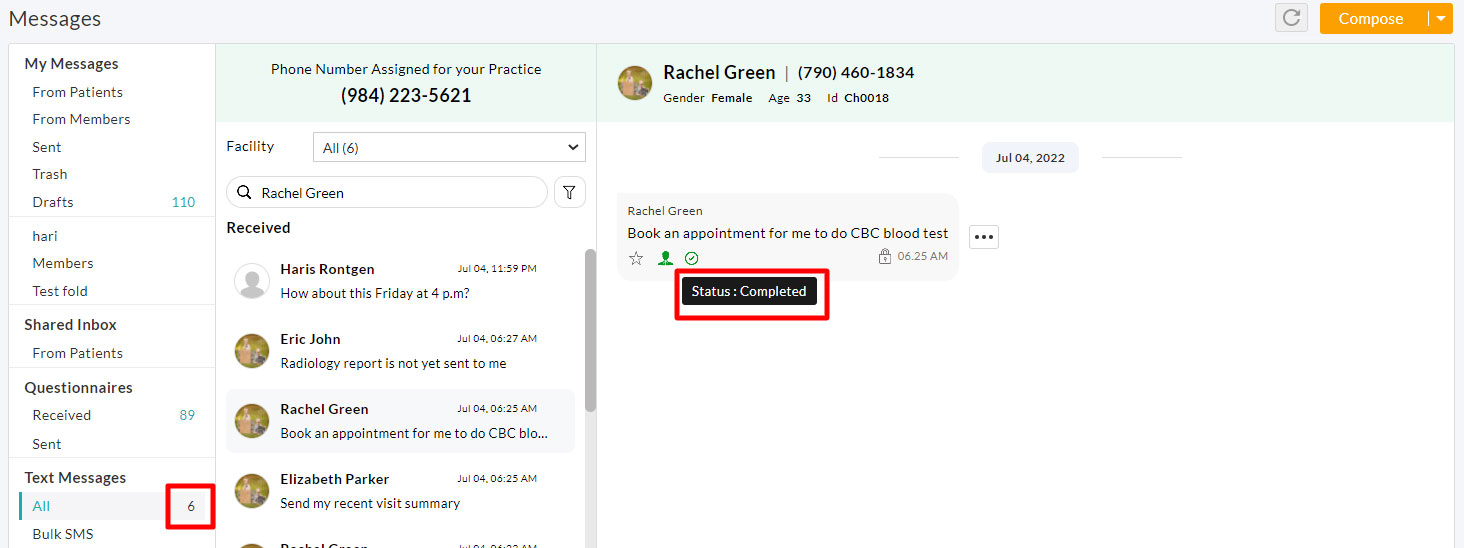
The count displayed against the 'All' tab gets reduced when you process the messages. You can do either of the three actions below to process a message.
- Reply to the message and mark it as completed.
- Assign the message to another member in your practice.
- Delete the message if there is no action required.
Reply and Mark as Complete
You can reply to the patient message using the message box at the bottom of the right pane.
Once replied, you can click on the 'More Options' icon and select the 'Mark as Complete' option. This changes the status of the message as completed and reduces the pending message count.

Assign to Other Members
If the message requires action from a member in your practice, you can assign it to them by following the steps below:
- Click on the 'More Options' icon (3 dots).
- Select the 'Assign Members' option.
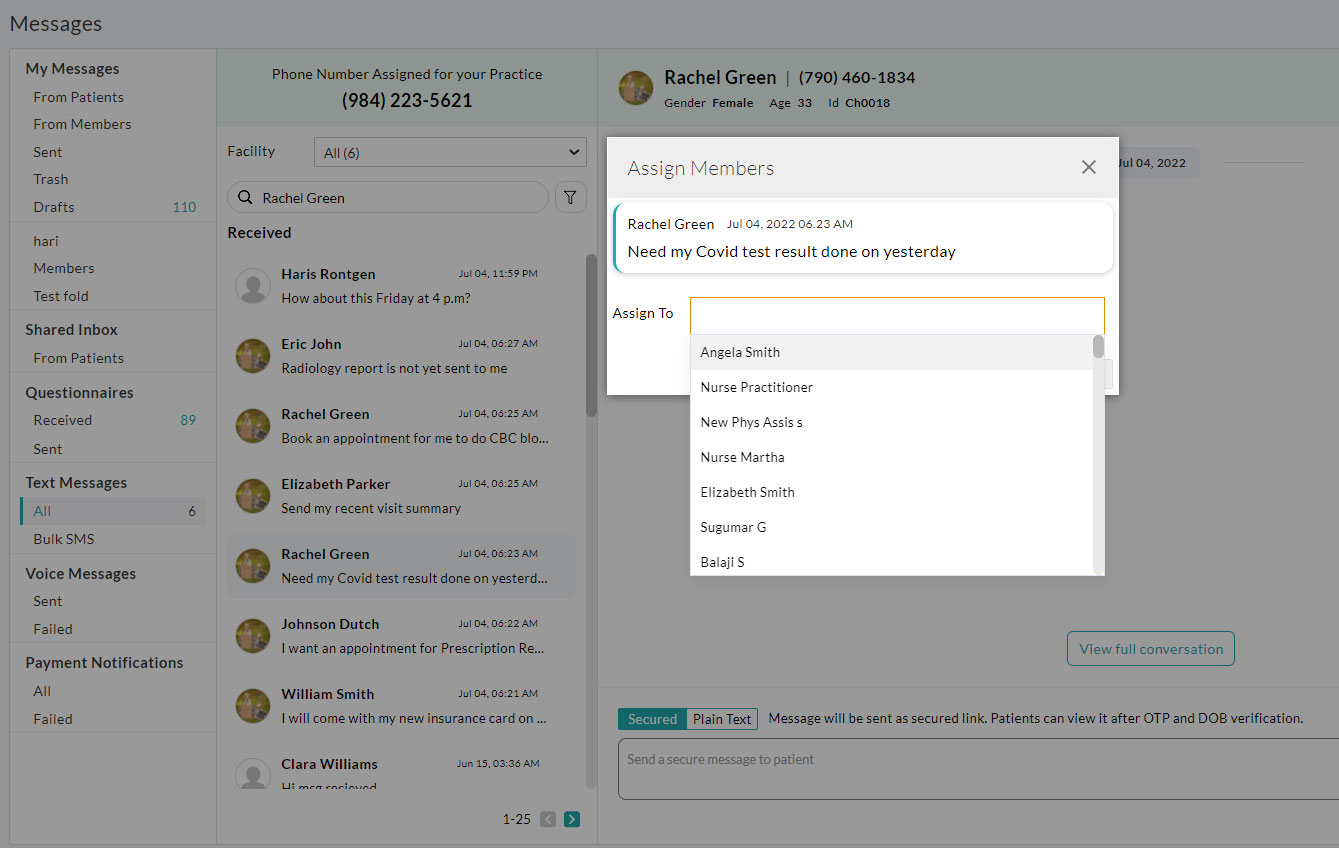
- Choose the member name(s) from the drop-down list.
- Click on the 'Assign' button.
Track Messages
Members can view the messages assigned to them from their Charm account and act on them. Once done, they can mark the status of the message as completed.
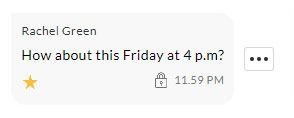
A Red or Green Clock icon represents the task completion status. A red clock indicates a pending message, whereas green indicates a completed message.


Delete The Message
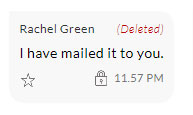
You can delete messages that don't need an action using the 'Delete' option under the 'Menu' icon. The delete action does not delete the message. Instead, the status gets updated as 'Deleted', and the pending message count gets reduced.
Bookmark Messages
Click on the 'Star' icon below the message to bookmark it for later reference. You can use the Starred filter option to view all your bookmarked messages.
View Message Conversations
By default, the latest message received from the patient is shown on the message conversation view. You can click the 'View full conversation' button at the bottom to view past messages sent/received to/from the patient. You can scroll the message window to view the entire patient conversation in a chronological order.

You can also view the entire conversation from the Patient Dashboard > Messages section as well.
Role Privileges & Other Settings
The Practice Admin and members with the required role privileges can access and manage the Two-way Text feature. The Admin can grant the role privileges using the below steps:
- Click on the Roles tab under the Facility section on the Settings page.
- Edit an existing role or create a new role.
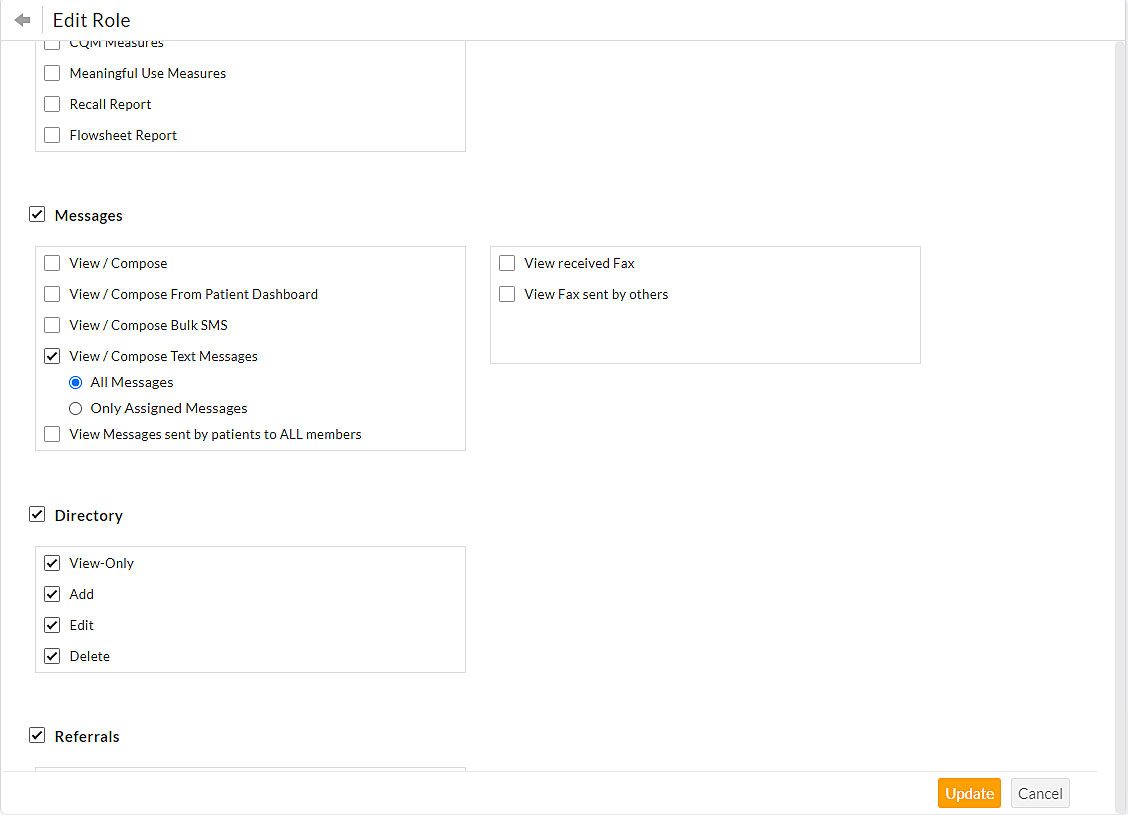
- Select the 'View/Compose Text Messages' privilege under the 'Messages' section.
- Choose between 'All Messages' or 'Only Assigned Messages' privilege next.
- Click on the 'Update' button, respectively.
Selecting All Messages allows members to:
- View, reply, or delete all the incoming messages from patients.
- Assign the messages to other members in your practice
- Access all the filter options
Selecting Only Assigned Messages allows members to:
- View, reply, or mark as complete the messages assigned to them.
- Access the Assigned to me (Pending), Assigned to me (All), and Sent by me filter options alone.
Members receive a sound or pop-up notification within their Charm account whenever a new message is received from the patient.

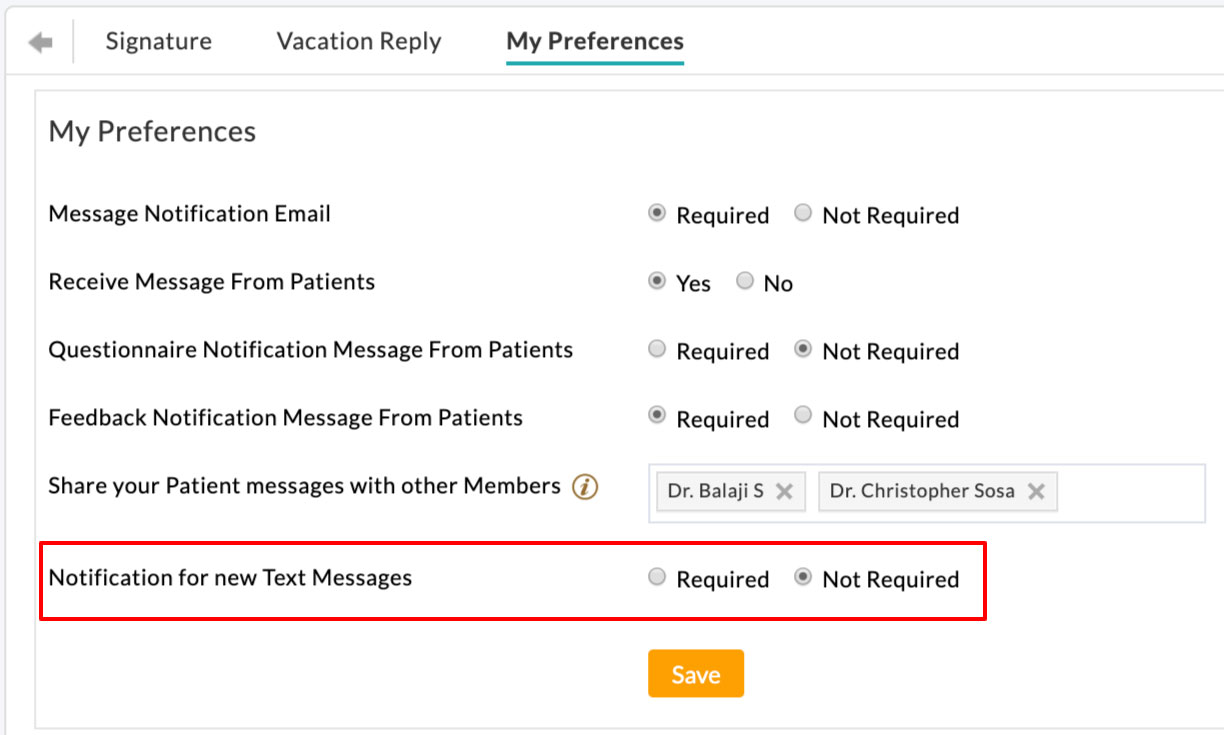
Members can turn-off this notification from the Settings > Messages > My Preferences section if required.
