Appointment Settings
- Configuring Time Zone
- Configuring Facility Working Hours
- Configuring Provider Working Hours
- Configuring Working Hour Exception
- Online Appointment
- Auto Convert Appointment Time to the Patient's Time Zone
- Configuring Visit Types
- Configuring Event Types
- Associating Visit Types to Providers
- Schedule Rules for Visit Type
- Create Pre-Screening Form
- Assign Pre-screening Form to Providers
- Configuring Auto-share Questionnaires
- Configuring Appointment Fields Settings
- Configuring Appointment Status
- Configuring Appointment Preferences
- Vacation Reply
Configuring Time Zone
- Go to Settings > Calendar > Facility Timings

- Select the Facility for which the time zone needs to be defined.

- Select the appropriate time zone for your Facility location.
- Click on the 'Save' button to save changes.
Configuring Facility Working Hours
- Click on the Settings > Calendar > Facility Timings
- Select the Facility for which the Working Days and Hours need to be defined.
- Assign the start time and end time for each working day and mark non-working day(s).
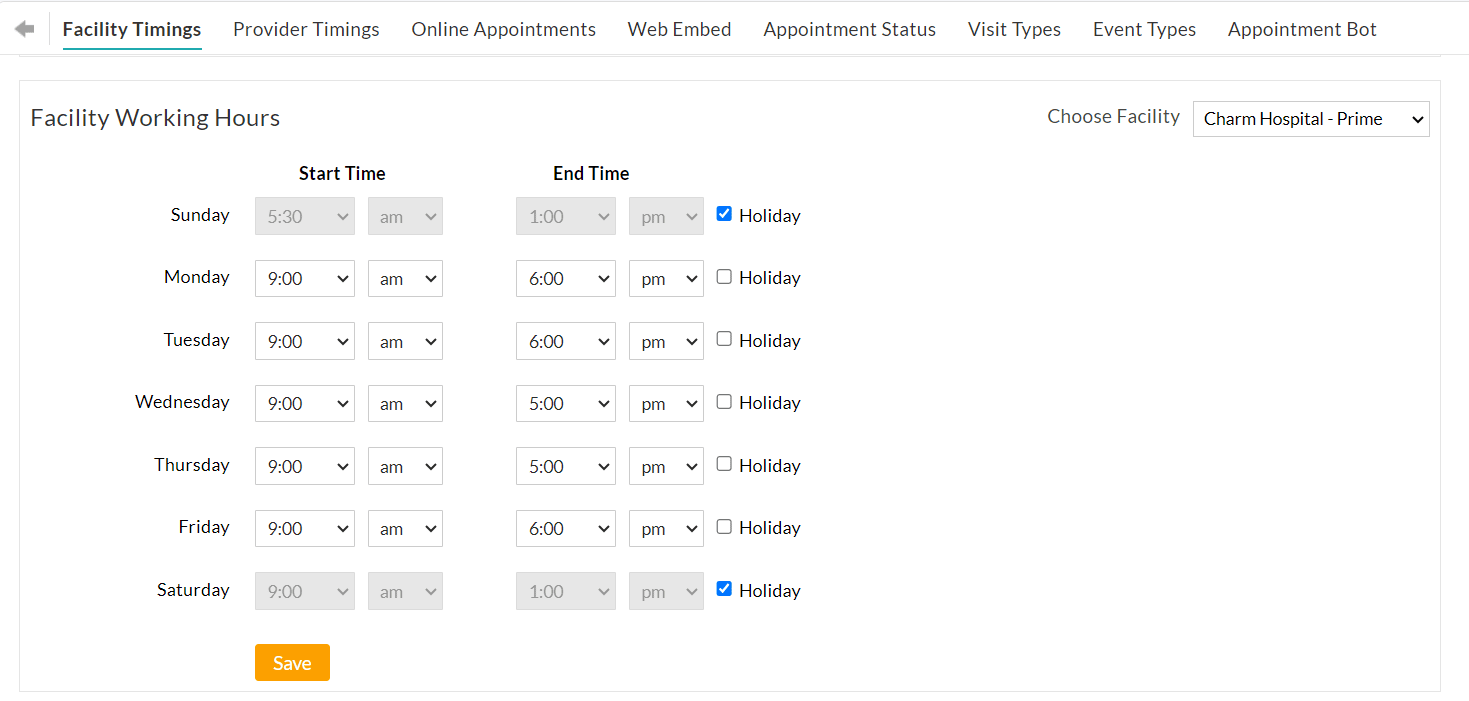
- Click on the 'Save' button to save changes.
Configuring Provider Working Hours
- Click on the Settings > Calendar > Facility Timings

- Select the Facility and the Provider for whom the working hours need to be defined.
- Configure the member's time zone if it differs from the Facility time zone. The configured time zone is used in the member's Charm account instead of the Facility time zone.

- Assign start and end times for a Provider. Click on the '+' sign to assign more than one shift to the Provider, and click on the 'X' sign to delete the additional shift(s).

- Click on the 'Save' button to save changes.
Configuring Working Hour Exception
A Working Hour Exception is a feature that helps to alter Providers' availability on specific dates without modifying their default working hours.
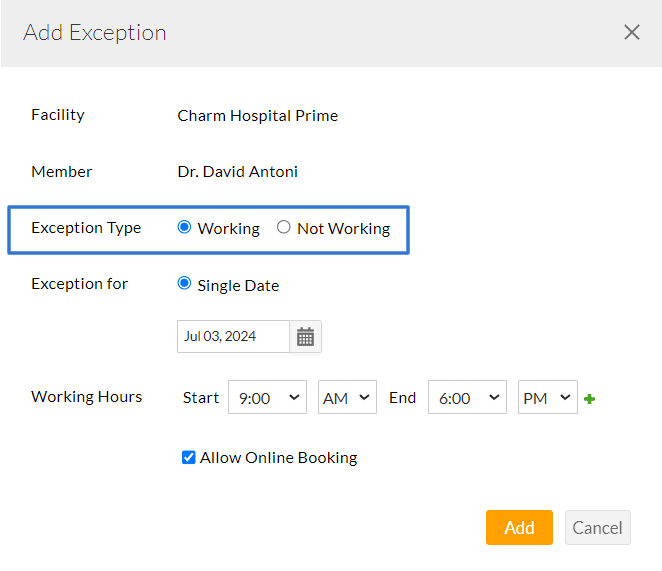
For example, you can add an exception to work on a day when you will not work and vice-versa. You can also modify your working hours on a day using exceptions. You can configure the regular working hours of a Provider at a Facility by default. Whenever there is a change in the default work timings, you can add it as an exception.

To add an exception, click on the '+ Exception' button and choose the exception type. If the exception type is 'Working', then select the date and the working hours. To open this date on the Online Calendar (Web Embed or PHR), choose the 'Allow Online Booking' option. Similarly, you can add exceptions not to work on specific dates or for a period.
Online Appointment
- Click on the Settings > Calendar > Online Appointments

- Configure the time slots and Appointment duration.
- You can also configure whether the Appointments need approval or not. You can choose one of the below three options.
- Approval required for ALL Patients (New & Old) - Choose this option if the approval is required for both new and existing Patients. Patient Appointment requests get listed in the Calendar > Appointment requests section that you can approve or decline.
- Approval required for New Patients Only - Choose this option if the approval is required, only for new Patients. Existing Patients can book the Appointments without your approval.
- Approval NOT required - If this option is selected, Appointments will be confirmed automatically for both existing and new Patients. For New Patients, the Patient record will be added before scheduling the Appointment.
- If you would like to receive an email notification for Appointment requests, choose the 'Appointment Request Notification Email' option and select the members to be notified.

Note: The Patients can book their Online Appointments from Charm PHR and Web Embed Calendar.
Auto Convert Appointment Time to the Patient's Time Zone
- If you are consulting the Patients across multiple time zones, you can choose the Appointment notification - Emails/Text Messages to show the Patient's local time zone.
- The Appointment time zone is auto-converted to the Patient's time zone based on their Zip Code.
- You can enable this option from the 'Settings > Calendar > Preferences' section using the 'Auto convert the Appointment time to Patients' time zone (using their Zip Code)' option.
- You can also choose to attach the universal calendar file (.ics file) to the Appointment confirmation and reminder emails.

Configuring Visit Types
The Visit Types for the Appointments can be configured by following the steps given below. When the Patient requests an Appointment, they can select a suitable visit type to meet the Provider. Based on the visit type, the duration of the Appointment and visit charges are auto-populated.
- Go to Settings > Calendar > Visit Types

- Click on the '+ Visit Type' button.

- Enter the Visit Type, Duration of the Appointment for that Visit Type, Charges, Procedure Code to be added to the Encounter, and choose a color to associate with the Visit Type.
- Click on the 'Add' button to save the new Visit Type.
Note: Practices can add a maximum of ten Procedure Codes to a Visit Type.
Configuring Event Types
Practices can configure various Calendar Events, such as Vacation, Holidays, Surgery, Meetings, Lunch breaks, etc., by following the steps below.
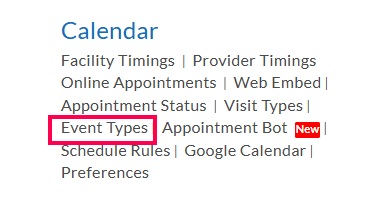
- Navigate to the 'Settings > Calendar > Event Types' section.
- Click on the '+ Event Type' button.

- Enter the Event Type Name and choose a Color for the Event for easier identification.
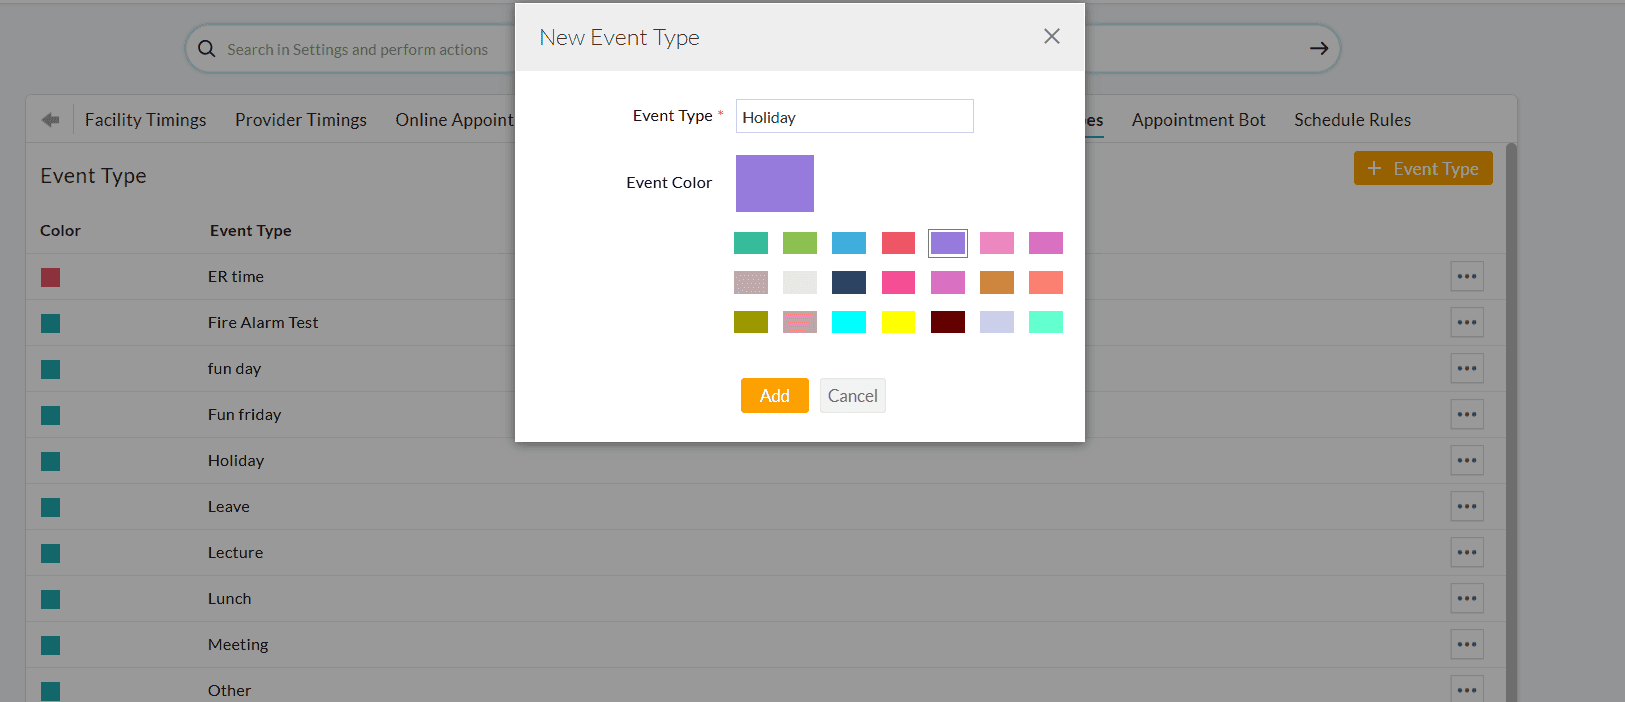
- Click on the 'Add' button to save the new Event Type.
Associating Visit Types to Providers
Once the Visit Types get configured, you can associate them with the Providers by following the steps given below.
- Go to the Settings > Calendar > Visit Types section.
- Under the 'Visit Types for Providers' section, click on the 'Configure Now' link against the Provider name.

- Choose the visit types handled by that Provider and click on the 'Update' button.

Schedule Rules for Visit Type
The 'Schedule Rules for Visit Types' option enables you to book certain types of visits only on specific days. For example, you can have the 'New Patient Visit' only on Monday and Wednesday. You can also restrict the number of Appointments for that visit type. To configure the rules, follow the steps given below.
- Go to Settings > Calendar > Schedule Rules

- Click on the '+ Rule' button.

- Select the Facility, Provider, and Visit Type. Choose the days and number of Appointments on which the selected Visit Type is allowed. Click on the 'Update' button to create the rule. If required, you can also configure the maximum number of Appointments permitted on that day.

- Once the rules get create , they get applied while booking an Appointment for the Provider from the EHR calendar, Patient portal, and Web Embed calendar.
Assign Pre-screening Form to Providers
- Once you have created a Pre-screening form, you need to assign it to the Providers from the 'Settings > Calendar > Online Appointments' section.

- You can either have the same Pre-screening form for all the Providers or have different forms for each, based on their Specialty.
Configuring Auto-share Questionnaires
Charm Questionnaires eliminate the paper intake forms and allow the Patients to complete them online before their visit. It helps in decreasing the Patients' waiting time drastically and reduces the workload of your staff. To simplify this process, Questionnaires can be automatically shared with Patients upon Appointment.
- To initiate the auto-sharing, assign the Questionnaires to your Providers/Visit Types from the Settings > Questionnaire > Preferences section.

- You can either assign the same Questionnaires to all the Providers and Visit types or have different Questionnaires for each.

- The configured Questionnaires get shared automatically with the Patients when they book an Appointment from Charm PHR or your Practice Website (Web Embed).
- When the Practice Staff books an Appointment from the EHR calendar, the related Questionnaires get checked automatically. It saves the time spent in selecting the Questionnaires manually for every Appointment.

Configuring Appointment Fields Settings
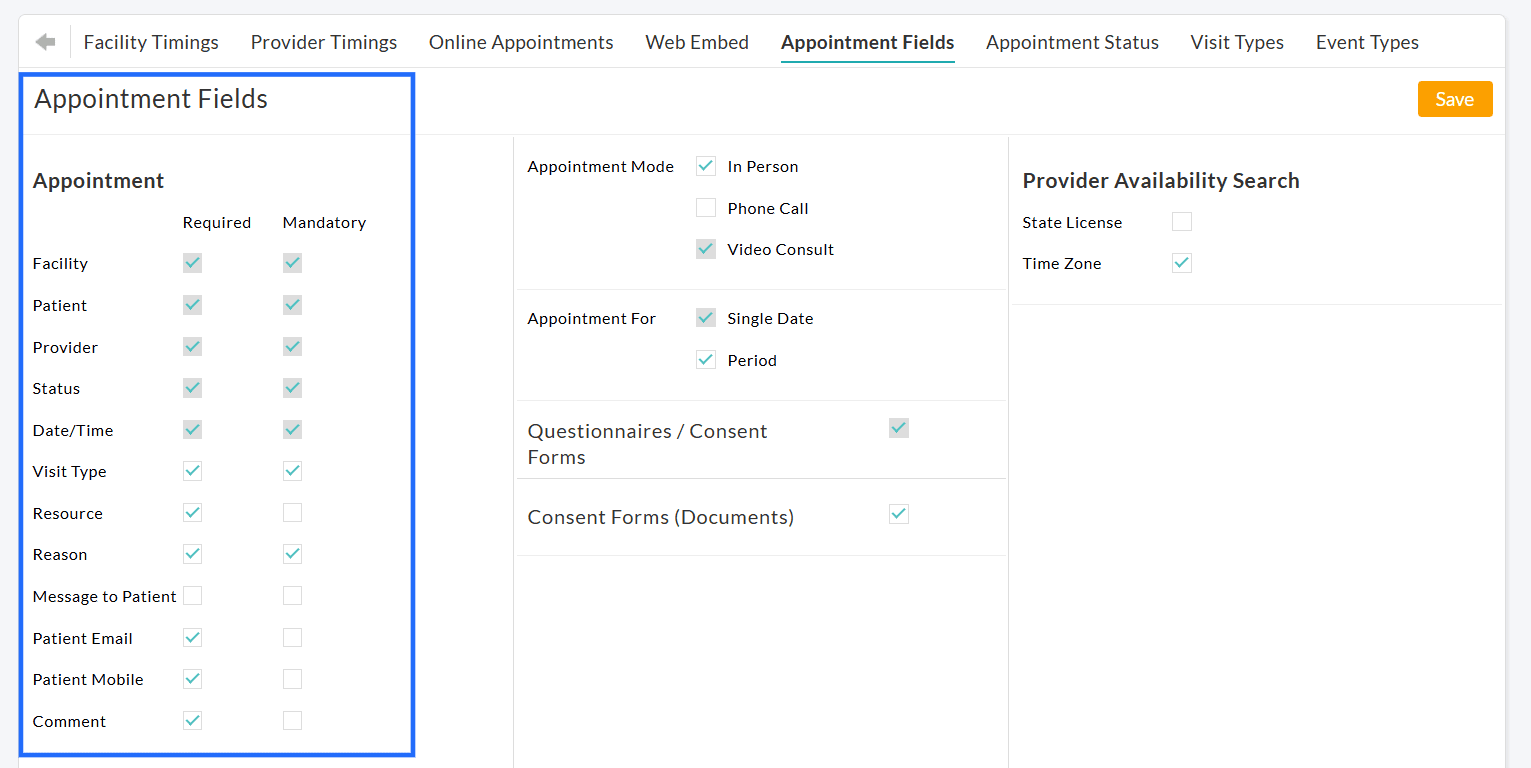
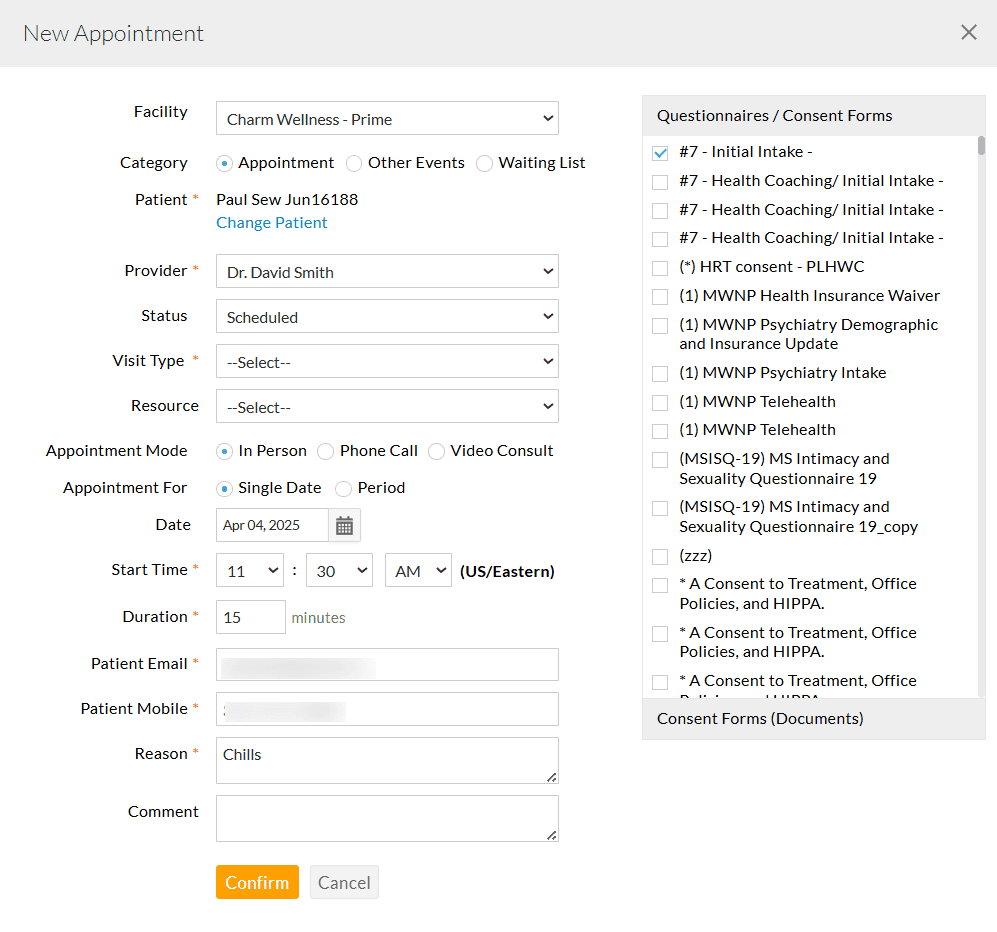
The Appointment Fields Settings enable Practices to customize the fields displayed in the Appointment Booking window based on their needs. It offers the option to add or remove fields and set them as mandatory if needed.
The Practice Admin or Office manager can customize the Appointment Fields under the 'Settings > Calendar > Appointment Fields' section.

Configure Appointment Fields:
- Under the 'Appointment' section, use the 'Required' checkbox to select the fields that should be shown in the Appointment Booking window.
- You can also mark the fields as mandatory using the 'Mandatory' checkbox. The fields marked as mandatory must be filled out by the Practice members while booking the appointment.
- The available fields include Facility, Patient, Provider, Status, Date/Time, Visit Type, Resource, Reason, Message to Patient, Patient Email, Patient Mobile, and Comment.
Additional Settings:
- The 'Appointment Mode' setting allows you to choose the appointment modes required for your Practice. CharmHealth supports 'In Person', 'Phone Call', and 'Video Consult' appointment modes. You can remove the modes that are not required for your Practice.
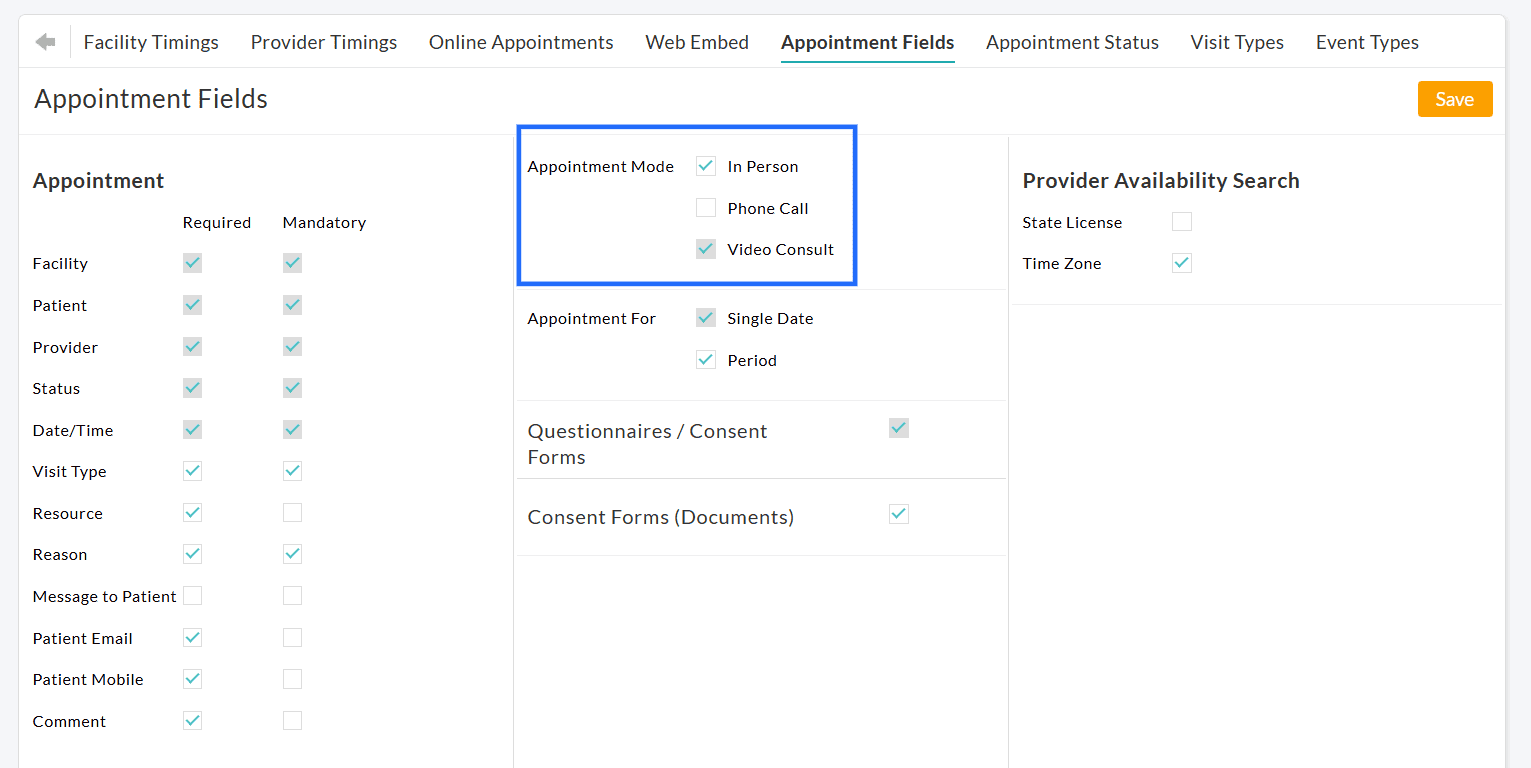
Note: The Video Consult mode is shown only if the TeleHealth Add-on is enabled.
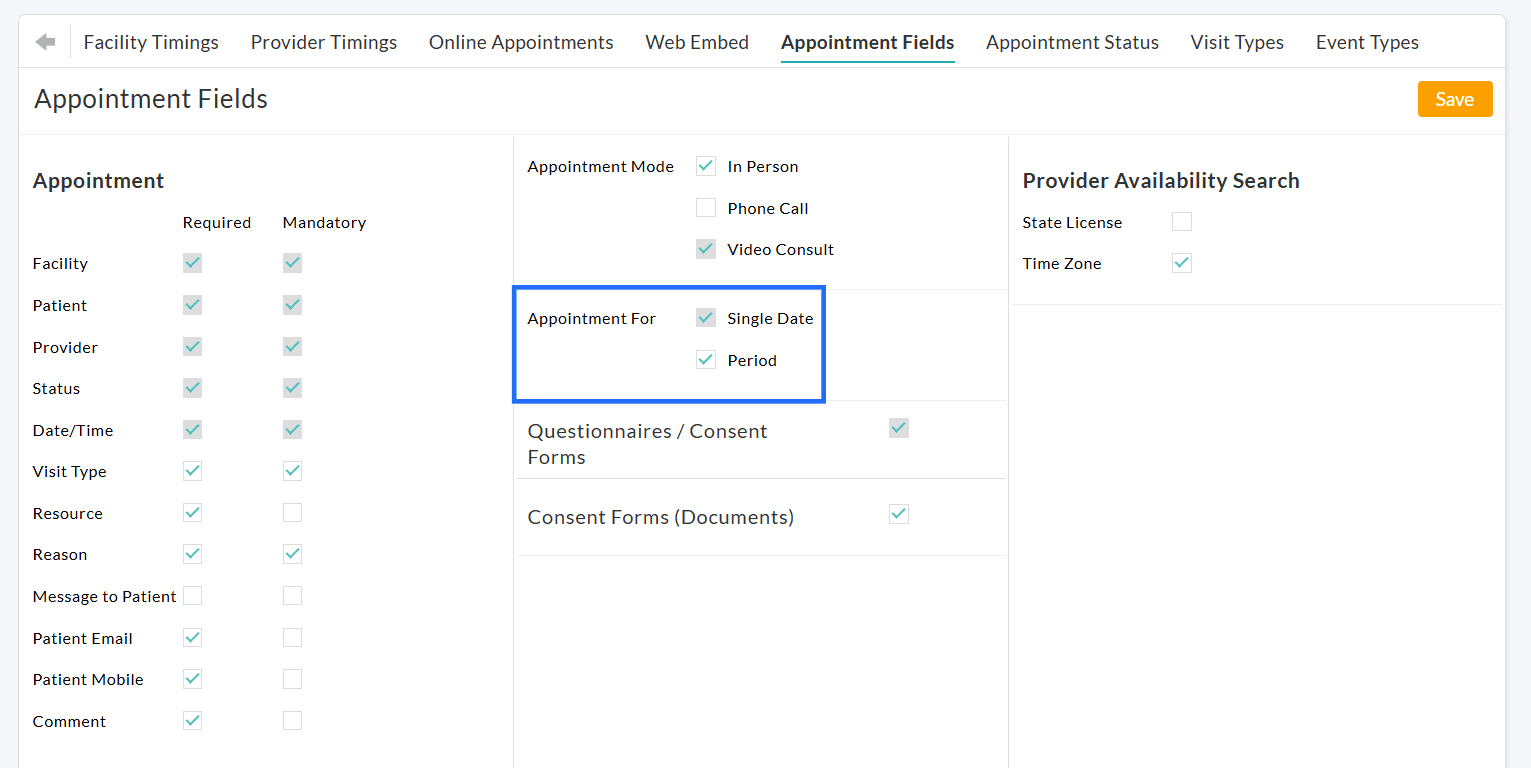
- If Periodic appointment booking is not required for your Practice, you can turn it off from the 'Appointment For' setting.
- You can also turn on/off the 'State License' and 'Time Zone' fields displayed within the 'Provider Availability Search' in the Calendar.
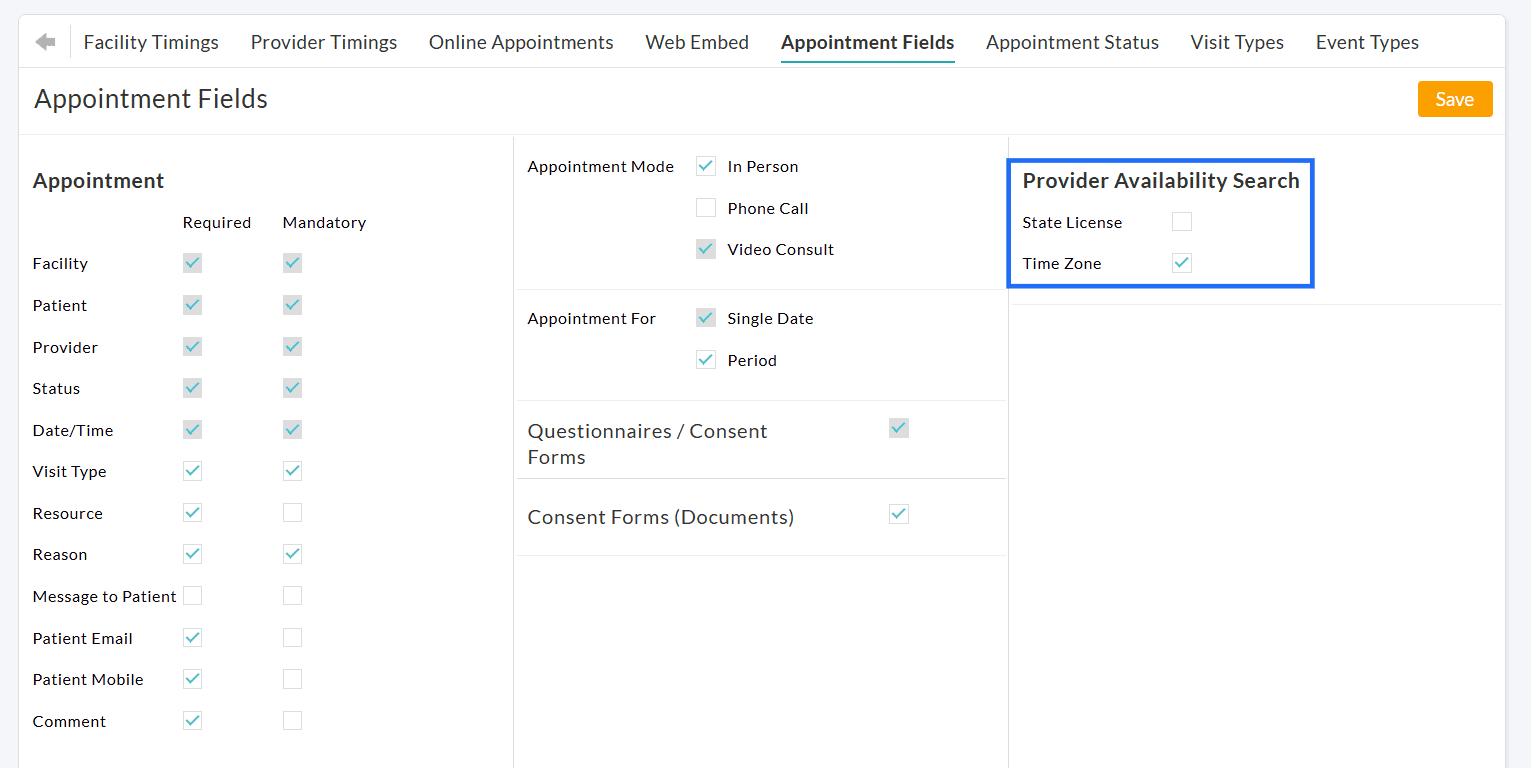
Once configured, the Appointment Booking window and the Provider Availability Search form are shown as per your preferences.

Configuring Appointment Status
Various Appointment Status can be configured by following the steps given below. When the Patient arrives for the Consultation, you can update the status against the Patient's Appointment.
- Go to 'Settings > Calendar > Appointment Status' section.
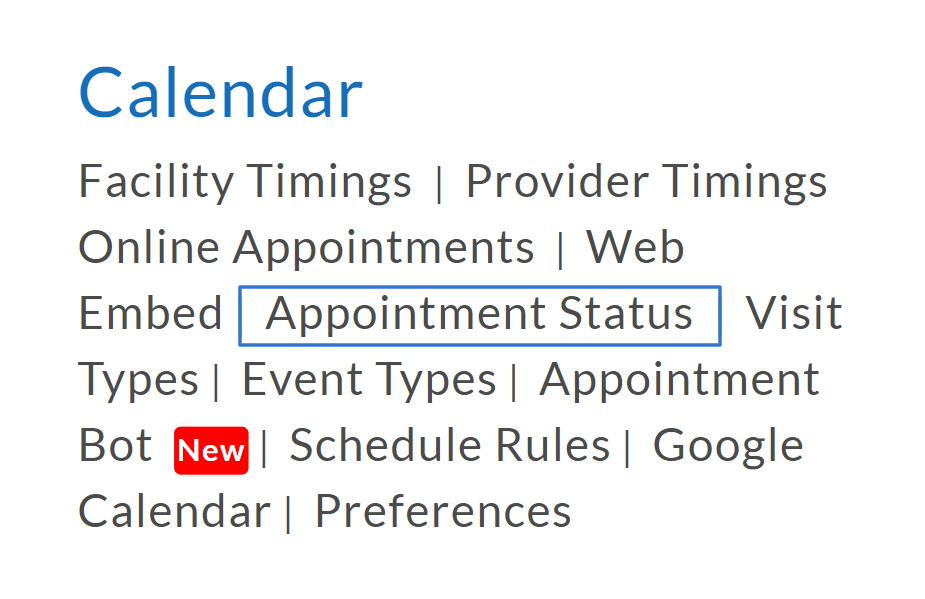
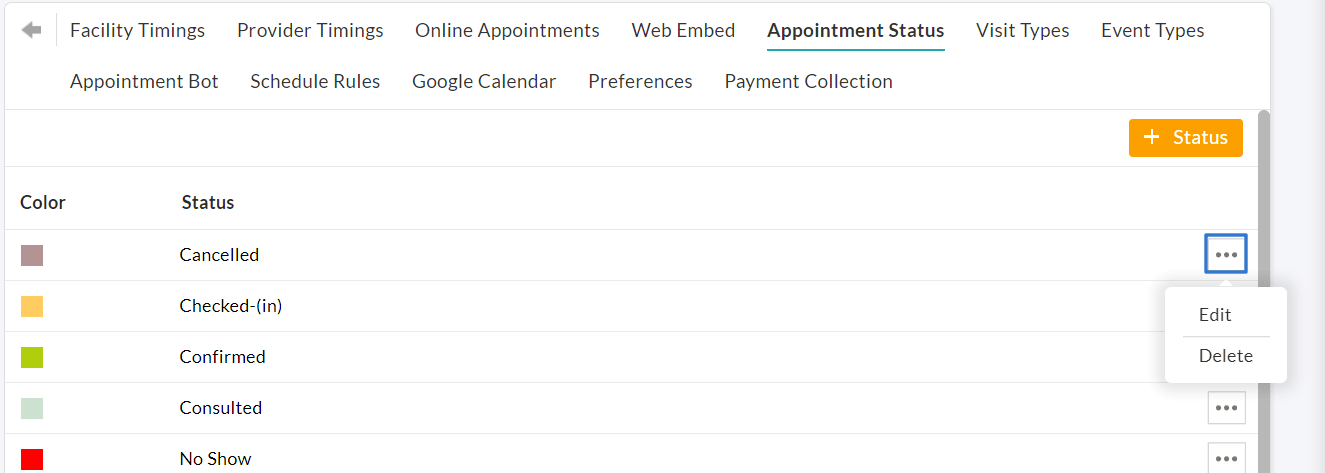
- Click the '+Status' button to create a new appointment status by color.

- Enter the 'Status' type, choose a color code, and click the 'Add' button.

- You can modify an existing status by selecting the 'Edit' option under the 'More Options' icon against each status.
- You can also configure the 'Default Appointment Status' to be selected in the Calendar using the drop-down list available here.
Configuring Appointment Preferences
The Appointment Preferences can be configured by following the steps given below. These Preferences are member-specific and can be configured based on their needs.
- Go to Settings > Calendar > Preferences
- Click on the 'Save' button to save your preferences.

Configuring Appointment Preferences includes, whether you would like
- To receive an Appointment Confirmation Email/SMS
- To receive an Appointment Cancellation Email/SMS
- To allow Patients to book the Appointments from the Patient Portal.
- To see the deleted members in the calendar.
- Patient Search to be enabled across the facilities, or restrict it to a particular facility while booking Appointments, etc.
Vacation Reply
The Provider can compose and save an automated Vacation reply.
- Go to Settings > Message > Vacation Reply

- Click on the check box to enable the Vacation Reply option and enter the required details. Once you have enabled the Vacation Reply, select the option 'Mark these days as non-working in calendar' to block your availability on the calendar.

- Click on the 'Update' button to save the Vacation Reply.