Online Patient Payment
CharmHealth EHR allows you to share Invoices and Receipts to the Patient Portal, thereby simplifying the process of collecting payments from the Patient. Instead of downloading the attachment, the Patient can see Invoices and Receipts from the Patient Portal. In addition, if you are using our Bluefin Payment Gateway Integration, the Patient can pay outstanding Invoices from the Patient Portal, making collections seamless and efficient. This document will walk you through the steps for sharing Invoices to the Patient Portal.
Note : If your Practice has not subscribed for Bluefin Payment Gateway integration, and you wish to do so now, please contact us at support@charmhealth.com to get your Gateway Merchant Account.
Supported functionalities include,
Send Invoice to the Patient
Practices can send an Invoice to a Patient to collect payments by following the steps below.
- Go to the 'Billing > Invoices' section.
- Select the Invoice to be sent to the Patient.

- Click the 'Send Invoice' button. You can also select the 'Send Invoice' option under the 'More Options' (...) icon against the Invoice.

- Practices can choose the required modes to send Invoice to the Patient. The communication modes configured as default under the 'Settings > Billing > Billing Settings > Sending Invoices - Defaults' section will be selected automatically.

- Select the 'Send Payment Link' option to enable Patients to make Invoice payments using the payment link received through Email/SMS. For Patients with PHR, a 'Pay' option will be available in their accounts. This option will be selected automatically if the Bluefin setting is enabled for the Practice.
- Choose the Beneficiary to which the amount has to be credited. You can request either the Invoice due amount or the Copay amount from the Patient's Insurance. If the Copay amount is unavailable from the Insurance, you can request the Invoice due amount.
- Enter the Subject and choose the Invoice Format to be sent.
- Edit the message content for the required mode(s) if needed.
- Click the 'Send' button to send the Invoice to the Patient.
- You can view the sent Messages under the 'Messages tab > Sent folder' section.
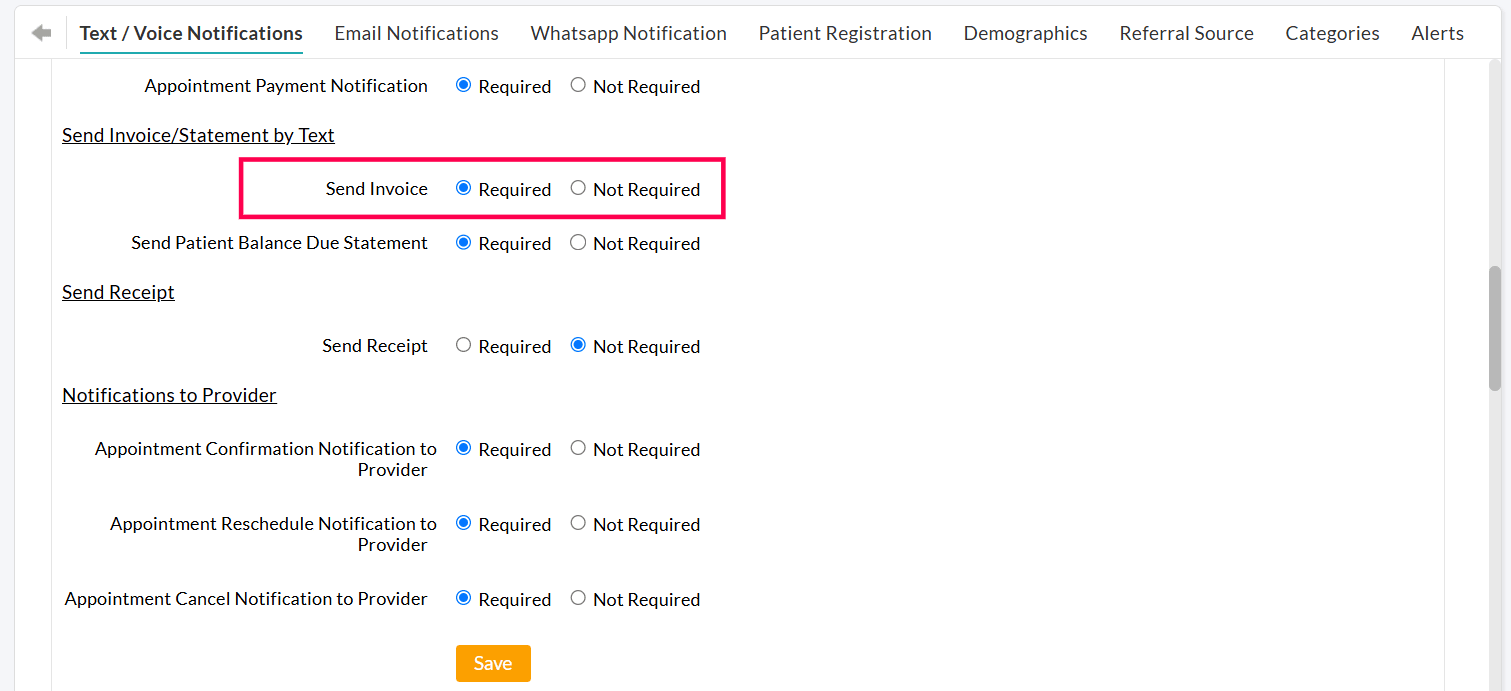
The 'Send to Cell number' option will be enabled only for the Practices subscribed for the 'Text/Voice Notification' add-on. Practices can disable this option from the 'Settings > Patient > Text / Voice Notifications > Send Invoice / Statement by Text' section.

Send Multiple Invoices
The Practice can send multiple Invoices to Patients by following the steps below.
- Go to 'Billing > Invoices'
- Select the Invoices to send and click the 'Send Invoices' button.

- Choose the delivery modes or set a preferred order for sending Invoices.
a. Send Through Selected Modes

- Choose one or more modes (PHR, Email, or Cell Number) to send Invoices.
- The Invoices will be sent only through the selected modes.
- If a Patient does not have the selected mode, the Invoice will not be sent to the patient.
- Example: If only PHR and Email are selected, and the Patient has only a Cell Number, they will not receive the Invoice.
b. Send Based on Preferred Order

- Arrange the preferred modes in priority order (e.g., PHR > Email > Text Message (Cell Number)).
- The Invoices will be sent through the available mode(s) based on the order.
- You can choose to send Invoices through:
- Only the first available mode (e.g., If a Patient has both PHR and Email, the Invoice will only be sent via PHR).
- The first two available modes (e.g., If a Patient has both PHR and Email, the Invoice will be sent through both).
Note: To set the default delivery preferences, go to 'Settings > Billing > Billing Settings > Sending Invoices - Defaults'.