Configure Payers
The Practice can configure the Payers to be listed while adding Insurance for the Patients.
Payer Settings
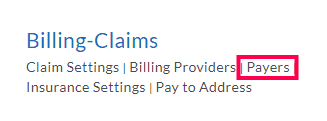
- The 'Practice Payer List' under the 'Settings > Billing-Claims > Payers' section shows all the Payers used by the Patients in the Practice.

- When a Payer is added by a Patient (from a Kiosk or PHR), it gets added as a 'Not Verified' Payer.

- Any Payer details added by the Practice members from the 'EHR > Patients > Patient Details > Insurance' section will be added as a 'Verified' Payer.
- When the Patients use the same Payer with different Payer addresses, multiple Payers with respective Payer address details will be shown under the Practice Payer List.
- When the Practice works with a pre-configured list of Payers, the 'We work with pre-configured list of payers and we accept patient insurances only with these payers. We do not want patients or practice members to add new payer or payer address details' option should be enabled. If this option is enabled, all the verified Payers in this list will be available for the Patients/Practice members for selection while adding the Patient Insurance details.
- If not, you can enable the 'Auto-suggest payers from CharmHealth Database while adding/editing insurance in CharmHealth EHR / PHR' option to auto-suggest the Payer list from the Master Payer List.
Add Payer
To add a new Payer to the Payer List, follow the steps given below.
- Go to Settings > Billing-Claims > Payers > Practice Payer List
- Click the '+Payer' button.

- Enter the Payer name, Payer ID, Eligibility Payer ID, Phone number, Fax, and Address details of the Payer.
- Enable the option to verify the Payer details and to auto-suggest in the list of Payers.
- Click the 'Add' button to add the Payer.
- While adding a new Patient's Insurance, you can only select the Payer from a drop-down that lists the added Payers.

Import Payers
To import Payers, follow the steps given below.
- Go to Settings > Billing-Claims > Payers > Practice Payer List
- Click the 'More Options' (...) icon near the '+ Payer' button and select the 'Import Payers' option to import Payers.

- Select the '.csv' file from the local storage to import Payers.

Note:
- Entries of 500 payers within the file size of 10MB.
- Please select a Comma Separated Values (.csv) file with data arranged in the below format.
- Payer Name*, Payer ID, Phone Number, Fax, Address Line1, City, State Code, 5 Digit Zip code, 4 Digit Zip Extension Code
- Fields marked with '*' are mandatory.
- Please note that the First Row is a Column Reference.
View Payers
The Payer List view consolidates all payers with the same ID and name, regardless of different addresses. This allows Practices to manage Payers more efficiently and effectively.
- Navigate to the 'Settings > Billing-Claims > Payers' section where you can view the consolidated list of Payers.


- The column, '# of Distinct Address and Contact Details', indicates the number of different addresses configured for a Payer.
- Clicking on the count will display all the distinct addresses associated with the specific Payer.

- Click the 'More Options' (...) icon against the Payer Address Details and select the 'View' option to view the Payer details.
Edit Payer Details
- Navigate to Settings > Billing > Payers > Practice Payer List
- Practices can update the Payer Name/Payer ID/Eligibility Payer ID using the 'Edit' option available against the Payer row as shown below.

- To merge Payers with multiple addresses, follow the steps below.
- Identify the Payers with different addresses that need to be merged.
- Select the 'Edit' option against the address row that the Practice considers the correct address.
- Enable the 'Update this address & contact details to this Payer' checkbox.
- Click on 'Update'.
Delete Payer
- Click on Settings > Billing > Payers > Practice Payer List
- Click on the 'More Options' (...) icon against the payer name to be deleted and select 'Delete' option to delete the payer
- Click on 'OK' button to confirm deletion on the pop up window
Mark As Verified
- Go to Settings > Billing-Claims > Payers > Practice Payer List
- Click the 'More Options' (...) icon and select the 'Mark as Verified' option to mark the Payer as verified. Only verified Payers will appear in the auto-suggest option.
- Similarly, verified Payers can be marked as 'Mark as Not Verified', so that they would not get listed in the auto-suggest.